
How to Restore Backup of a WordPress Website Using JetBackup?
In this article, we will show how to Restore the Backup of a Specific WordPress website using JetBackup in the SiteCountry Control panel.
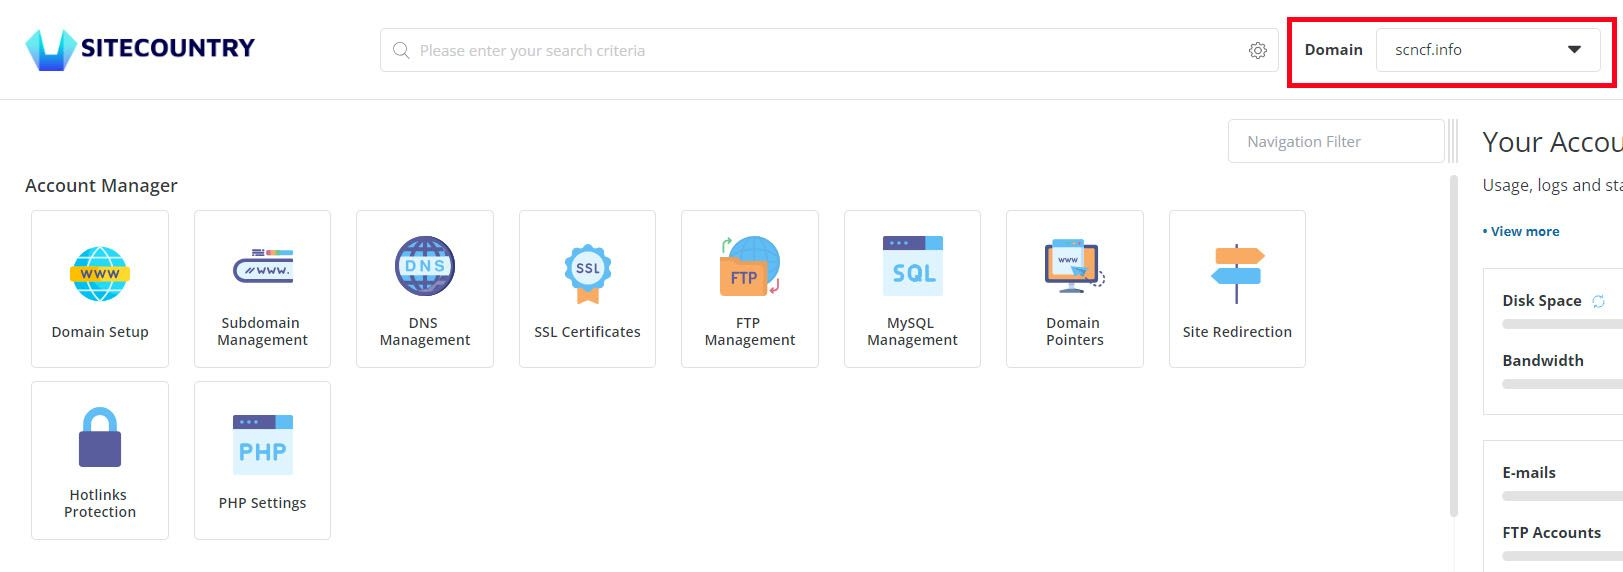
1) Log in to the SiteCountry Control Panel
2) Select the Domain Name for which you need to Restore Backup
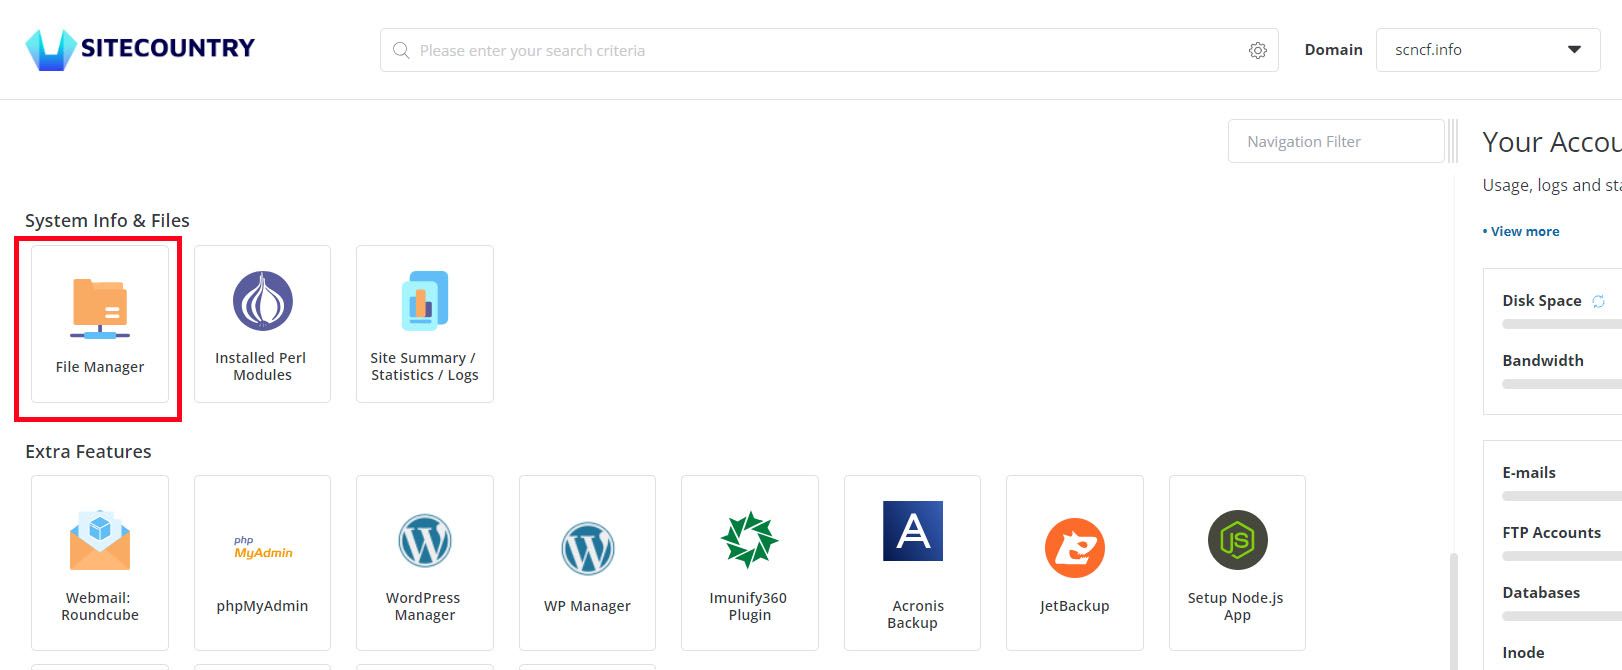
3) Click on File Manager
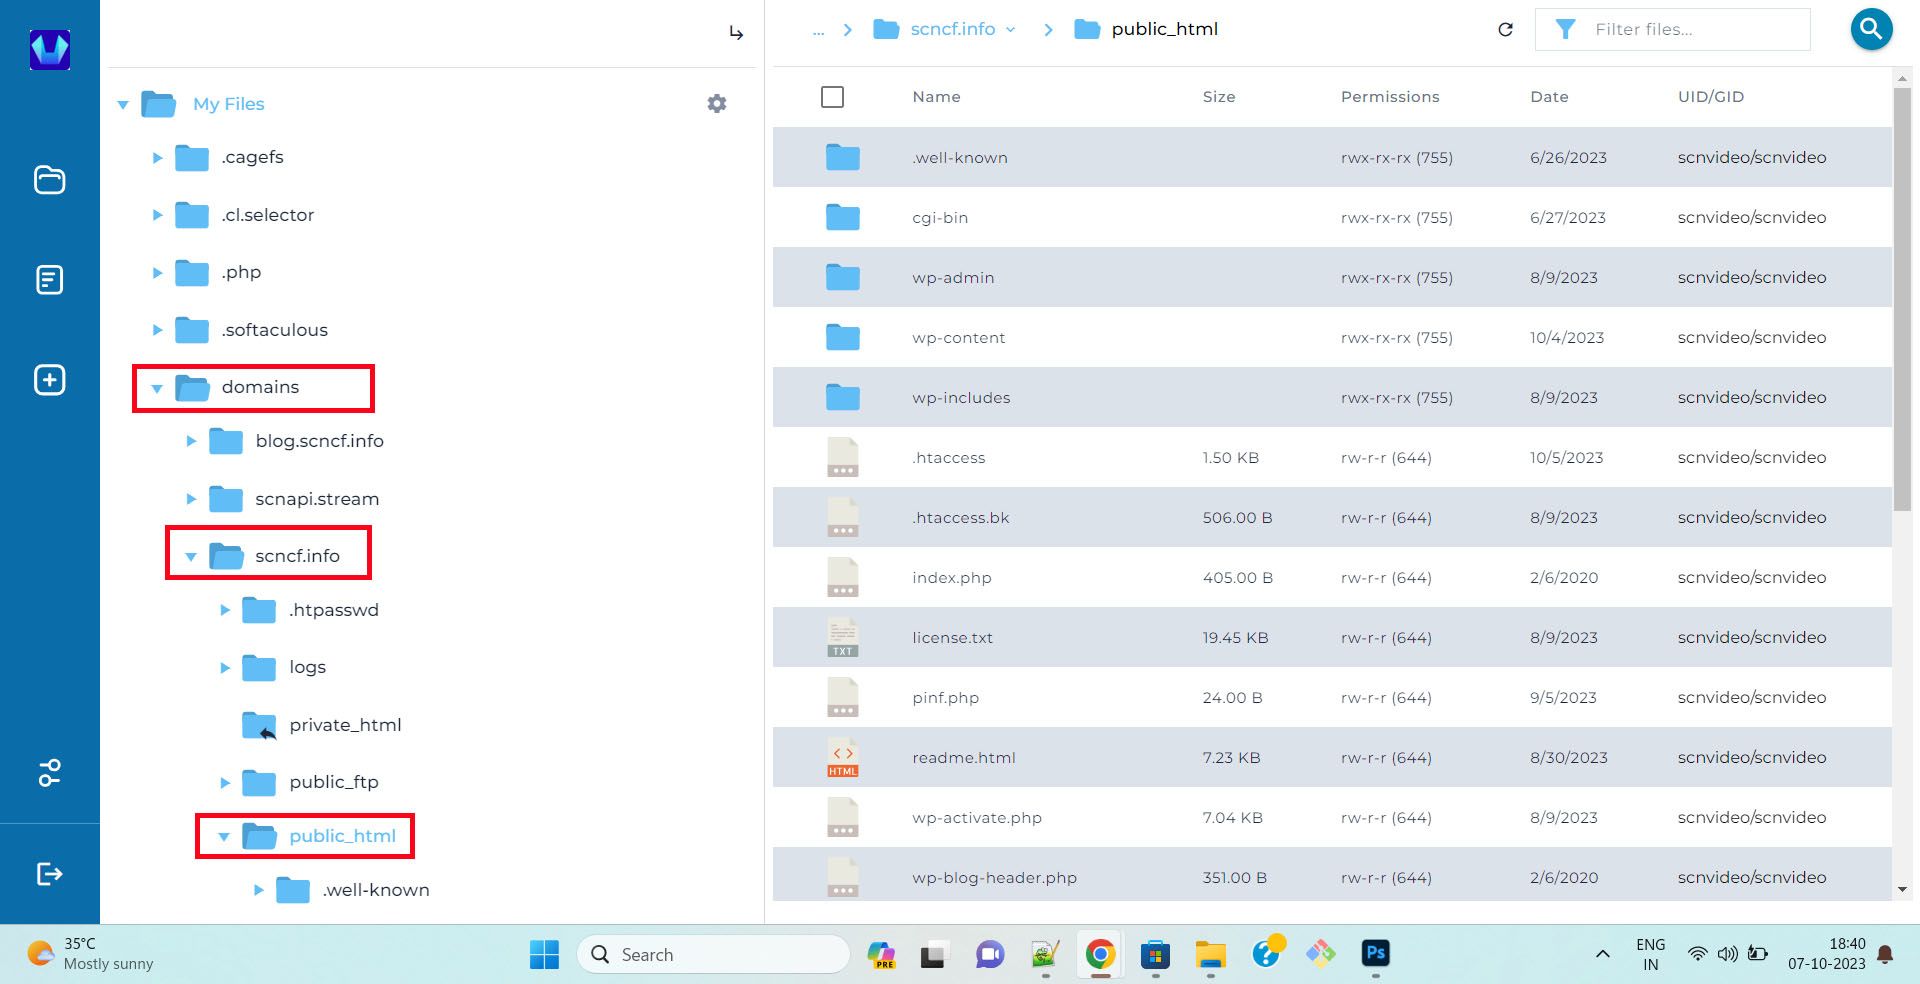
4) Navigate to the public_html directory of the domain for which you need to Restore Backup
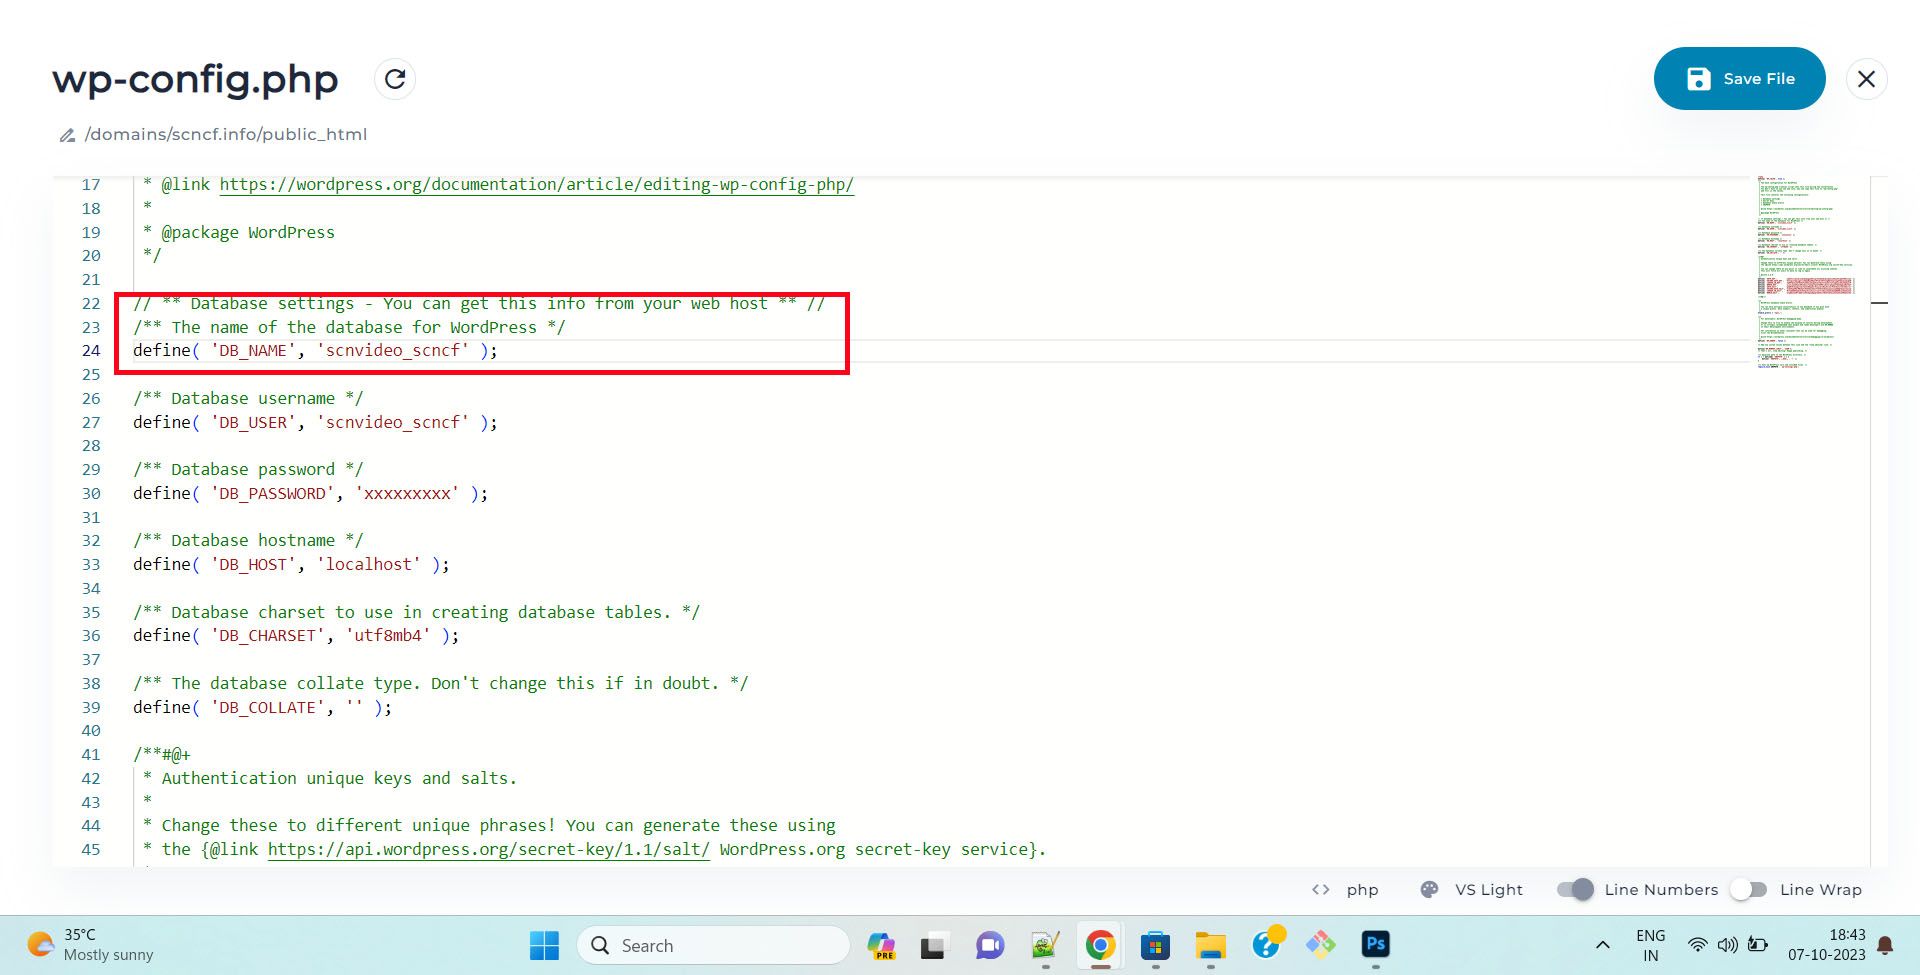
5) Right-click on the wp-config.php file and Click on Edit

6) Note down the DB_NAME
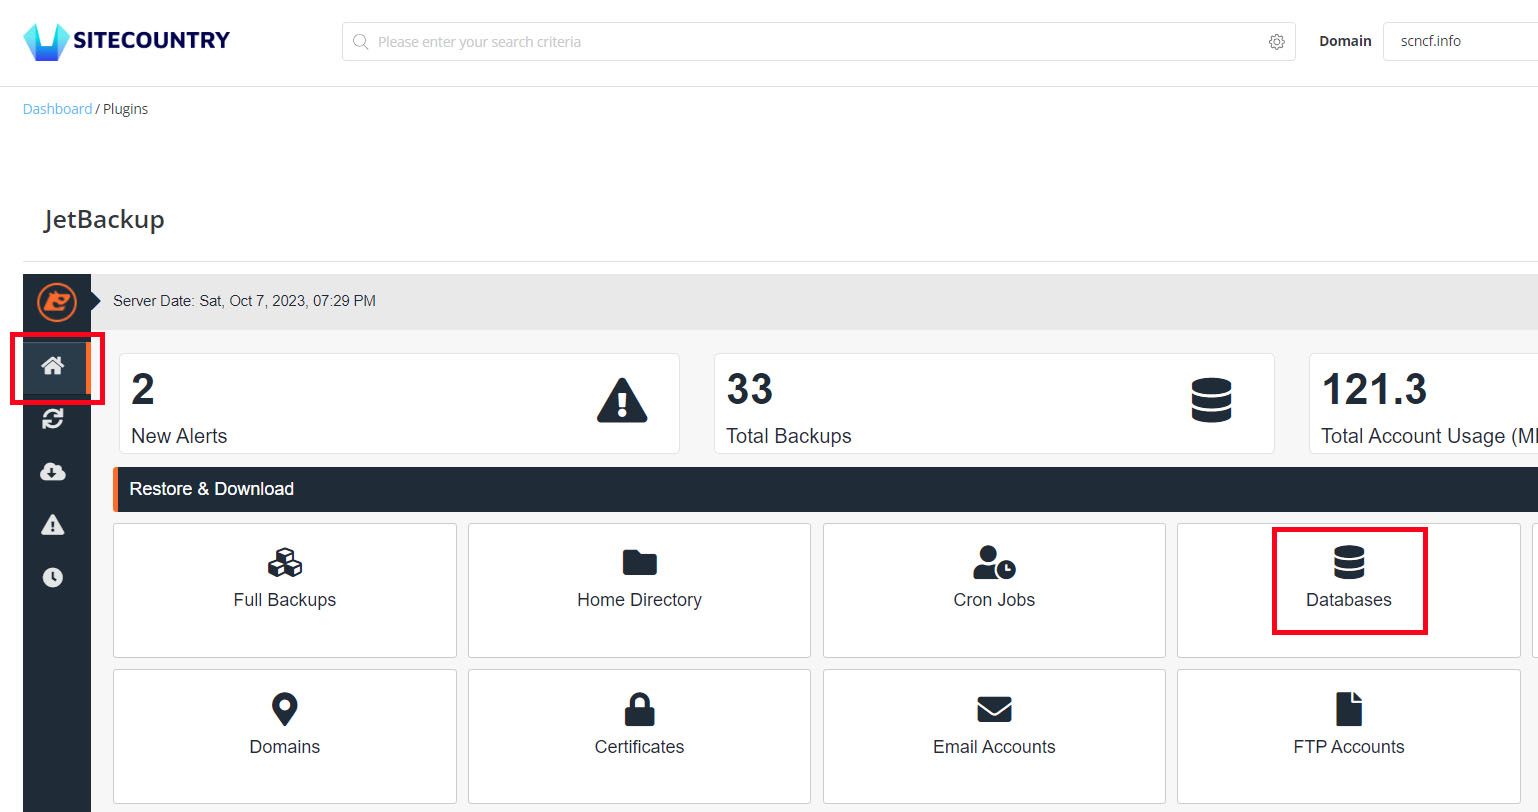
7) Navigate Back to the Control Panel Home

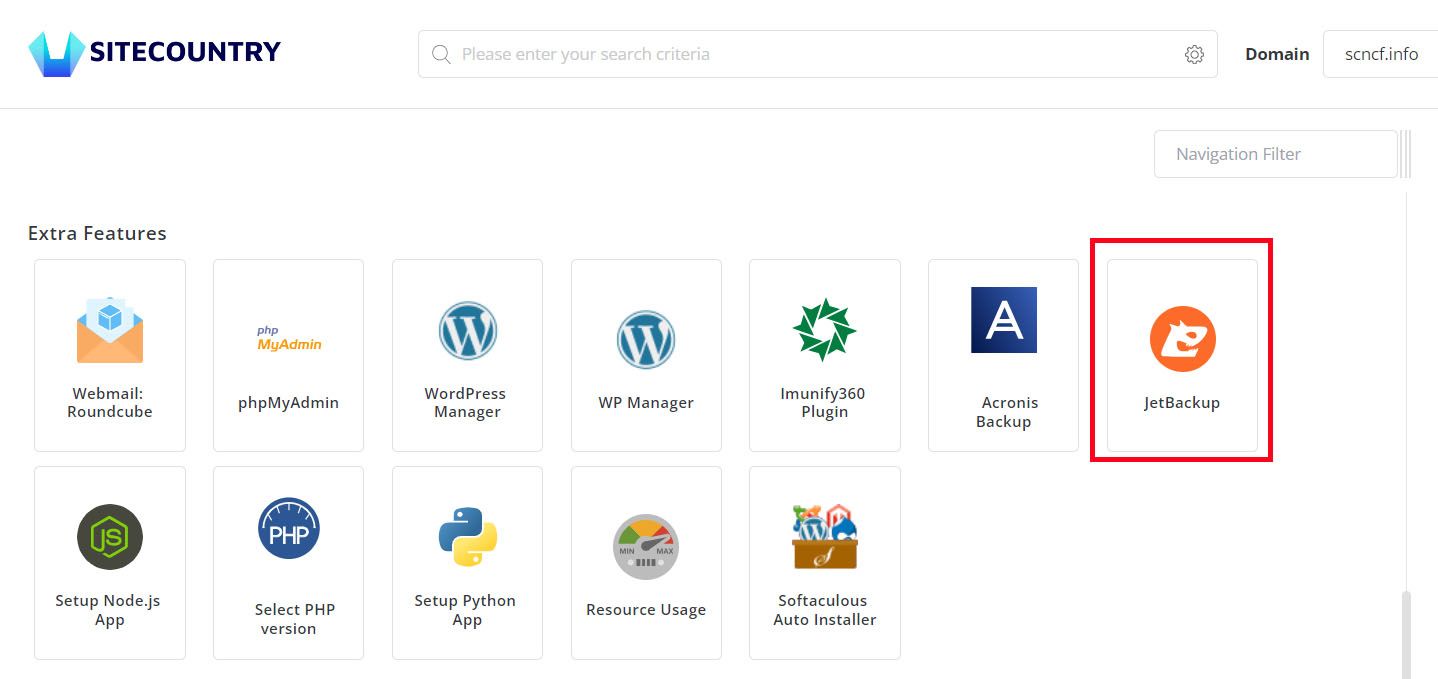
8) Click on the JetBackup under the Extra Features section
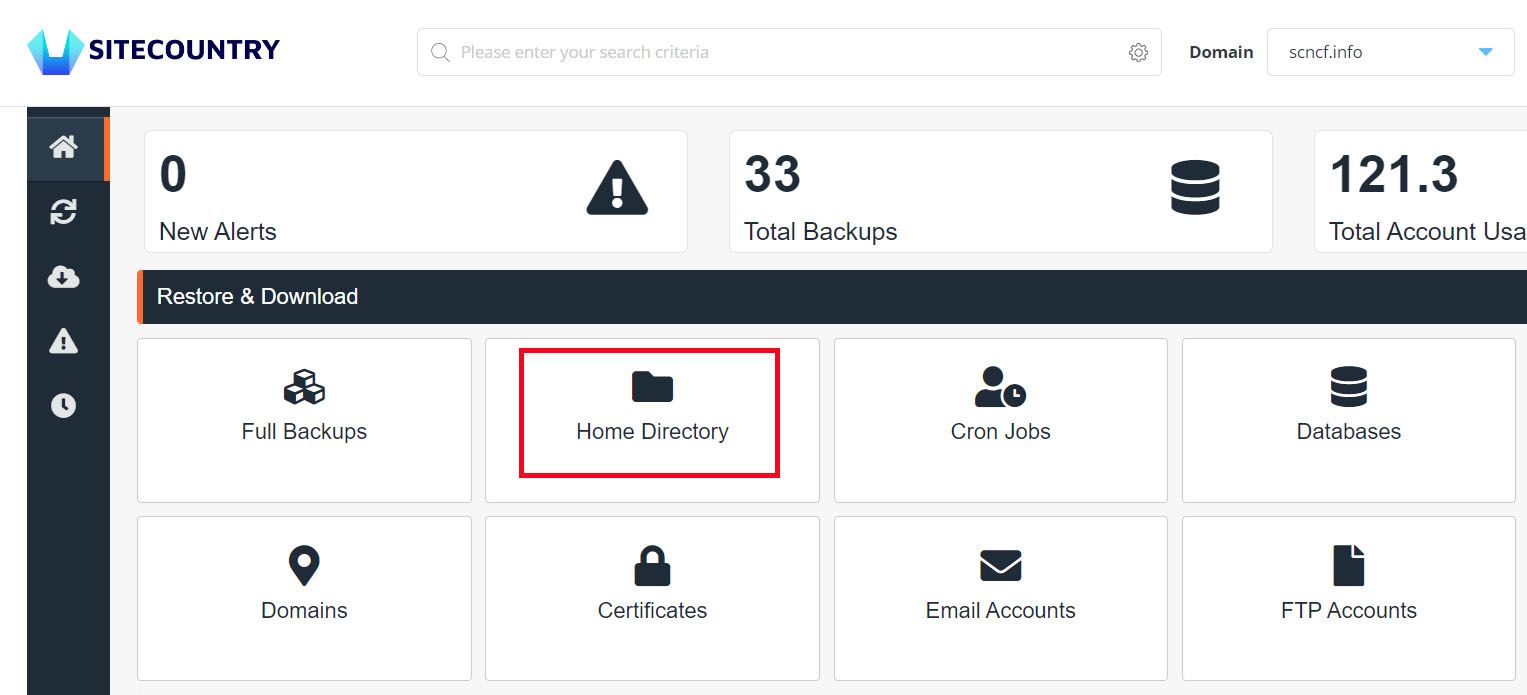
9) Click on Home Directory in the JetBackup Home
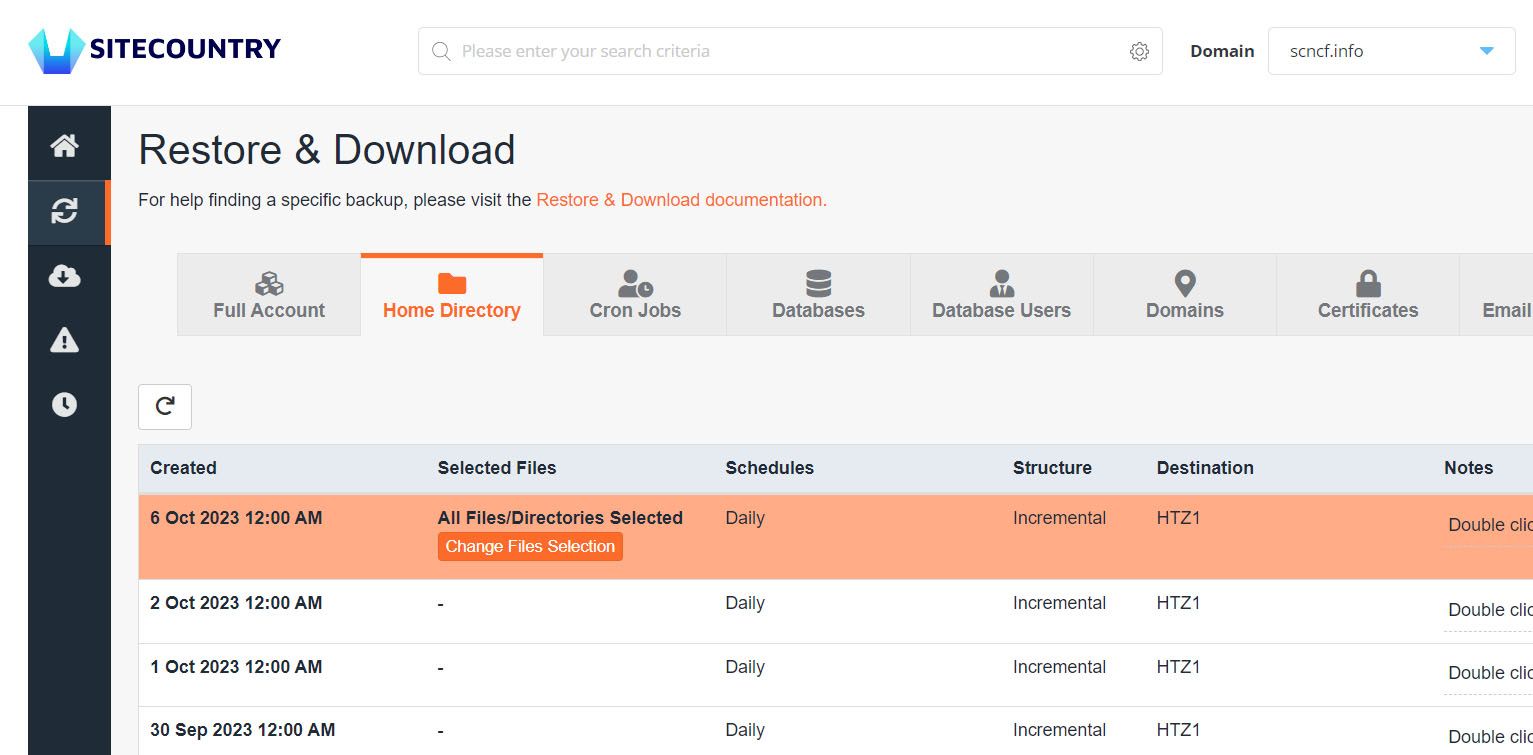
10) Then Click on the Website Backup you want to Restore as in the Screenshot below
Here in this example, we have chosen Website backup - 6 Oct 2023 12:00 AM
11) Click on Change Files Selection which will open a Popup window. In the popup window click on the domains
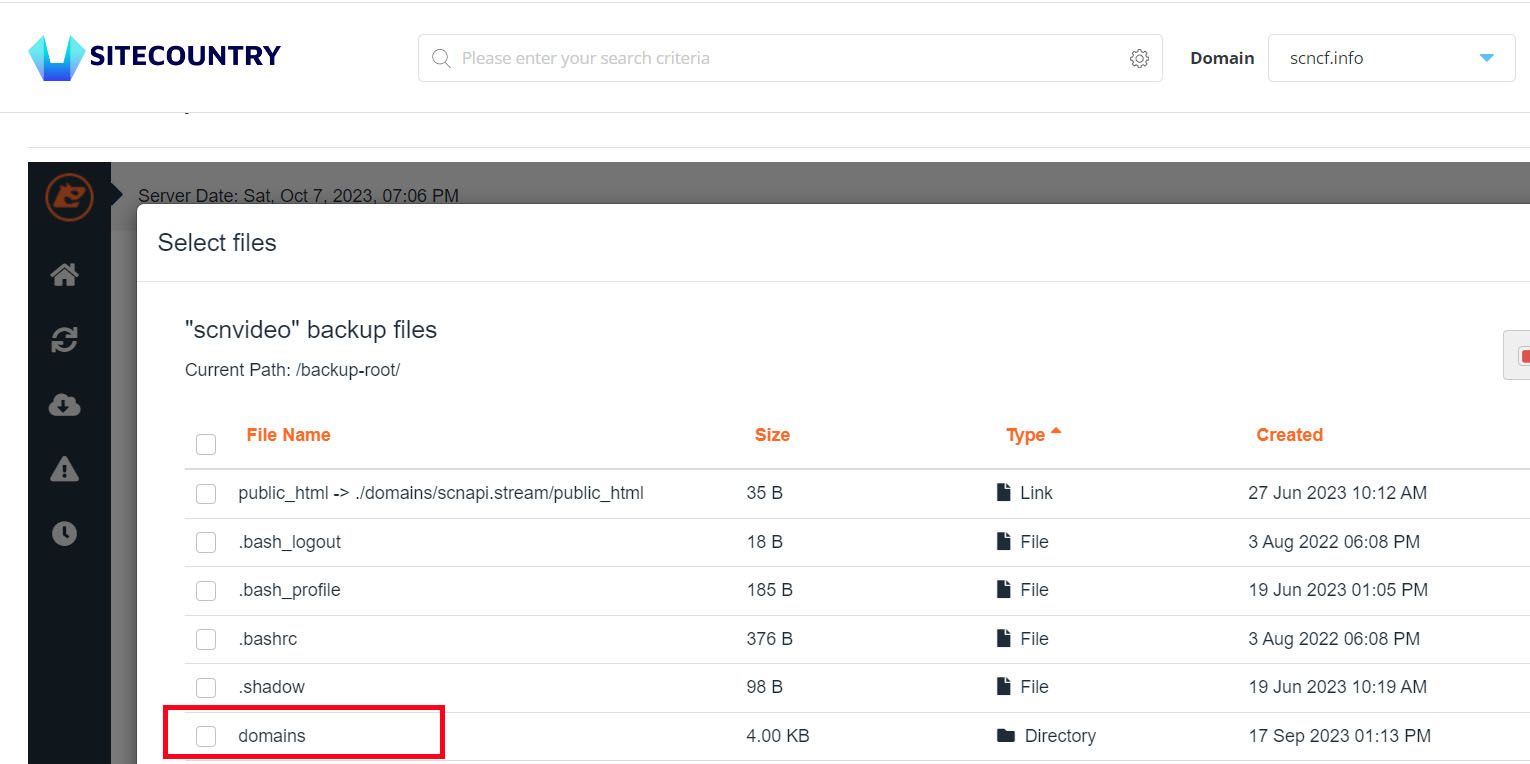
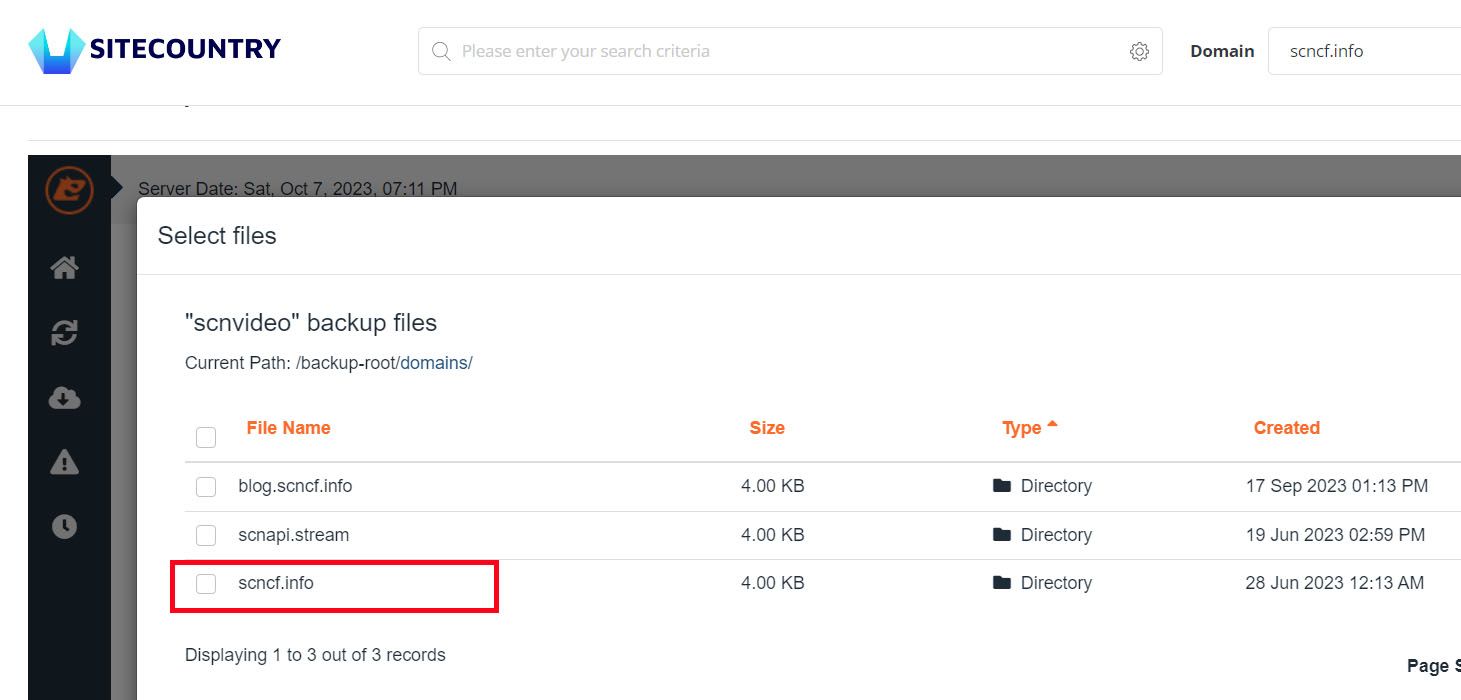
12) Click on the domain name for which you need to Restore Website Backup
Here in this example, we have chosen the Domain - scncf.info
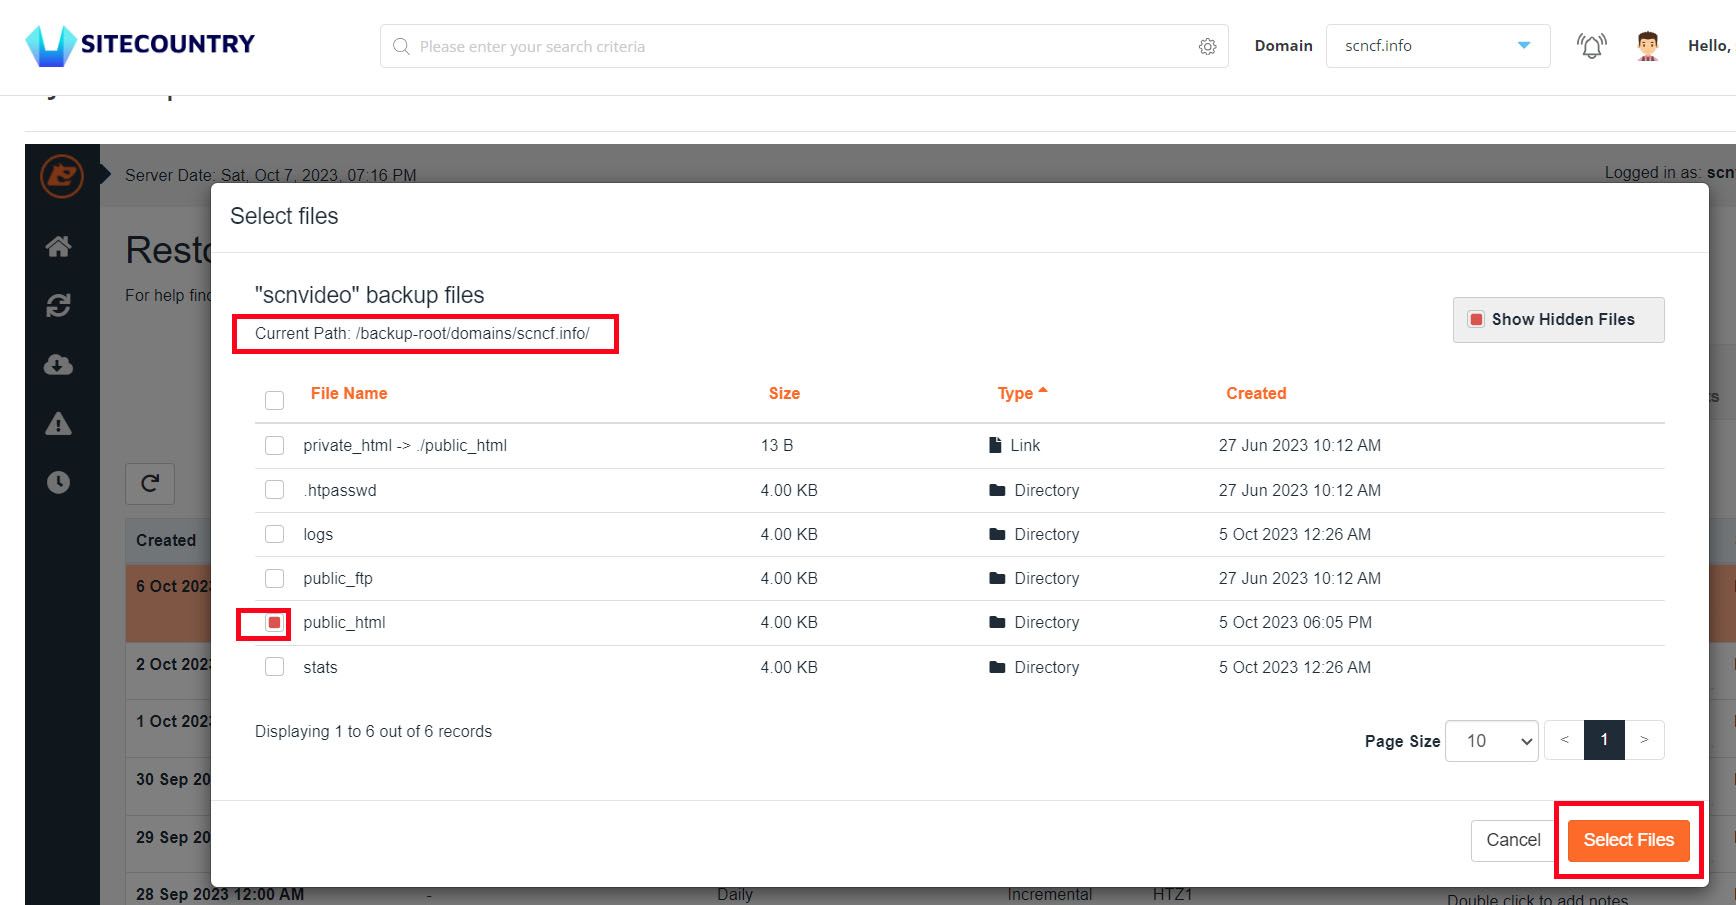
13) Check the on public_html and Make sure that your Current Path is only for a specific domain e.g /backup-root/domains/scncf.info/ and then click on the Select Files button as in the Screenshot below
14) Clicking the Select Files button will close the Popup and Show selected files to Restore as in the Screenshot below
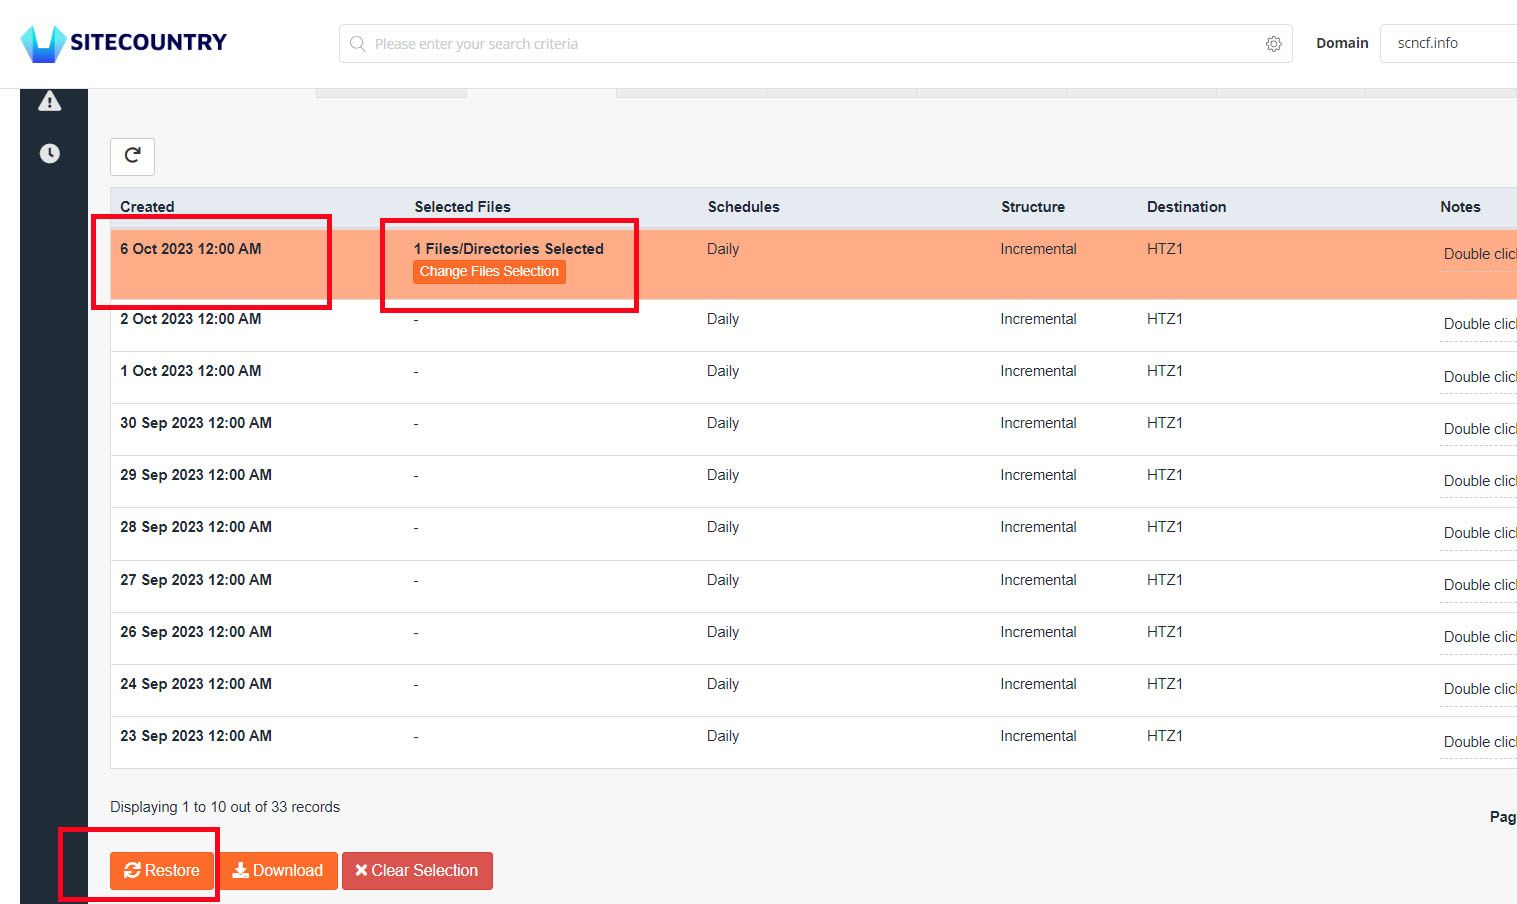
After verifying the above details Click on the Restore button
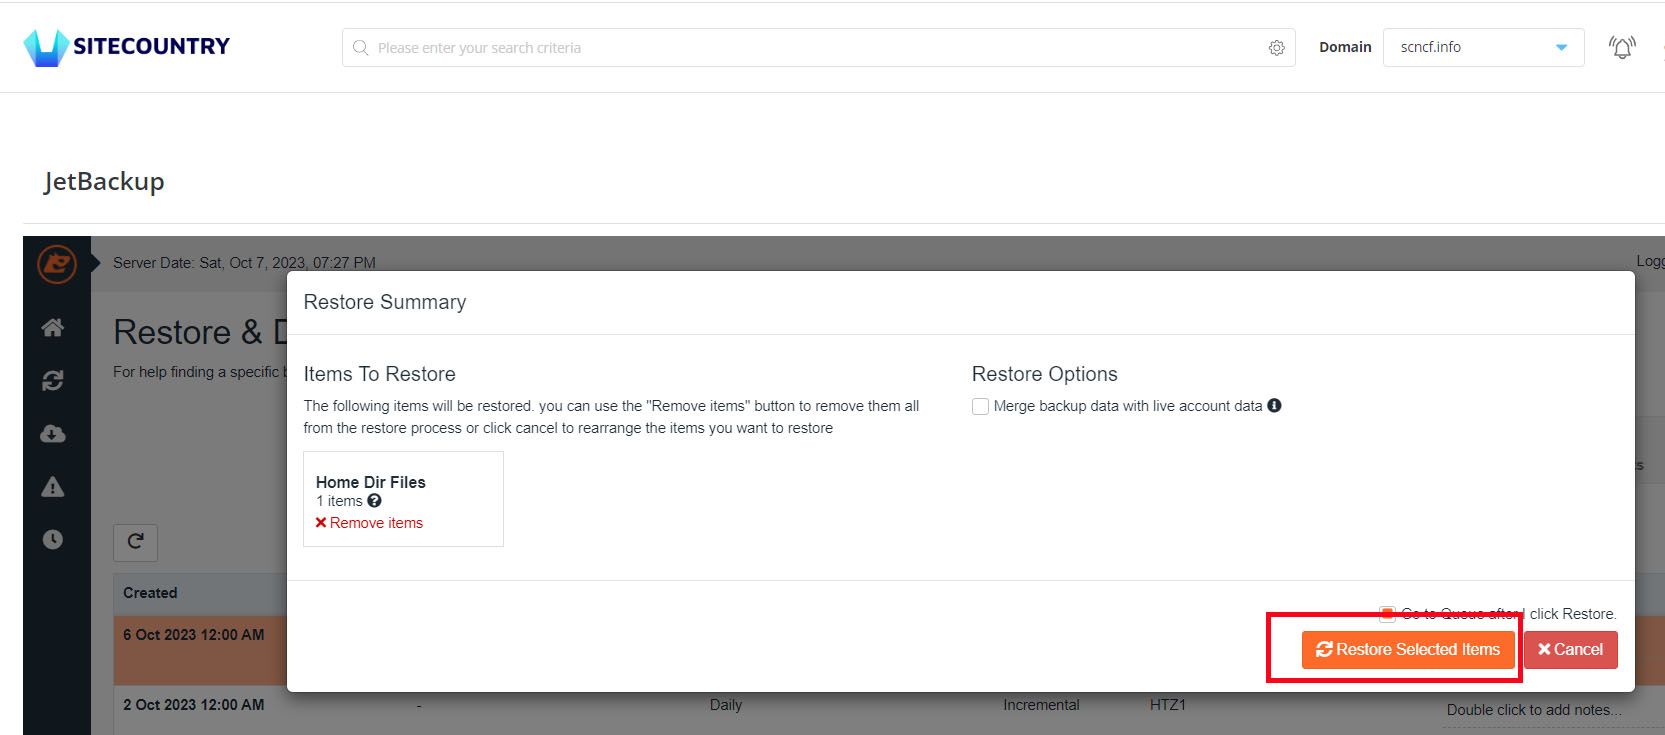
15) Click on the Restore Selected Items button in the Popup Window to Restore the Backup of Website Files
16) Go back to JetBackup Home and Click on Databases
17) In the Search box enter the DB_NAME noted in Step 6
Here in this example, it is DB_NAME - scnvideo_scncf
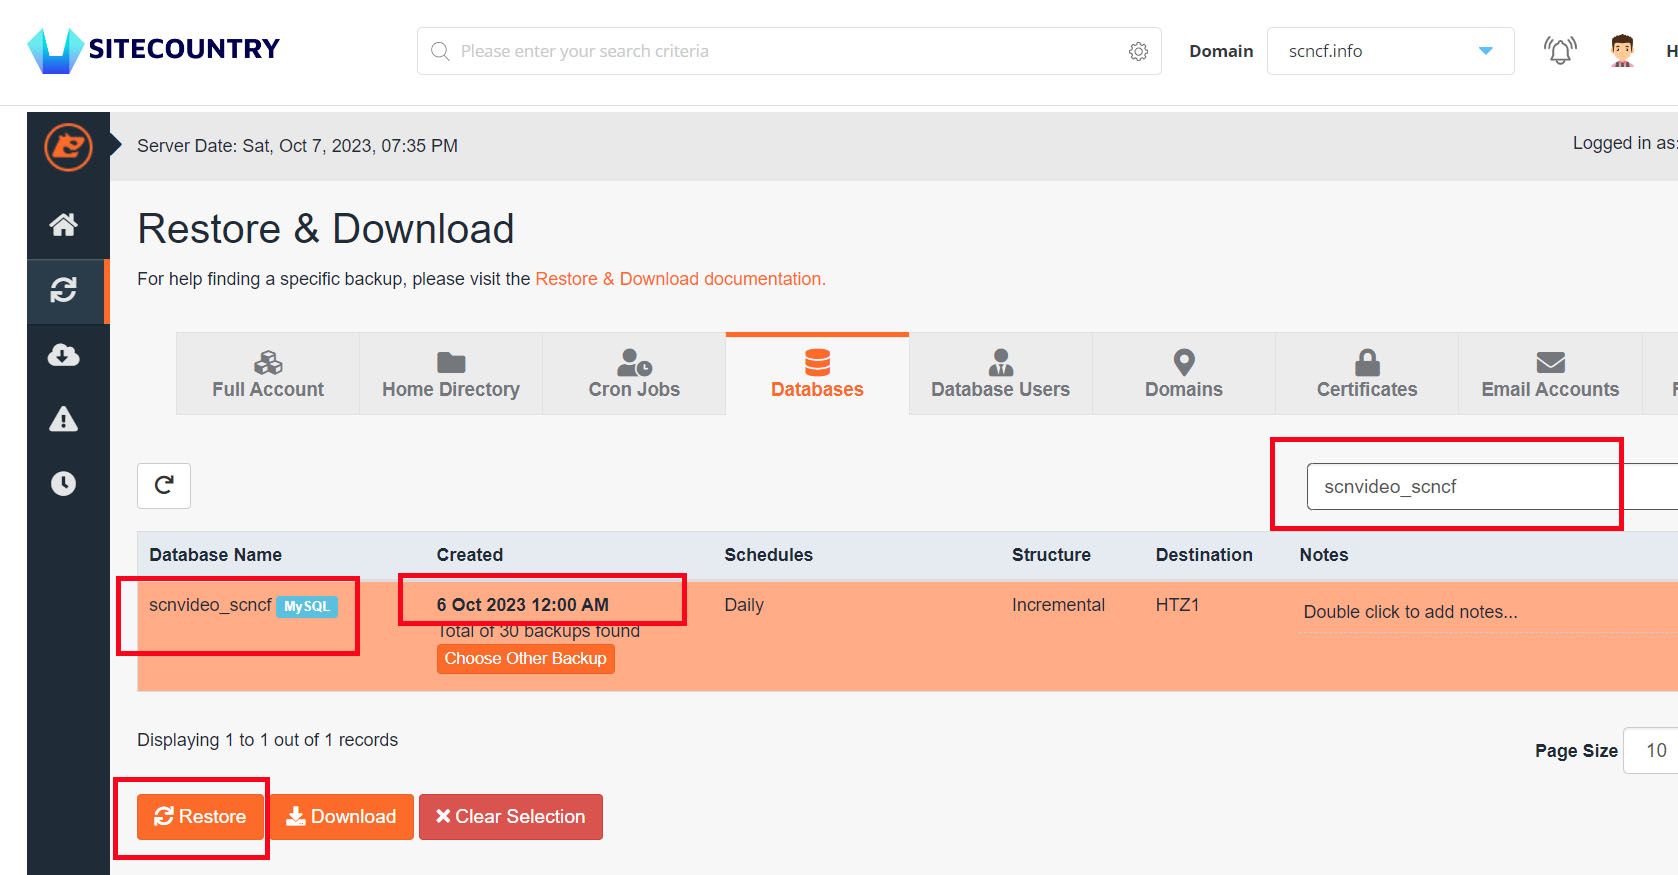
Then click on Database to Select and Finally click on Restore button and then Restore Selected Items to restore the Database backup for website scncf.info
Note: You may use the Choose Other Backup button to choose a different database backup
18) Once Website Files and Database Restore are done for a Specific Domain you can monitor the Status of Restore using the Queue option in the JetBackup window as in the below Screenshot
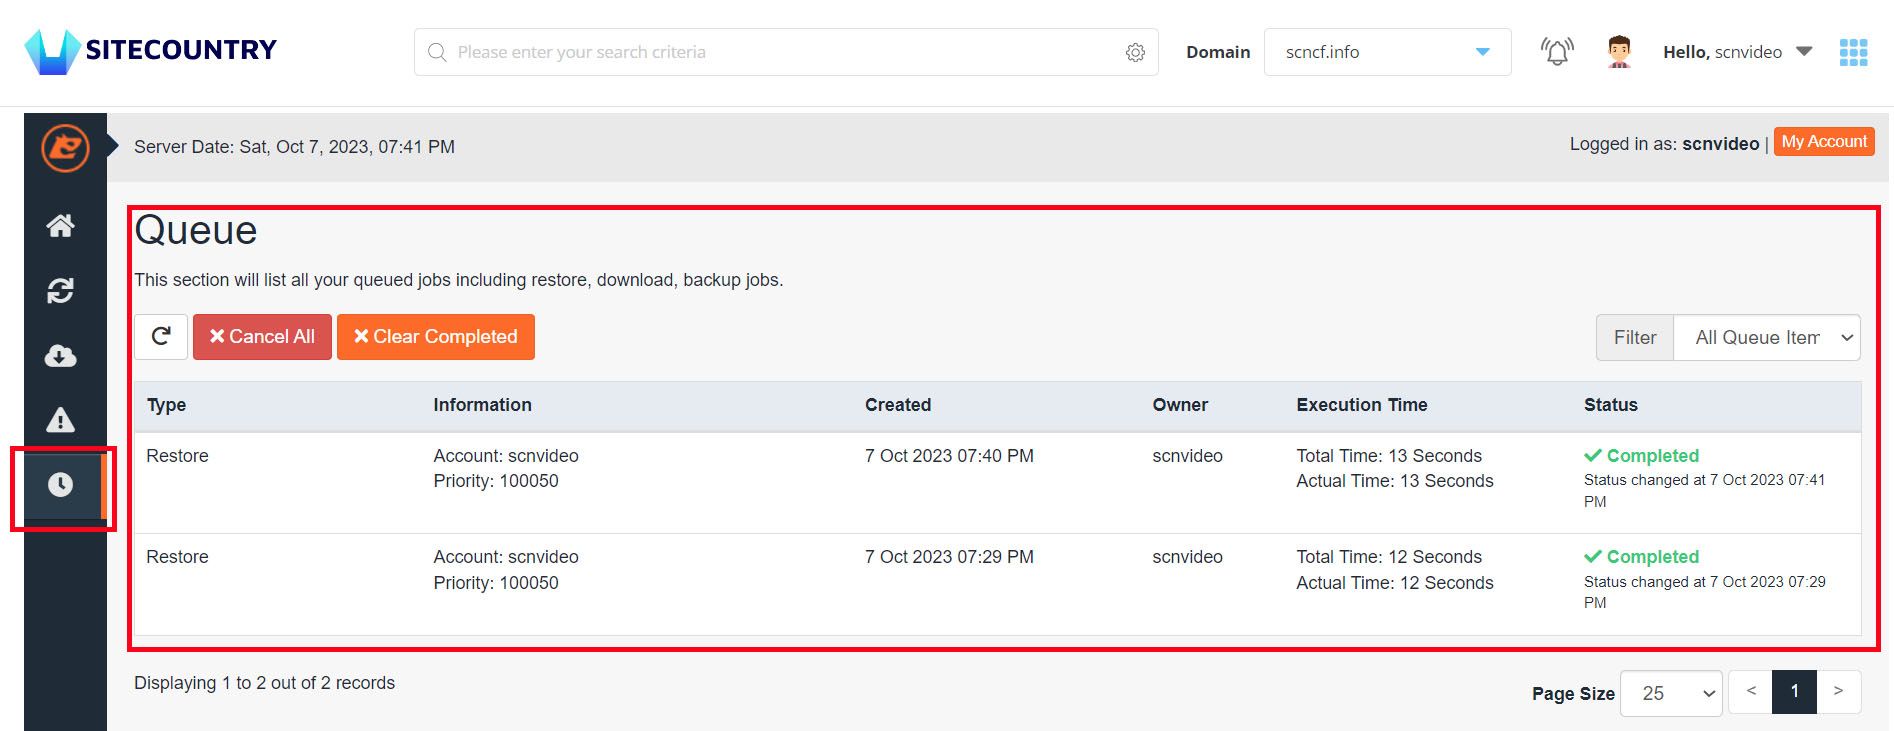
Once the Status of Restore schedules shows Completed then it means that the WordPress Website Backup Restore has been successfully completed.
You can open the website in the browser and check whether it is working fine.
Still, if you need any help in Restoring Website Backup, please feel free to contact our customer support team.