
How to Configure SiteCountry Email in Windows Mail App?
In this article, we will cover how to Configure SiteCountry Email at our Cloud Hosting in Windows Mail App.
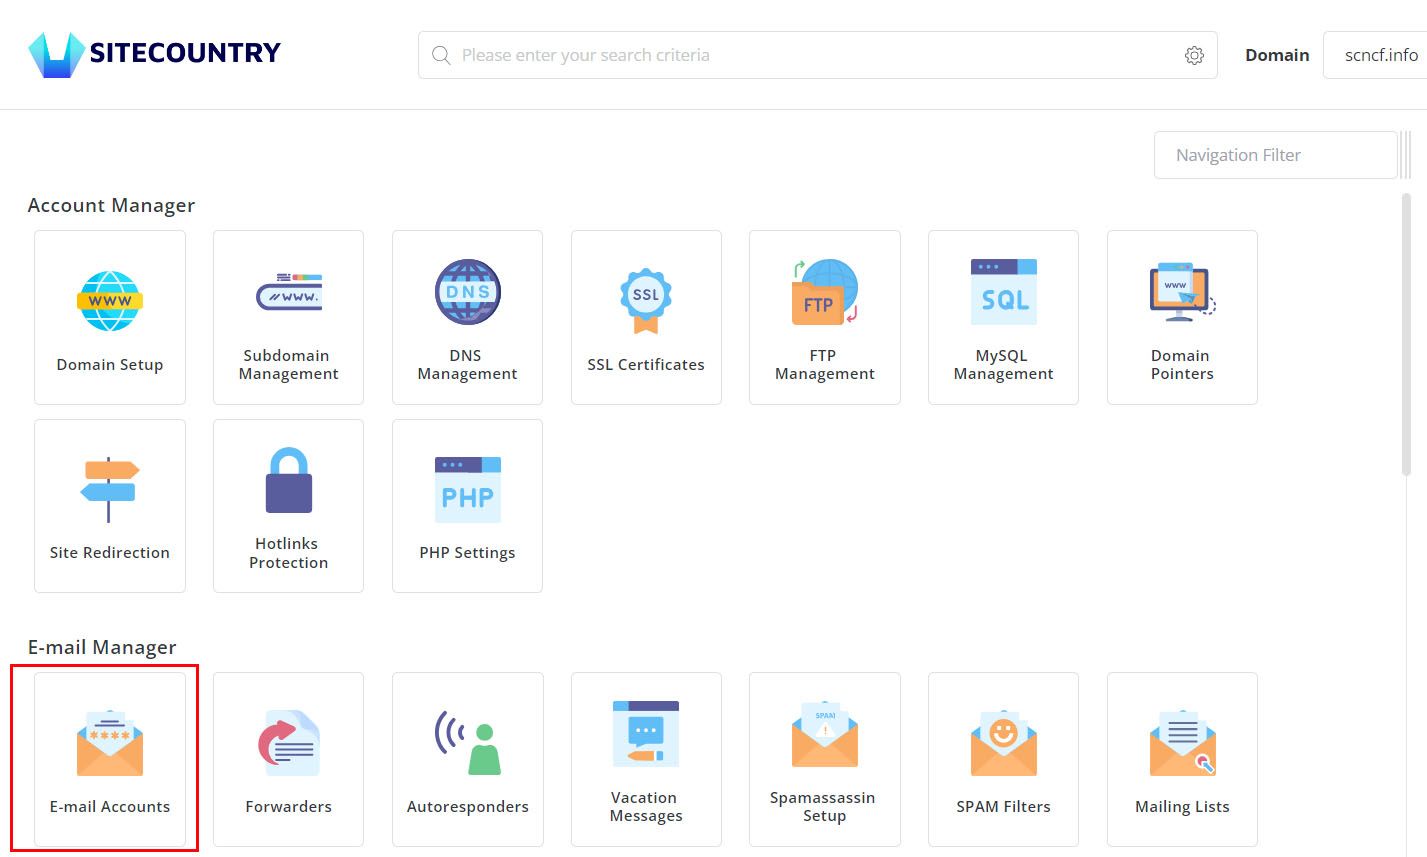
- Log in to your Hosting Control Panel
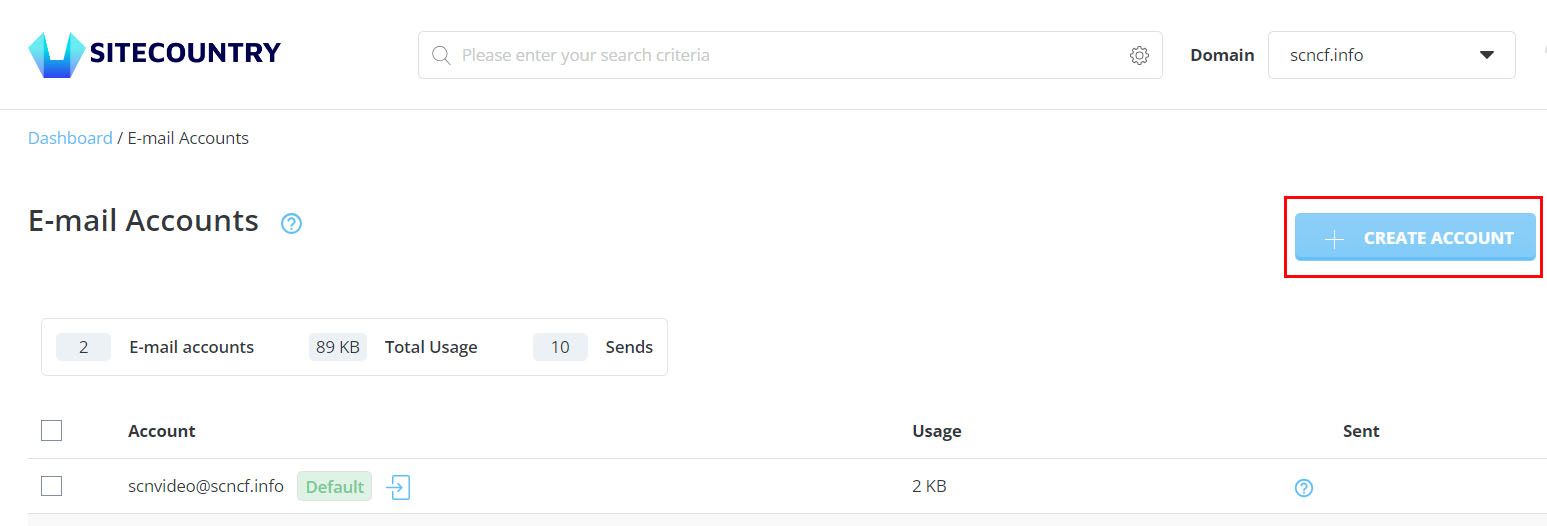
- Navigate to Email Manager > Email Accounts
3. If you don't have an email account for your Domain then Create a new email account as below. And if you already have one then just skip Steps 3 and 4.
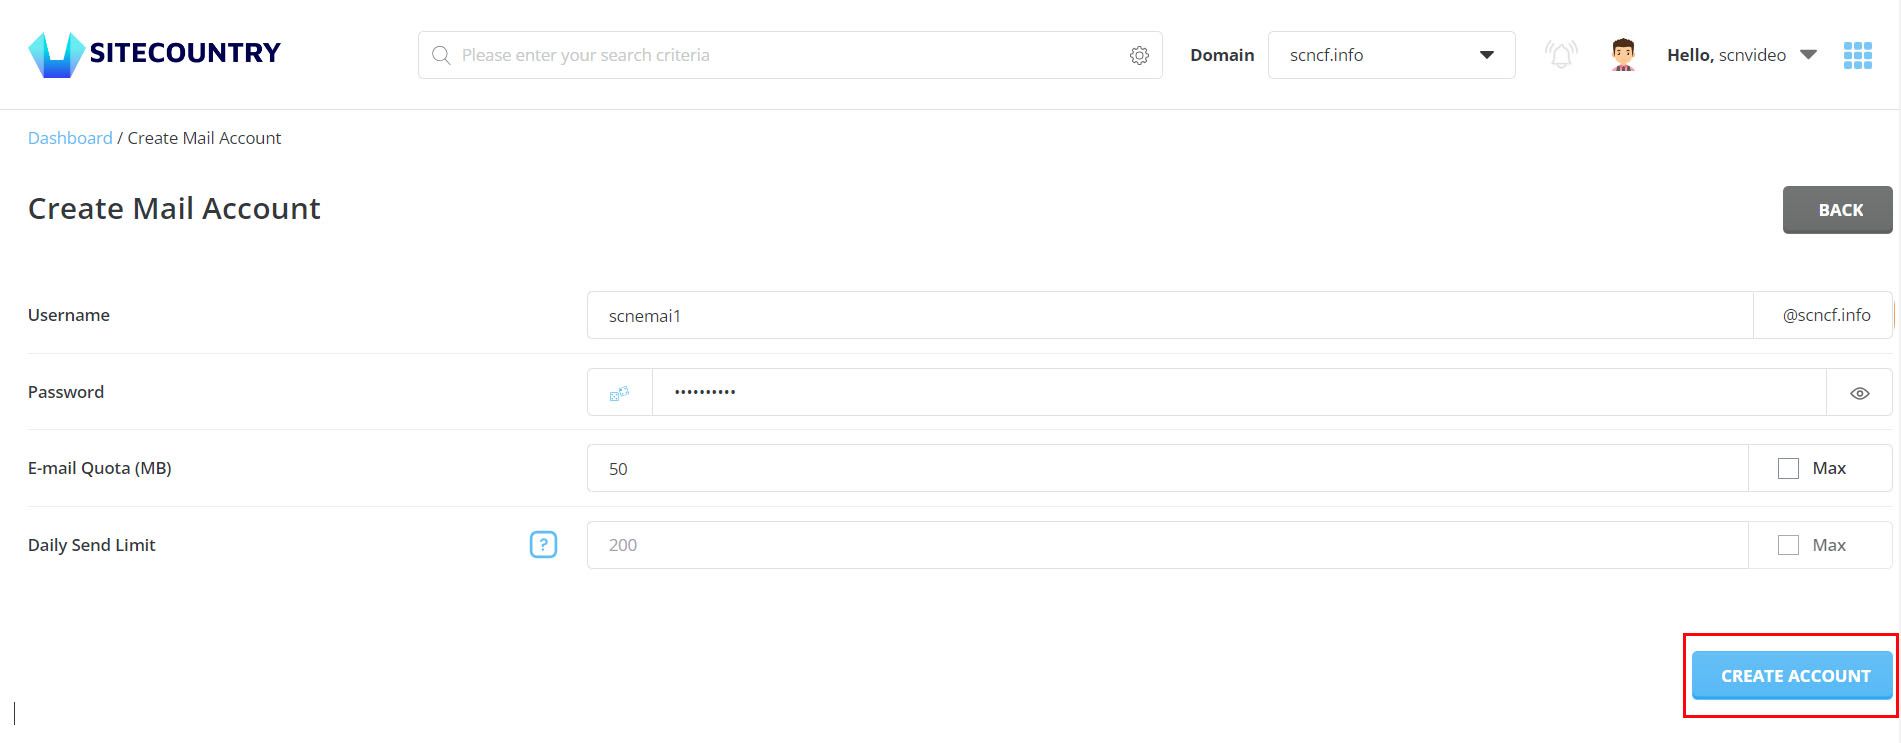
4. Note down the Mail settings (POP, IMAP & SMTP)

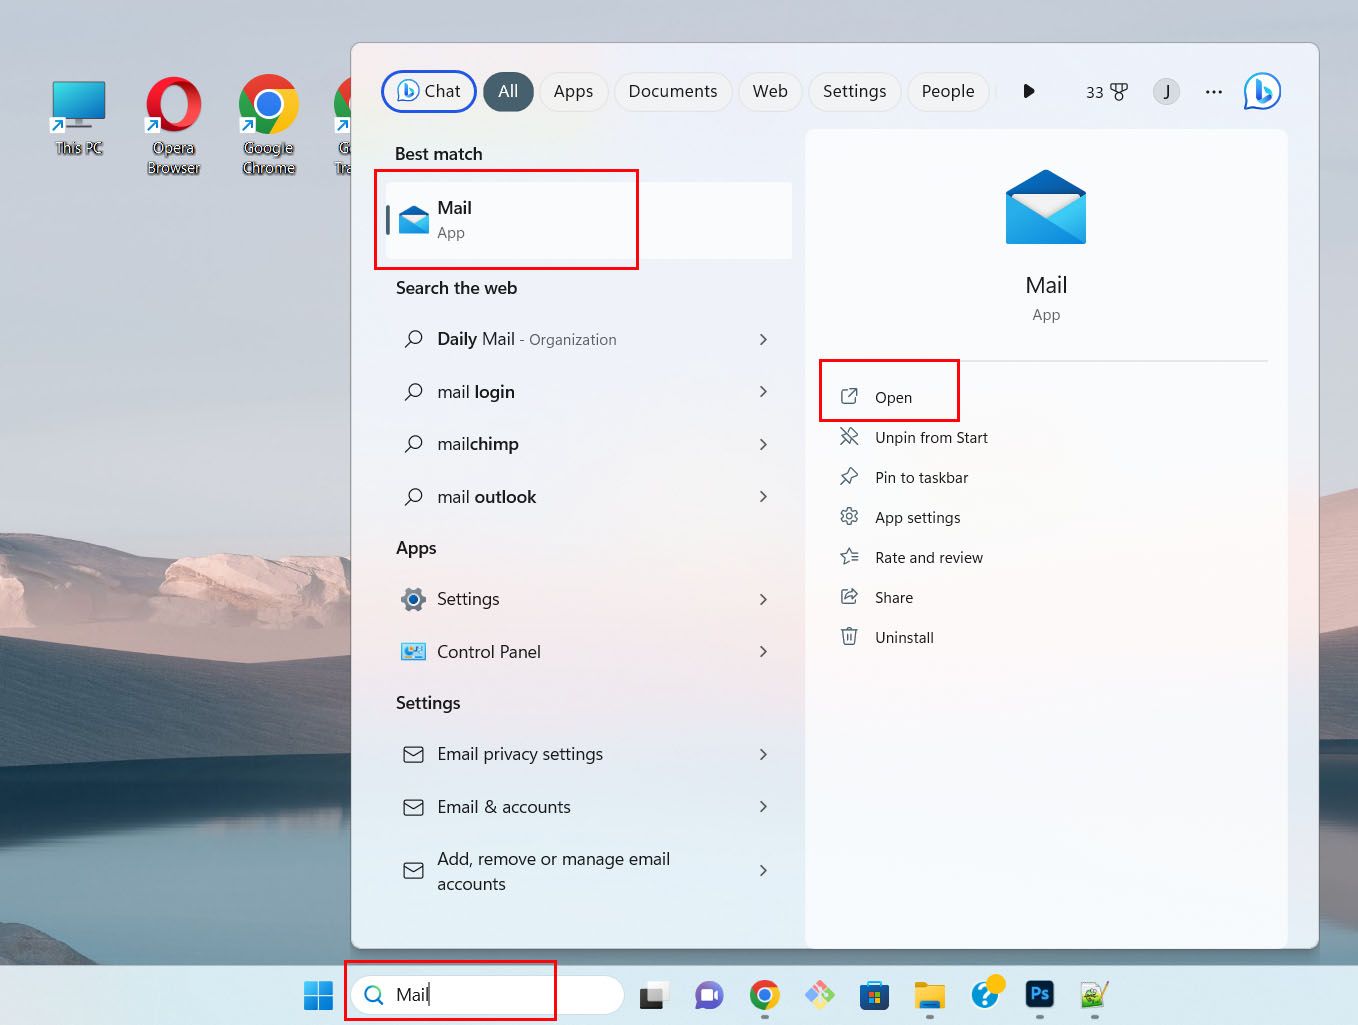
5. Open the Mail App on your PC
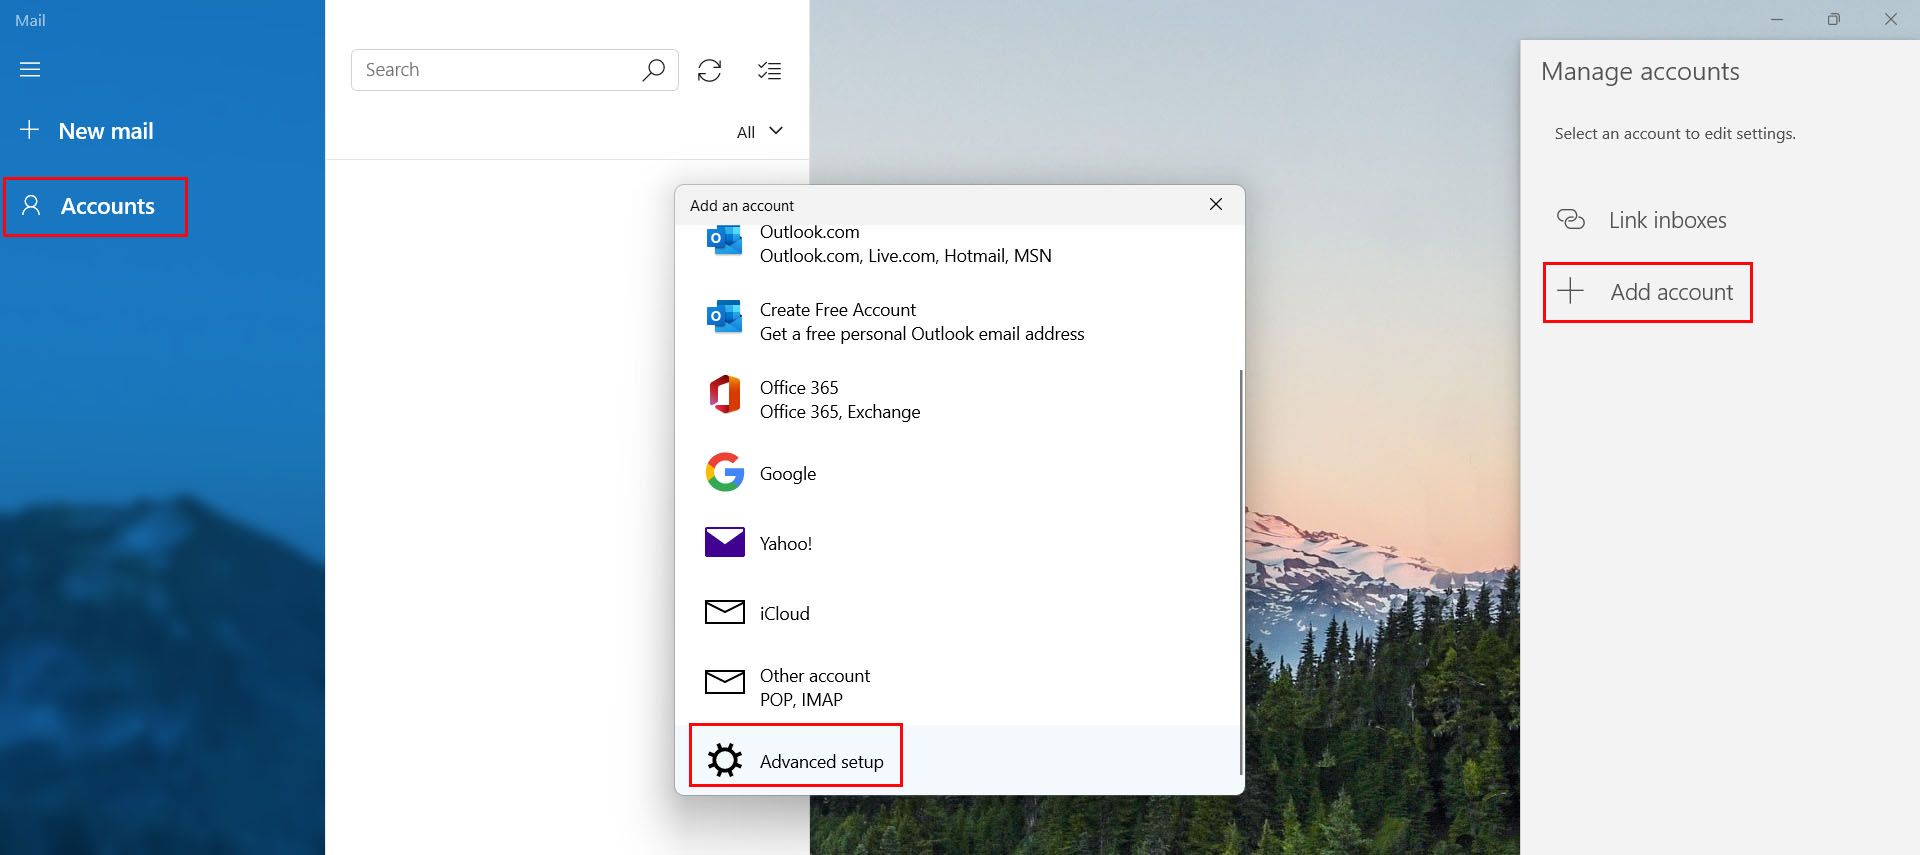
6. Click on Accounts > Add Account. Then Click on Advanced Setup
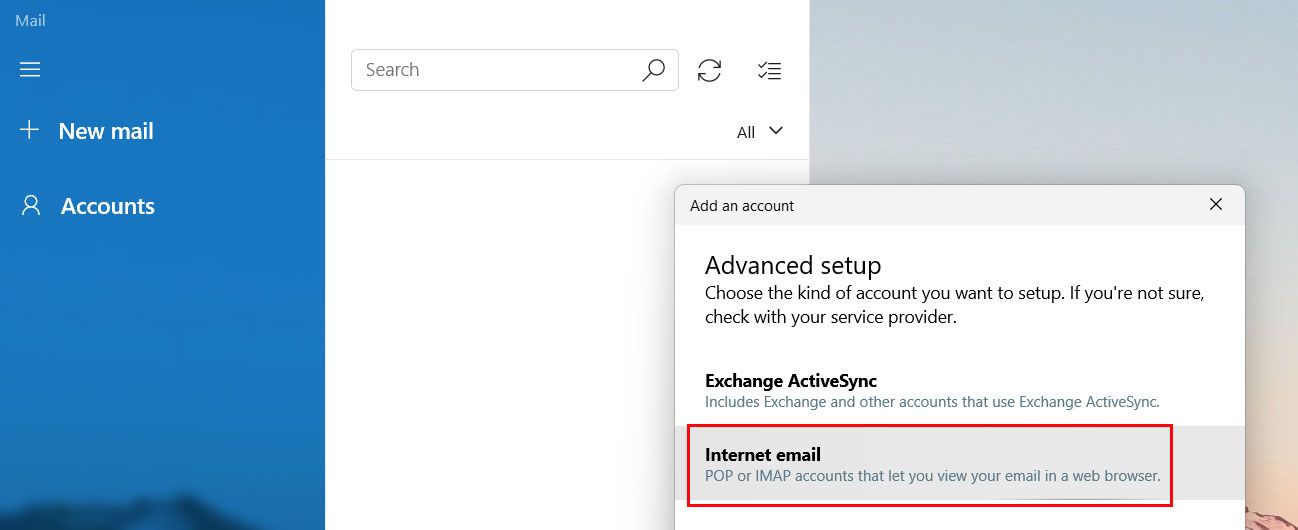
7. Choose the Internet Mail option
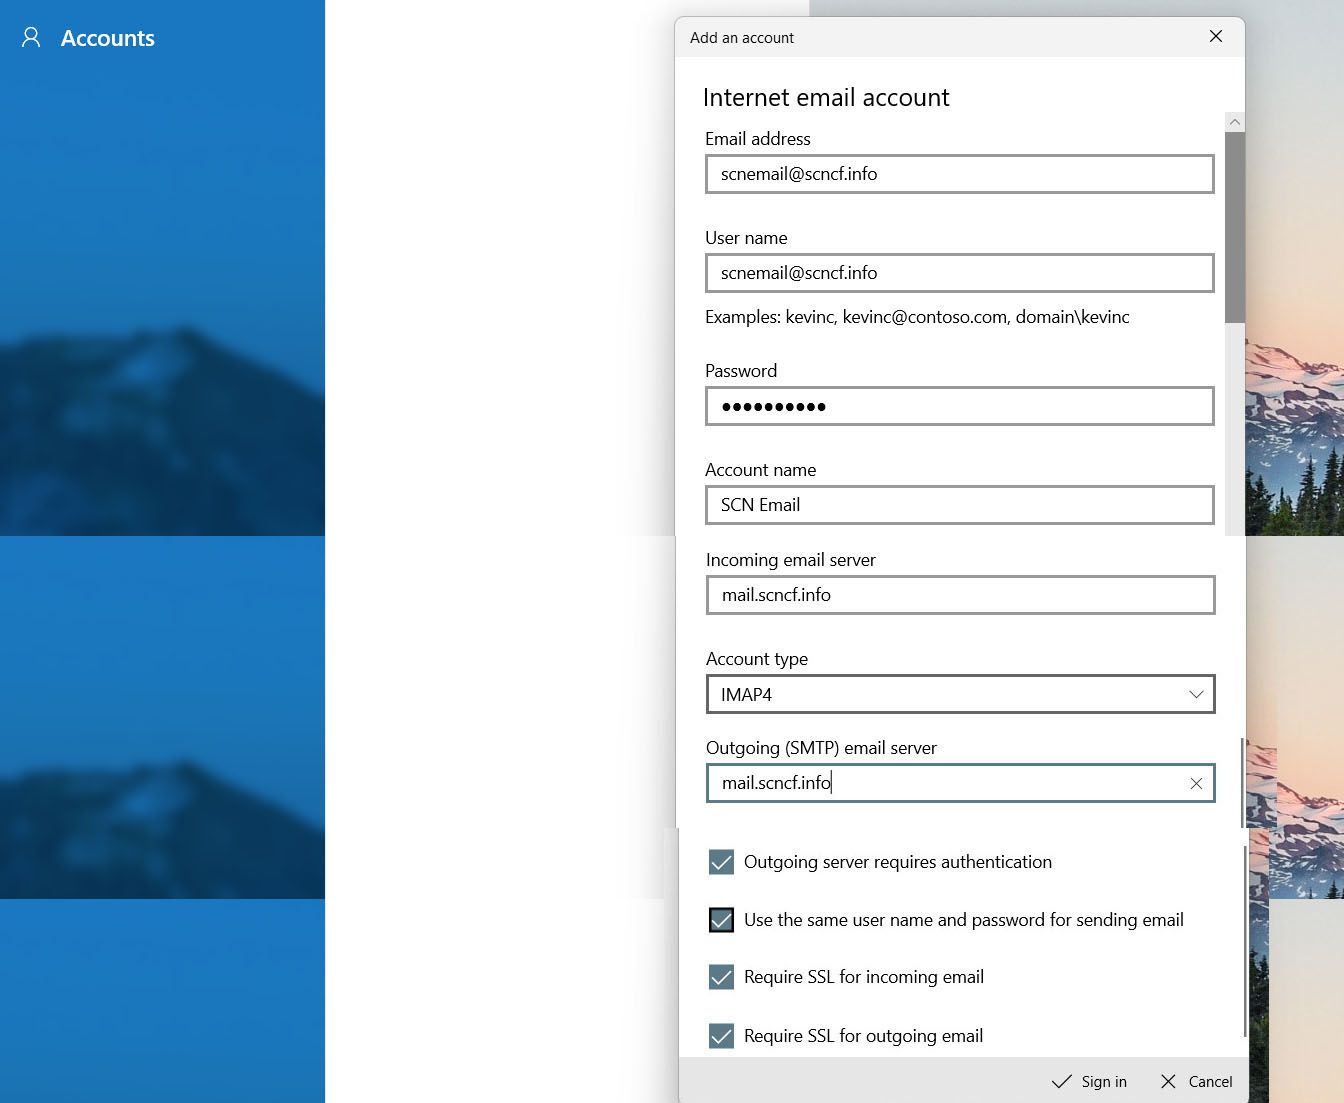
8. Enter Email Account Details as Follows and Click on the Sign In button
Email Address: scnemail@scncf.info
Username: scnemail@scncf.info
Password: <password of above email>
Account: <enter the account name>
Send your messages using this name: <enter the account name>
Incoming mail server: mail.scncf.info
Account Type: IMAP4
Outgoing (SMTP) Email Server: mail.scncf.info
9. Once the Email account was successfully set up you will see a screen as below
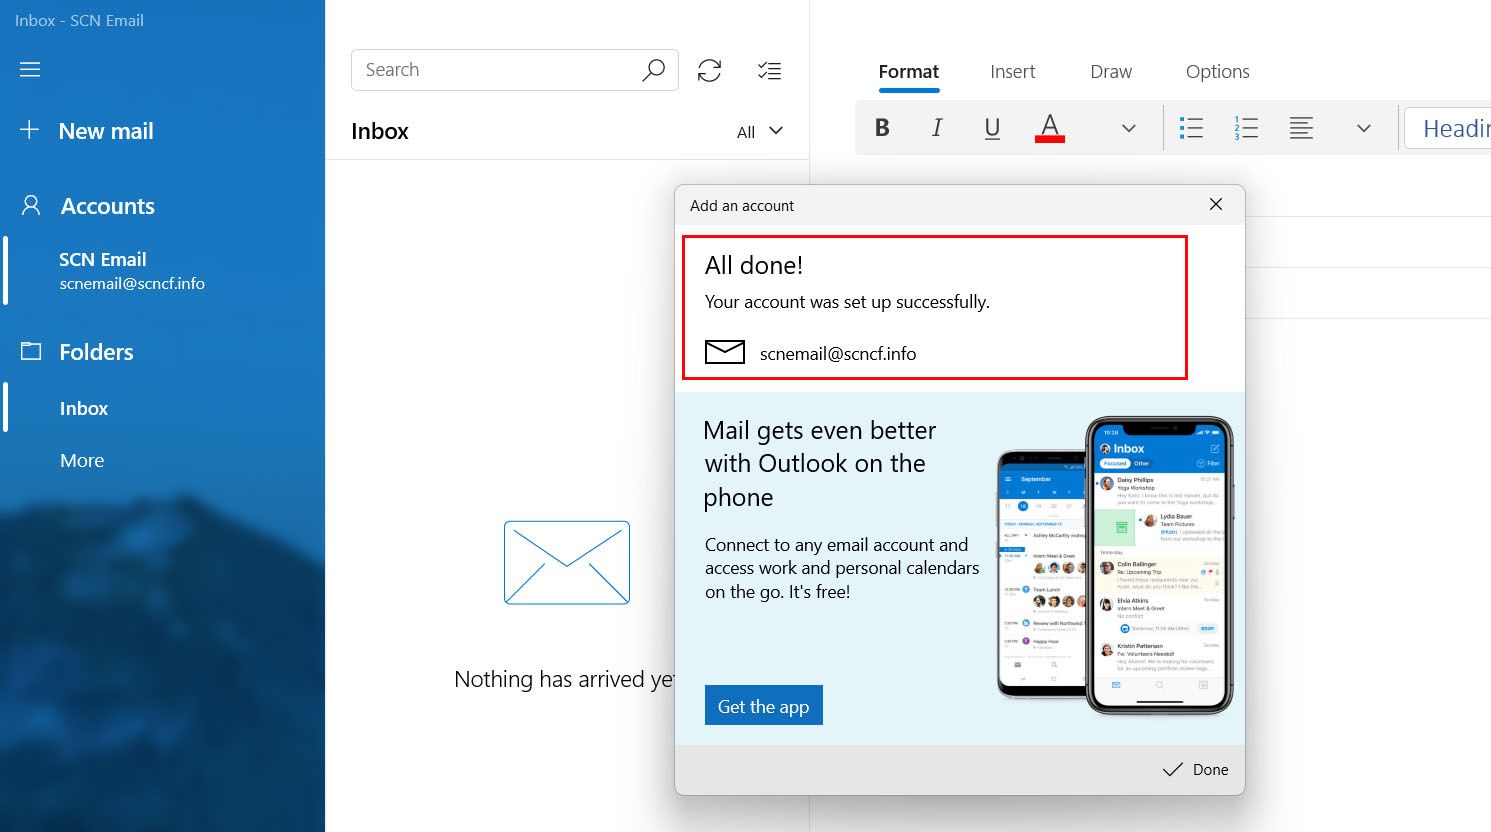
That's all, your SiteCountry Email has been successfully set up on the Windows Mail app.
If you need any help with Configuring SiteCountry Email with the Windows Mail app, please feel free to contact our customer support team.