
Migrating a website from Hostinger to SiteCountry Manually via Files & Database Import
Hello,
This article covers migrating a Website hosted on Hostinger to SiteCountry.
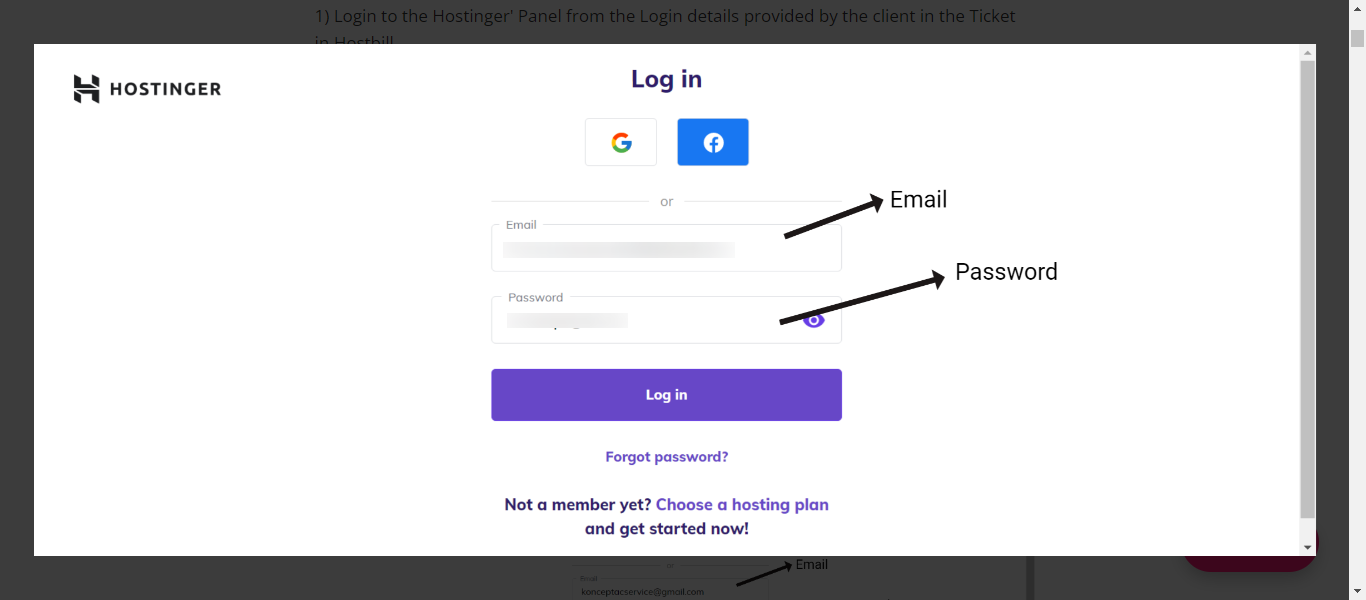
1) Login to the Hostinger Panel
Check the below screenshot for extracting the information:
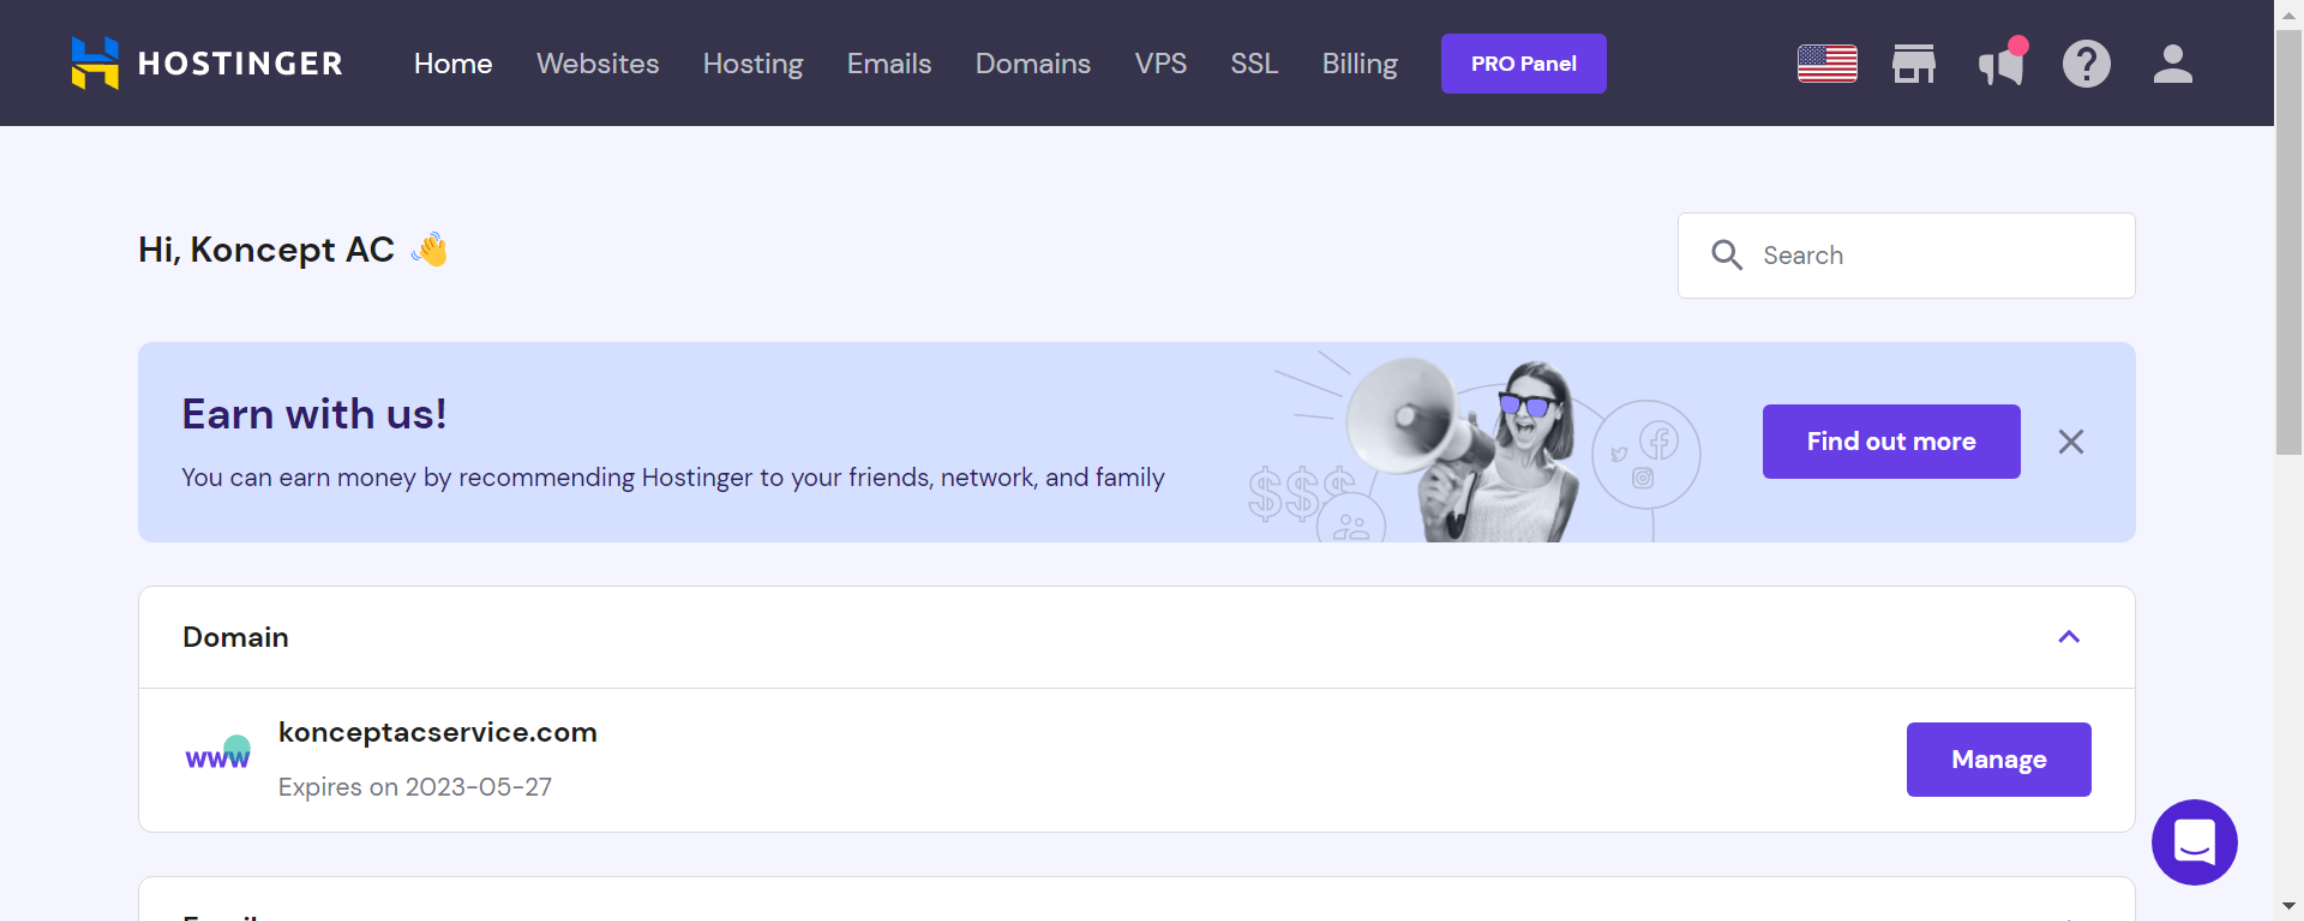
Once you are logged in, you will see the interface as this :
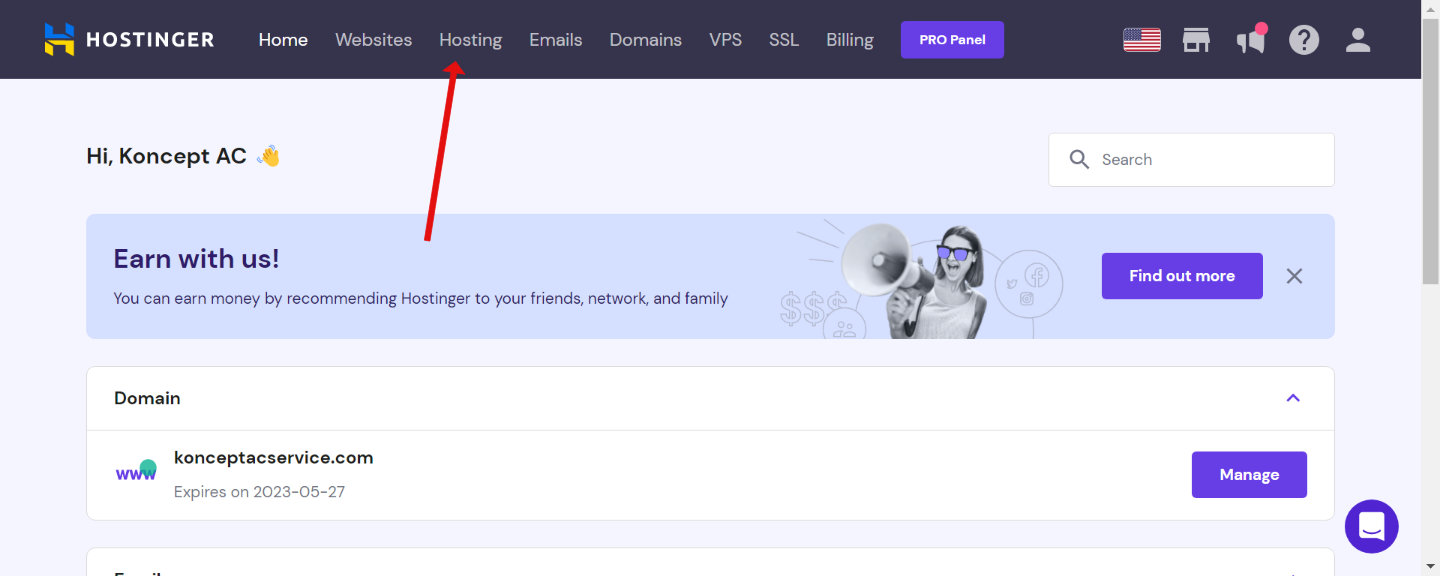
Now click on the Hosting Option on the Top Menu.
Now you will see x Websites on the Plan that would be showing on the Hostinger's Dashboard. Click over it and it will display the websites to you. Select the website that you want to migrate and move ahead.
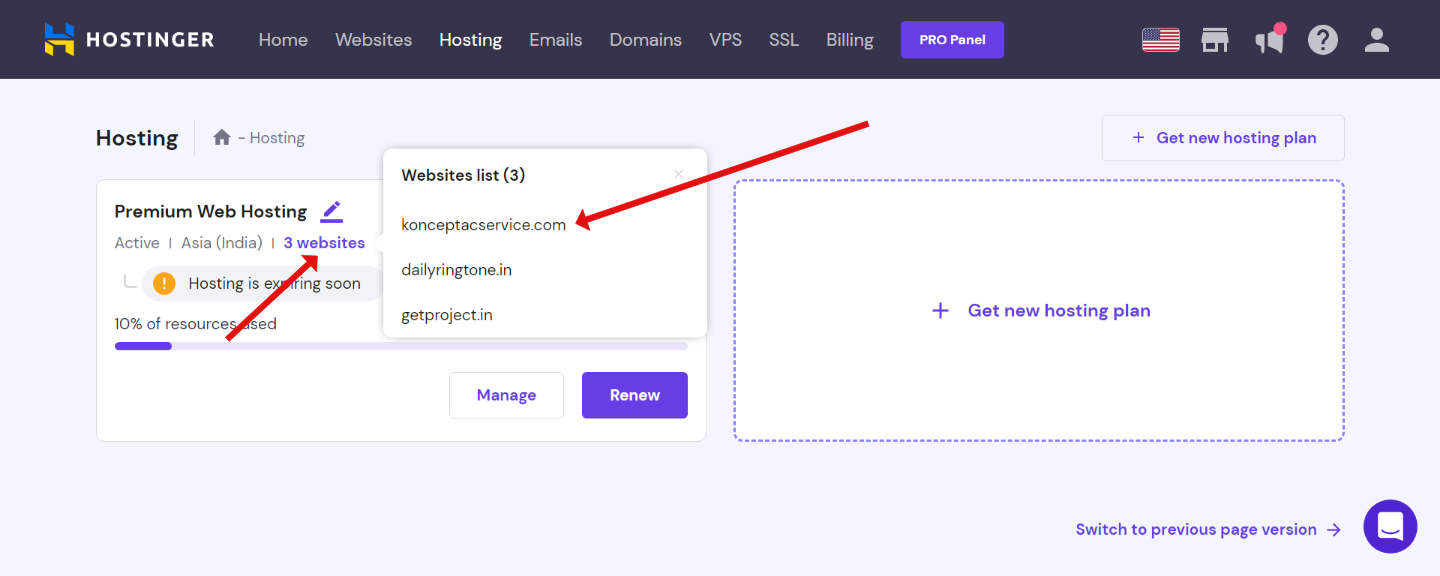
In our case, we are going to select the website : konceptacservice.com and moving ahead with the same.
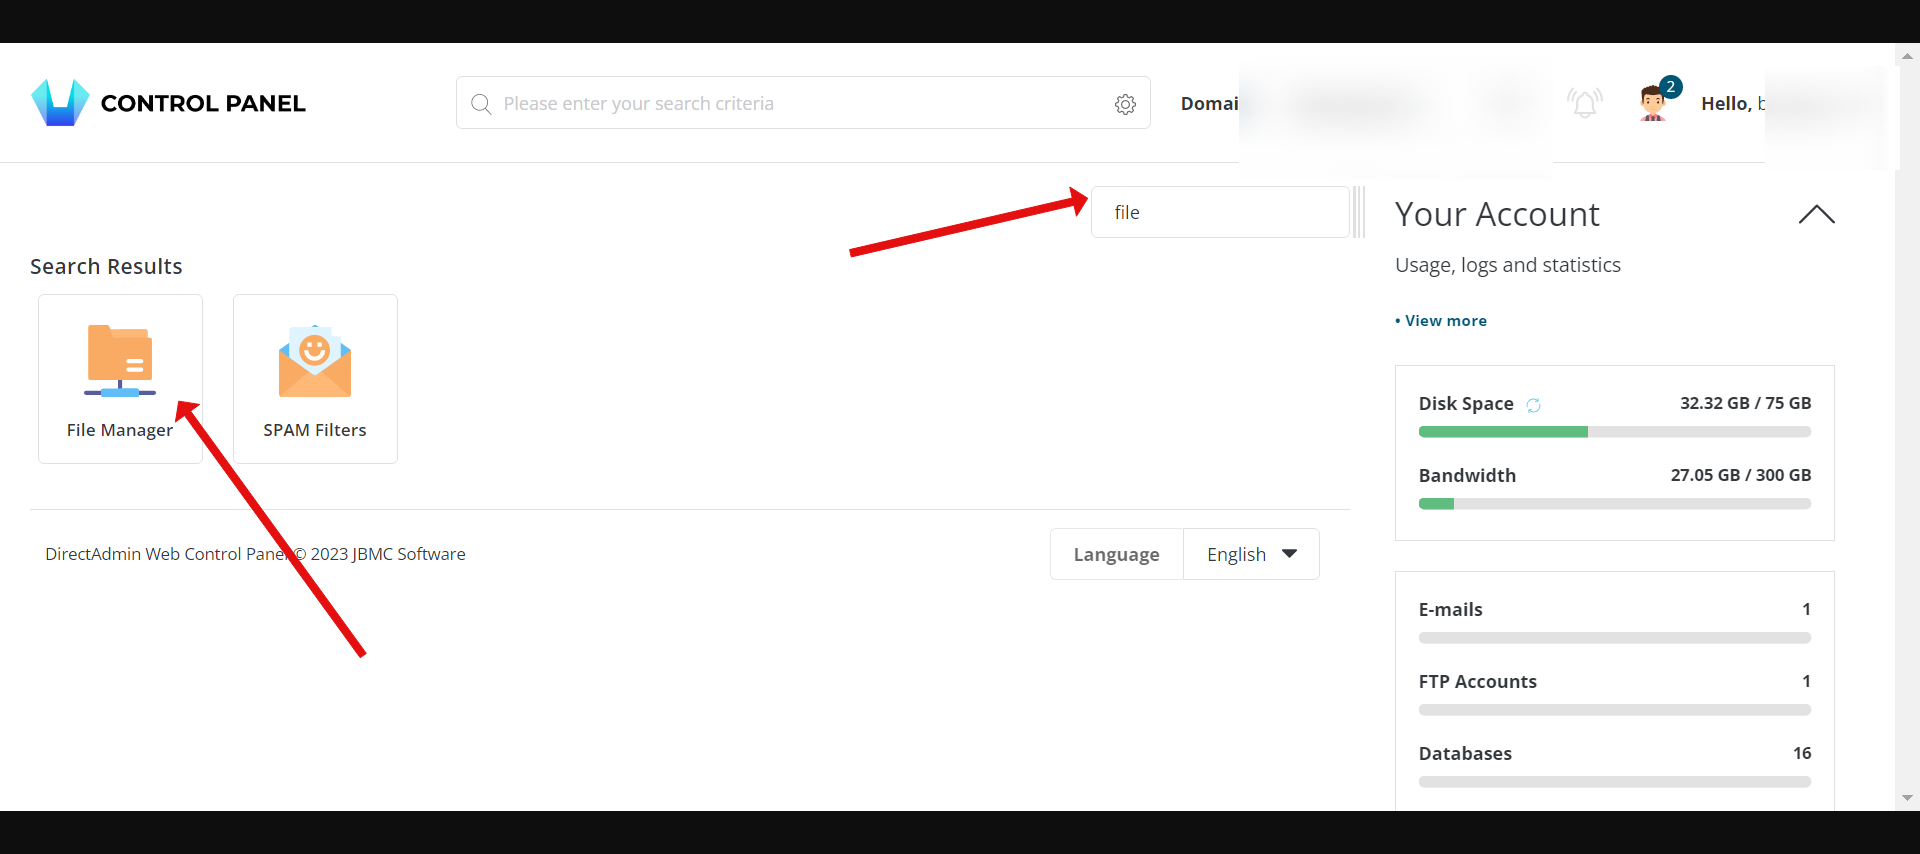
2) Now search for Filemanager in the Search bar that appears and expand the Files Section, then click on the filemanager.
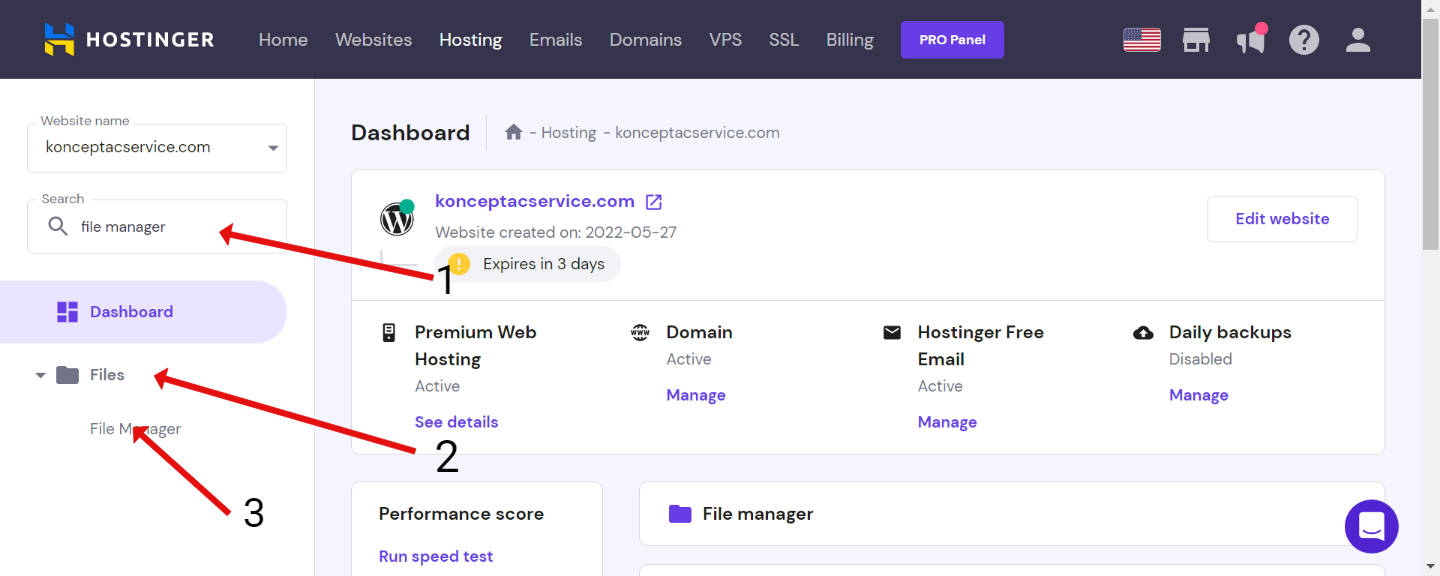
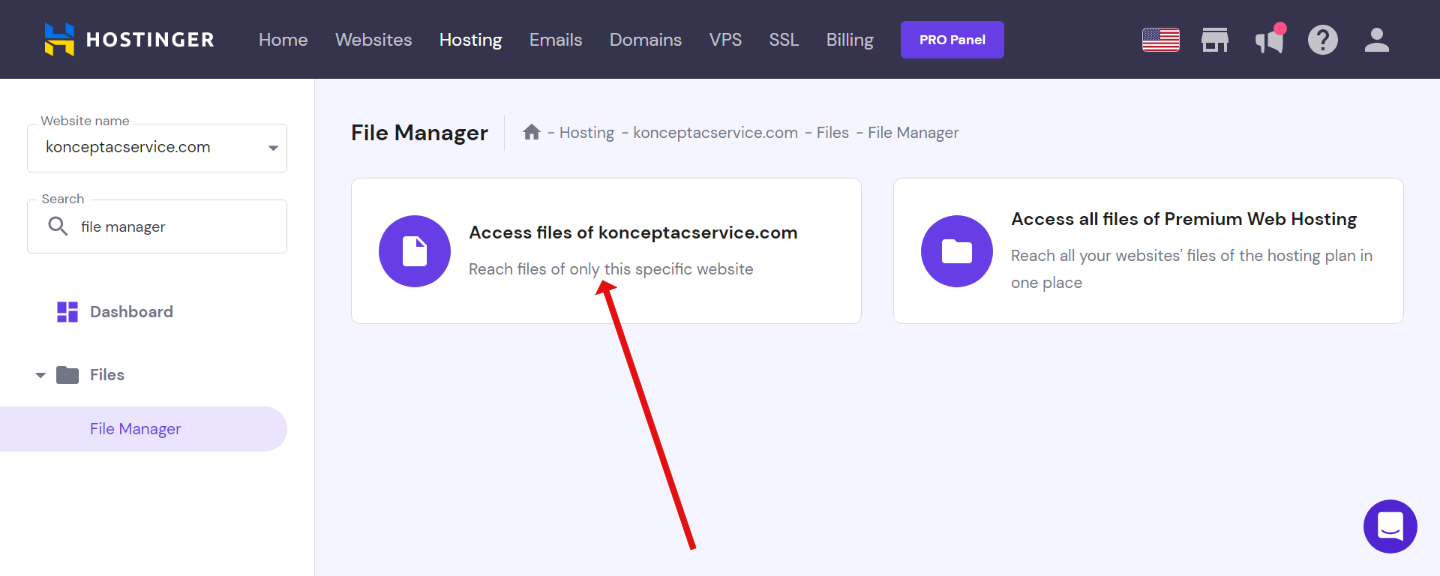
Next Click on the first option which allows you to access the files of the particular domain you selected.
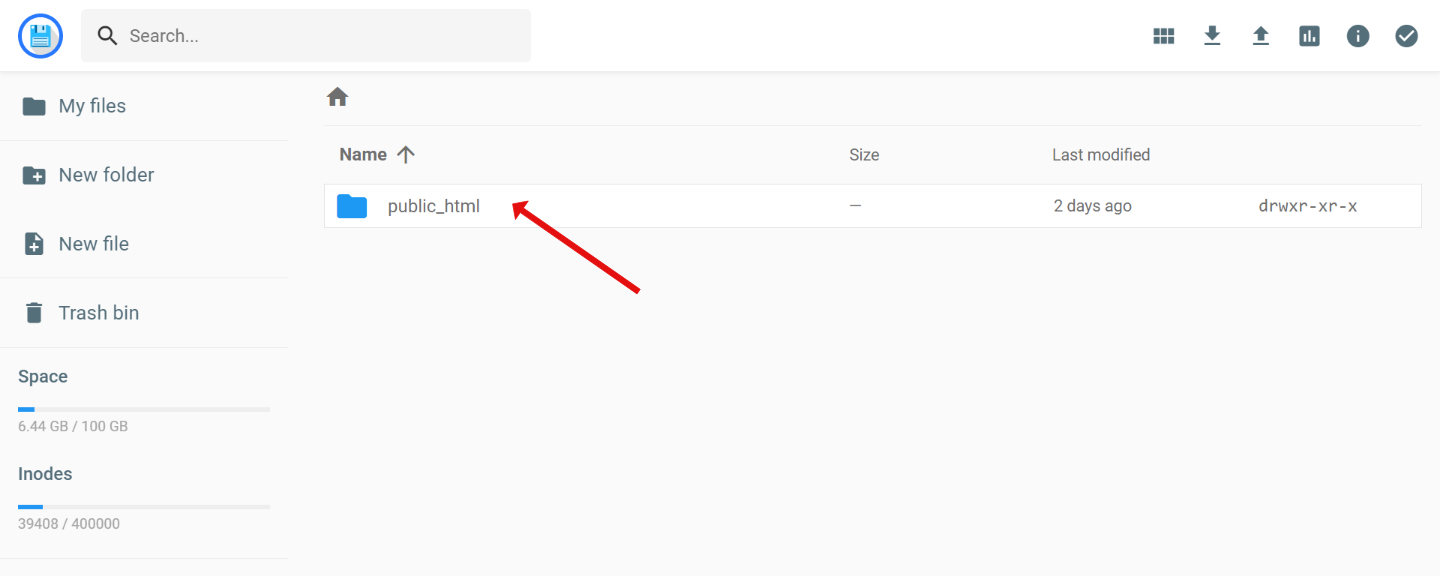
Double click on the public_html folder to open it.
Now Press Ctrl + A in your keyboard to select all the files in the directory.
NOTE: In the migration, please make sure that inside public_html folder, there are no other subfolders except wp-content, wp-admin, wp-includes.
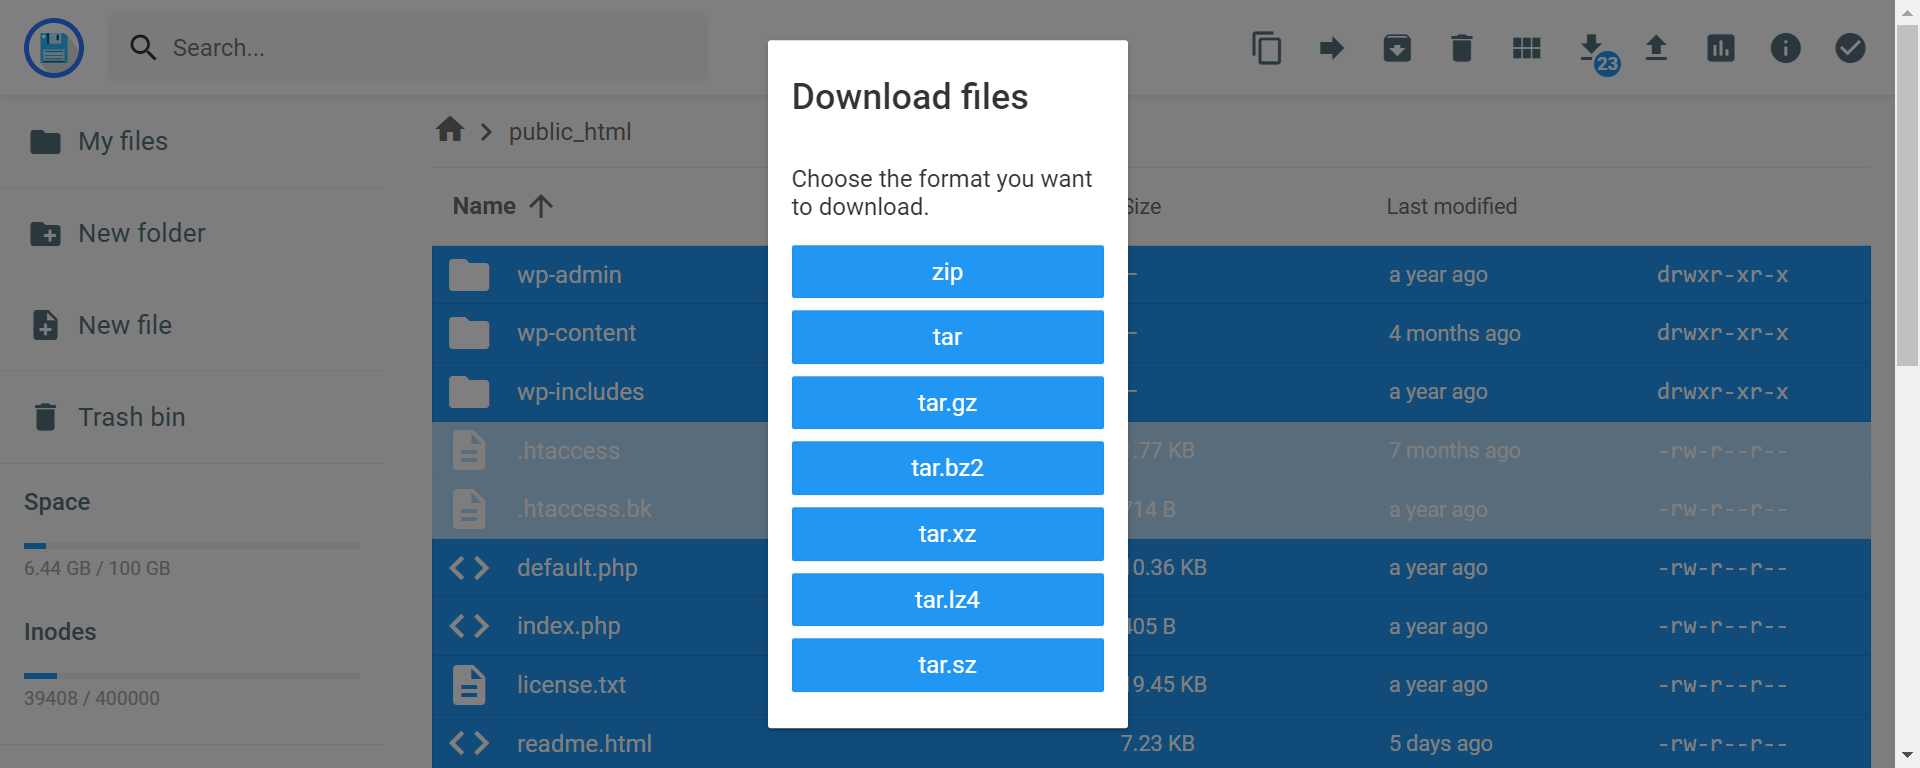
If it does then, you have to open that folder and check inside it, if that folder also contains wordpress subfolders (wp-content, wp-admin, wp-includes) inside it then go back and include the folder in the Ctrl + A and then click on the download button that appears on the top.
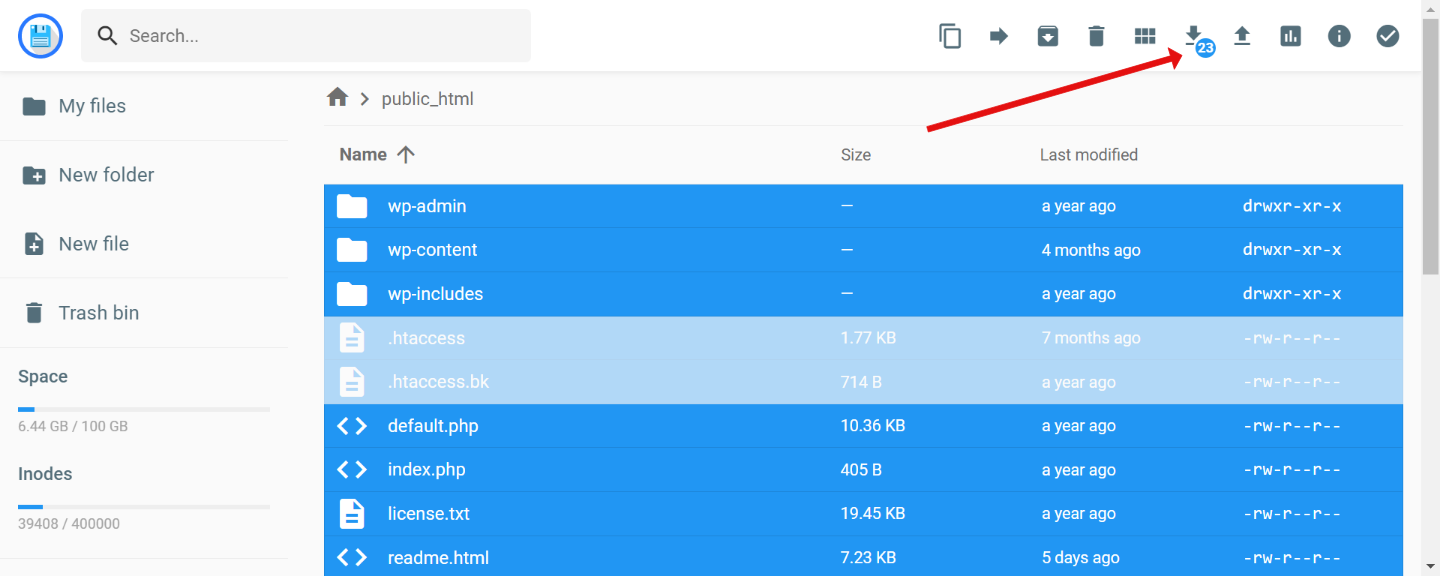
Select the format as tar.gz and the download of the file will start.
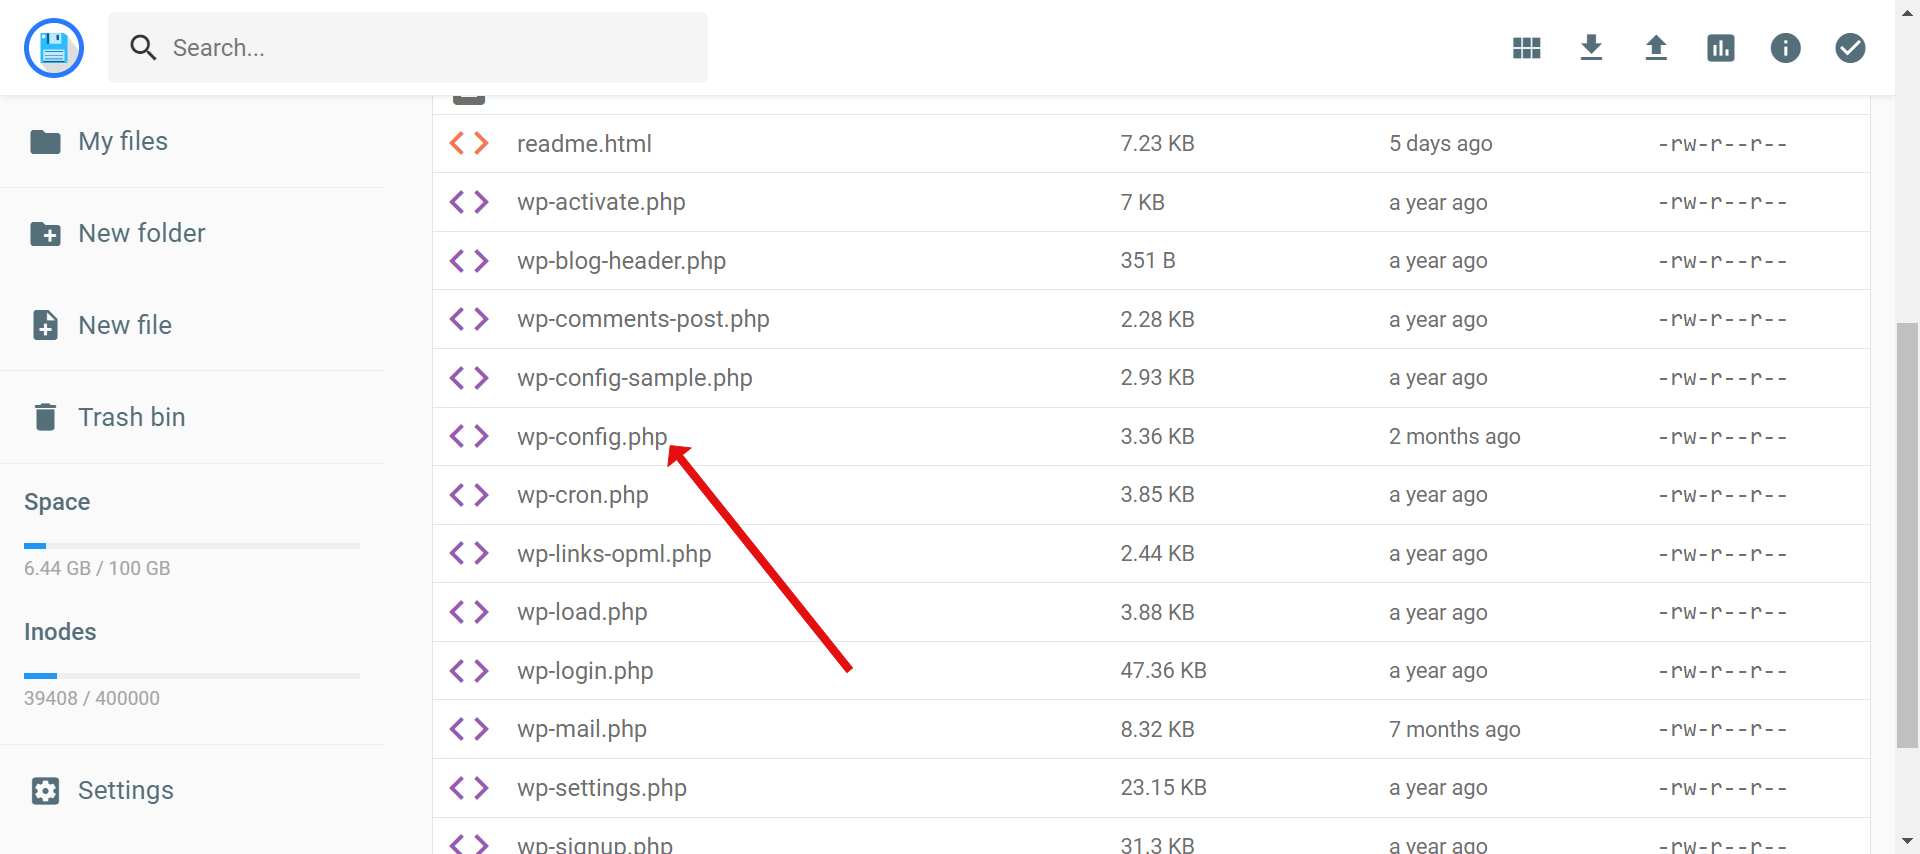
Step 3 : Go back to home and open public_html folder again.
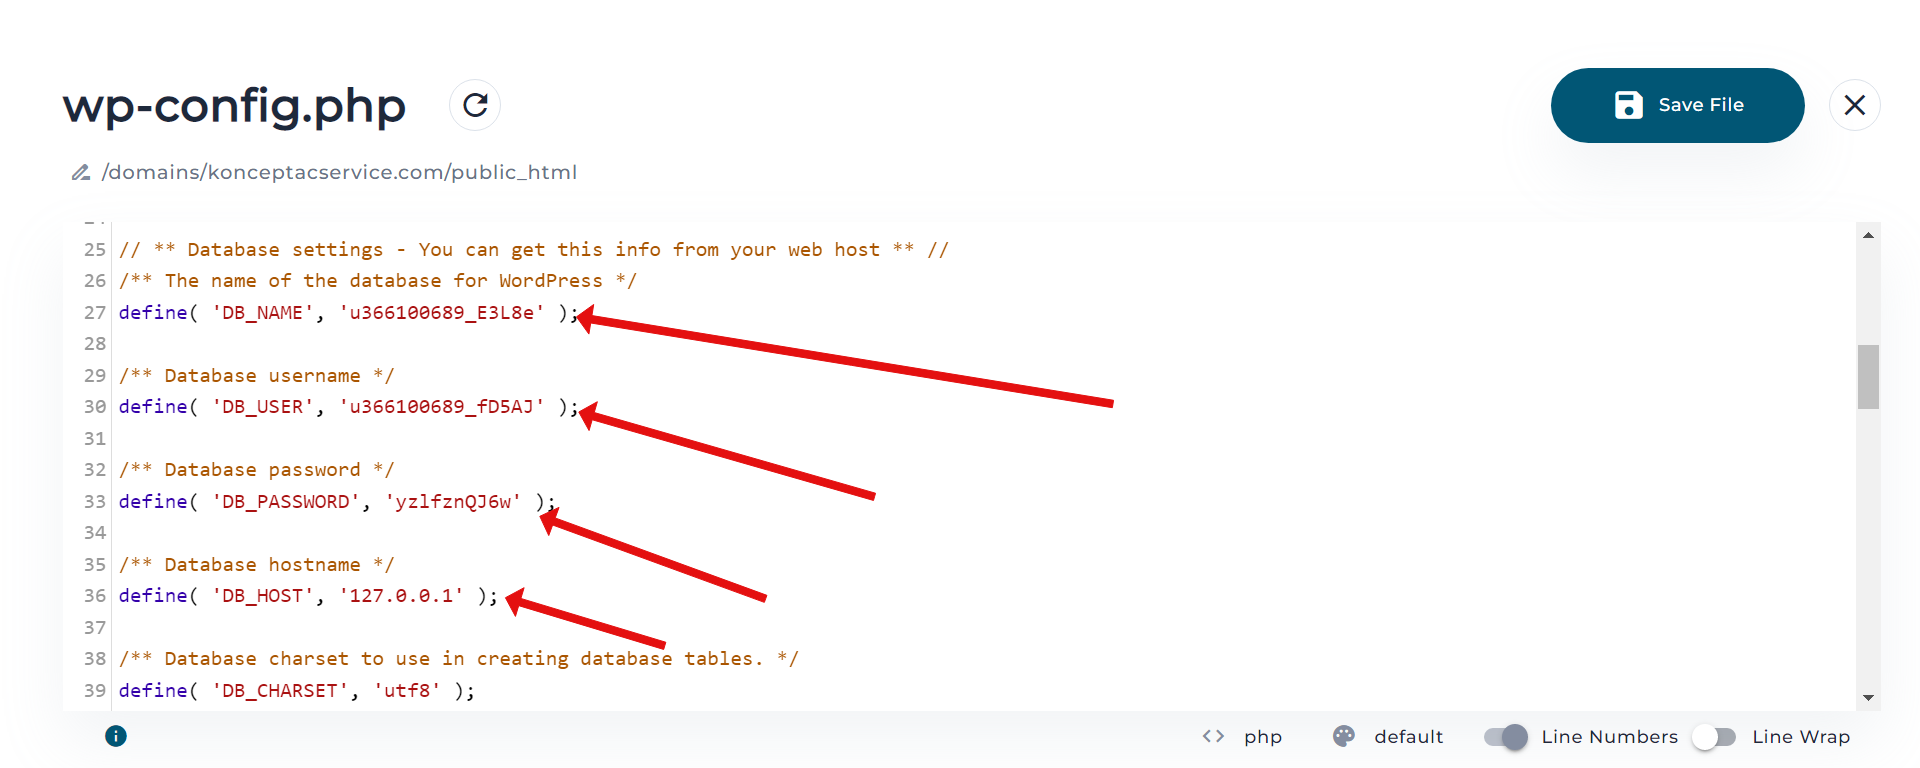
Now look for a file named wp-config.php in the file manager and open it.
After opening the file look for a line which contains the DB_NAME name as shown under :
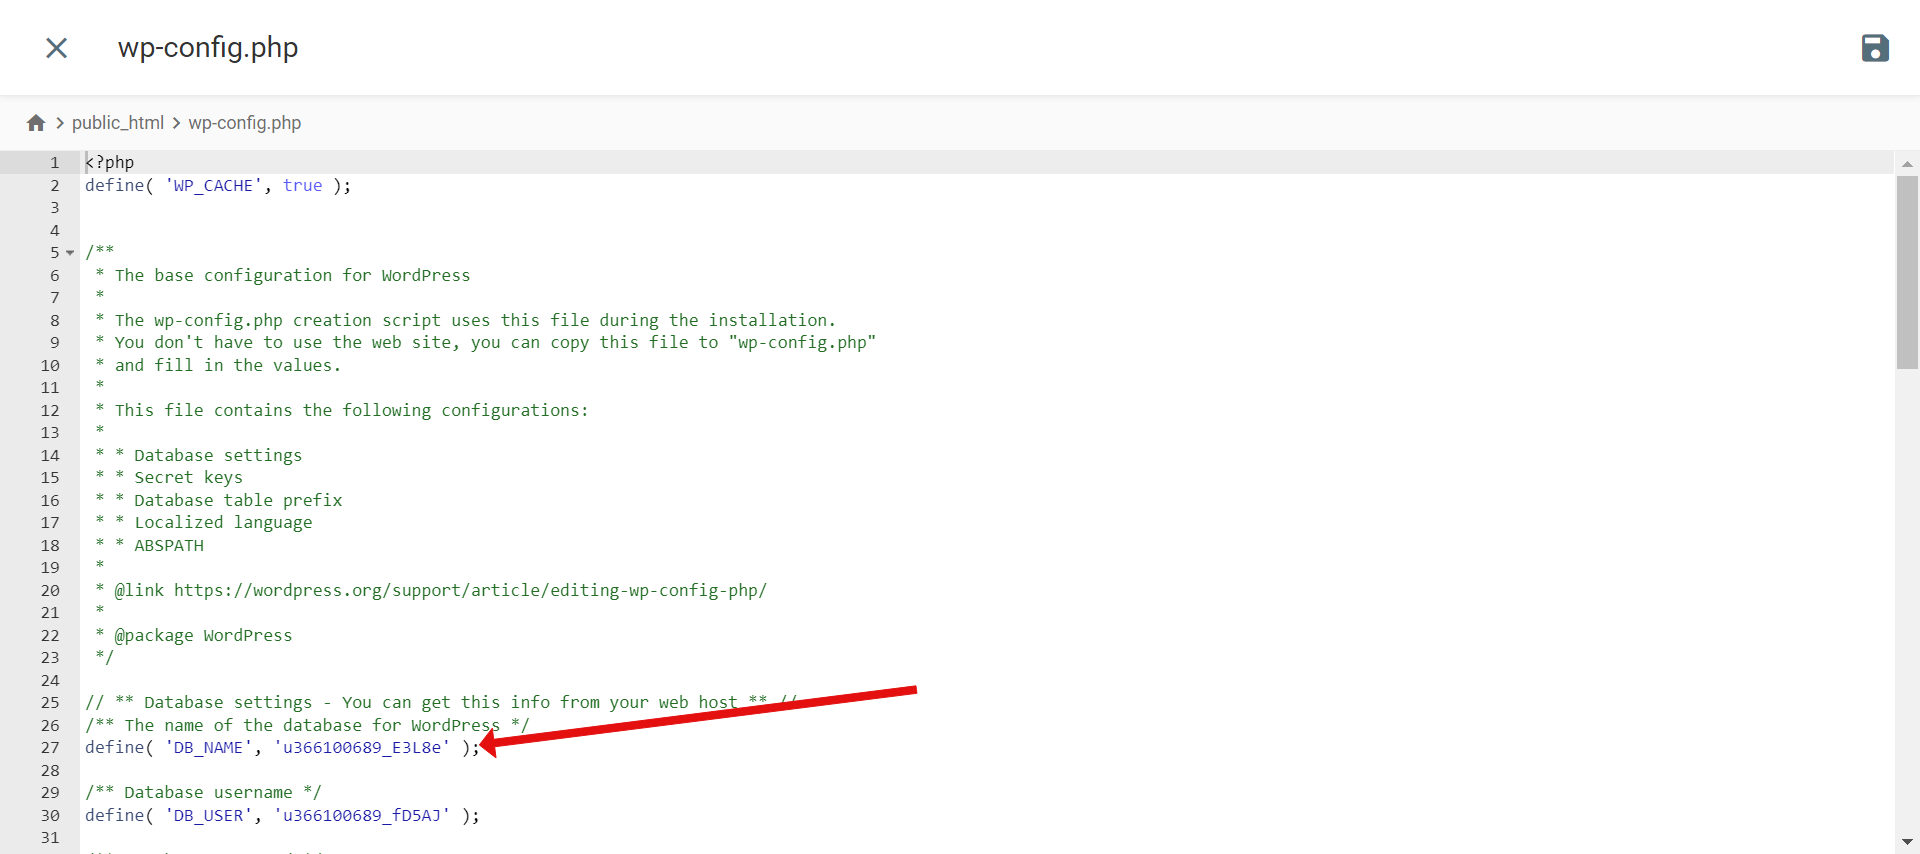
Copy the DB Name and save it somewhere for later use.
Step 4 ) Now go back to the Hotinger's hosting dashboard and then search for phpmyadmin
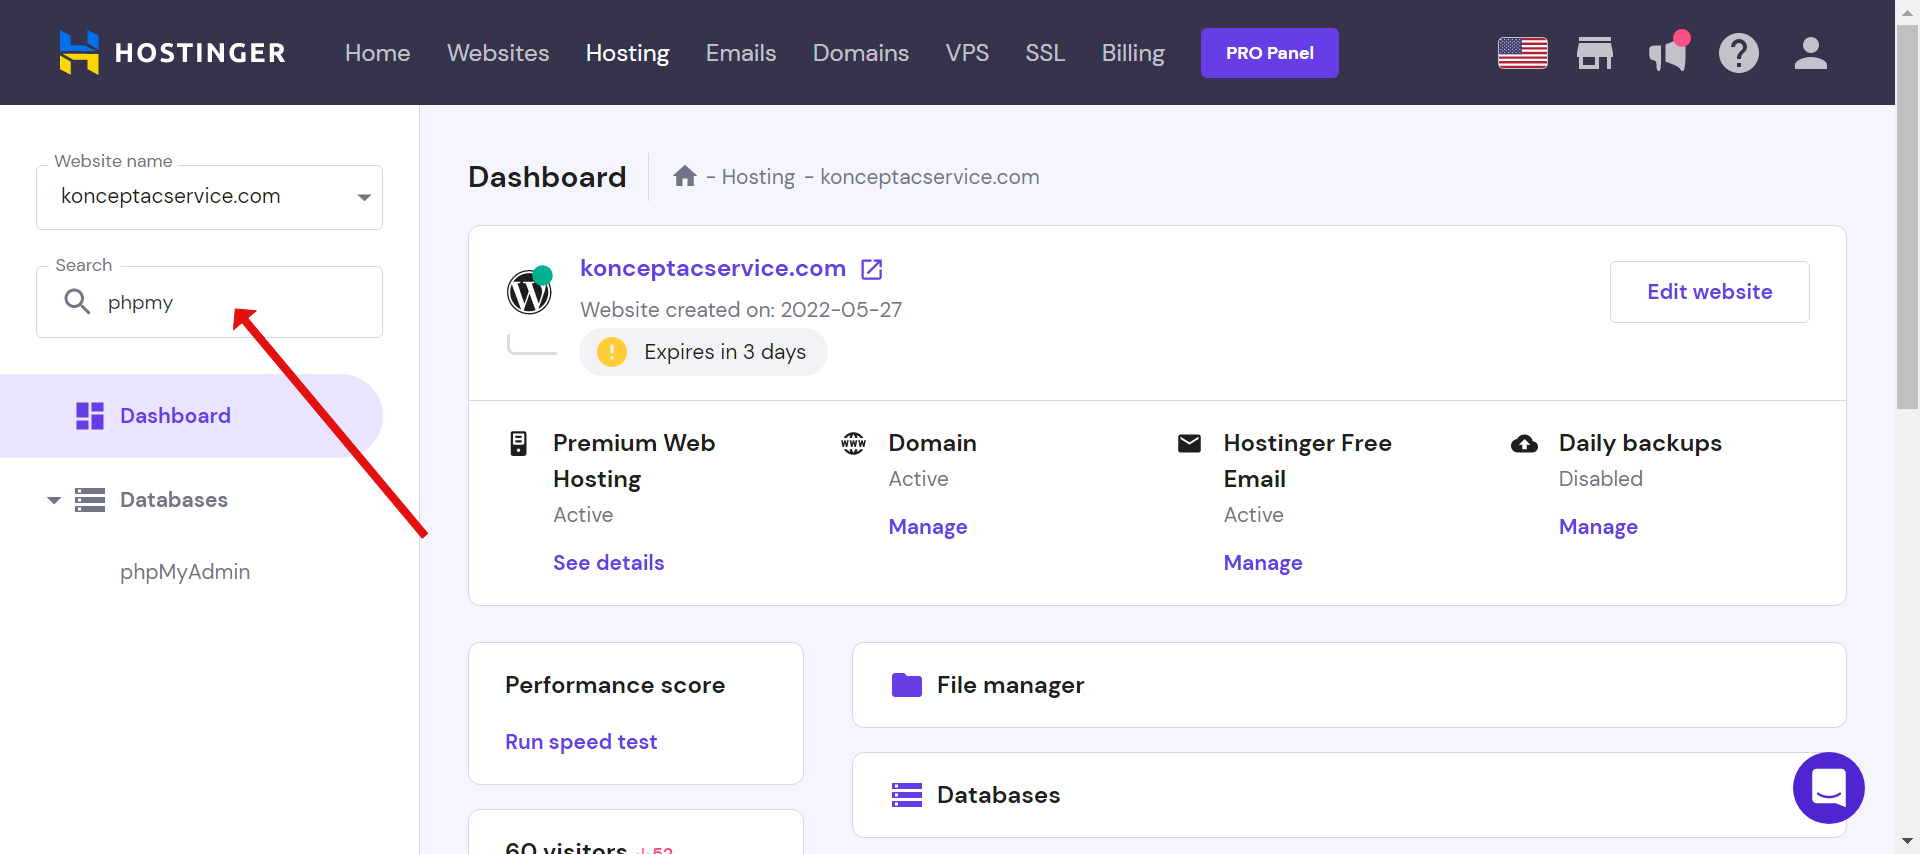
After this, search for the DB_Name which you copied and saved in the last step ( Use CTRL + F to search) :
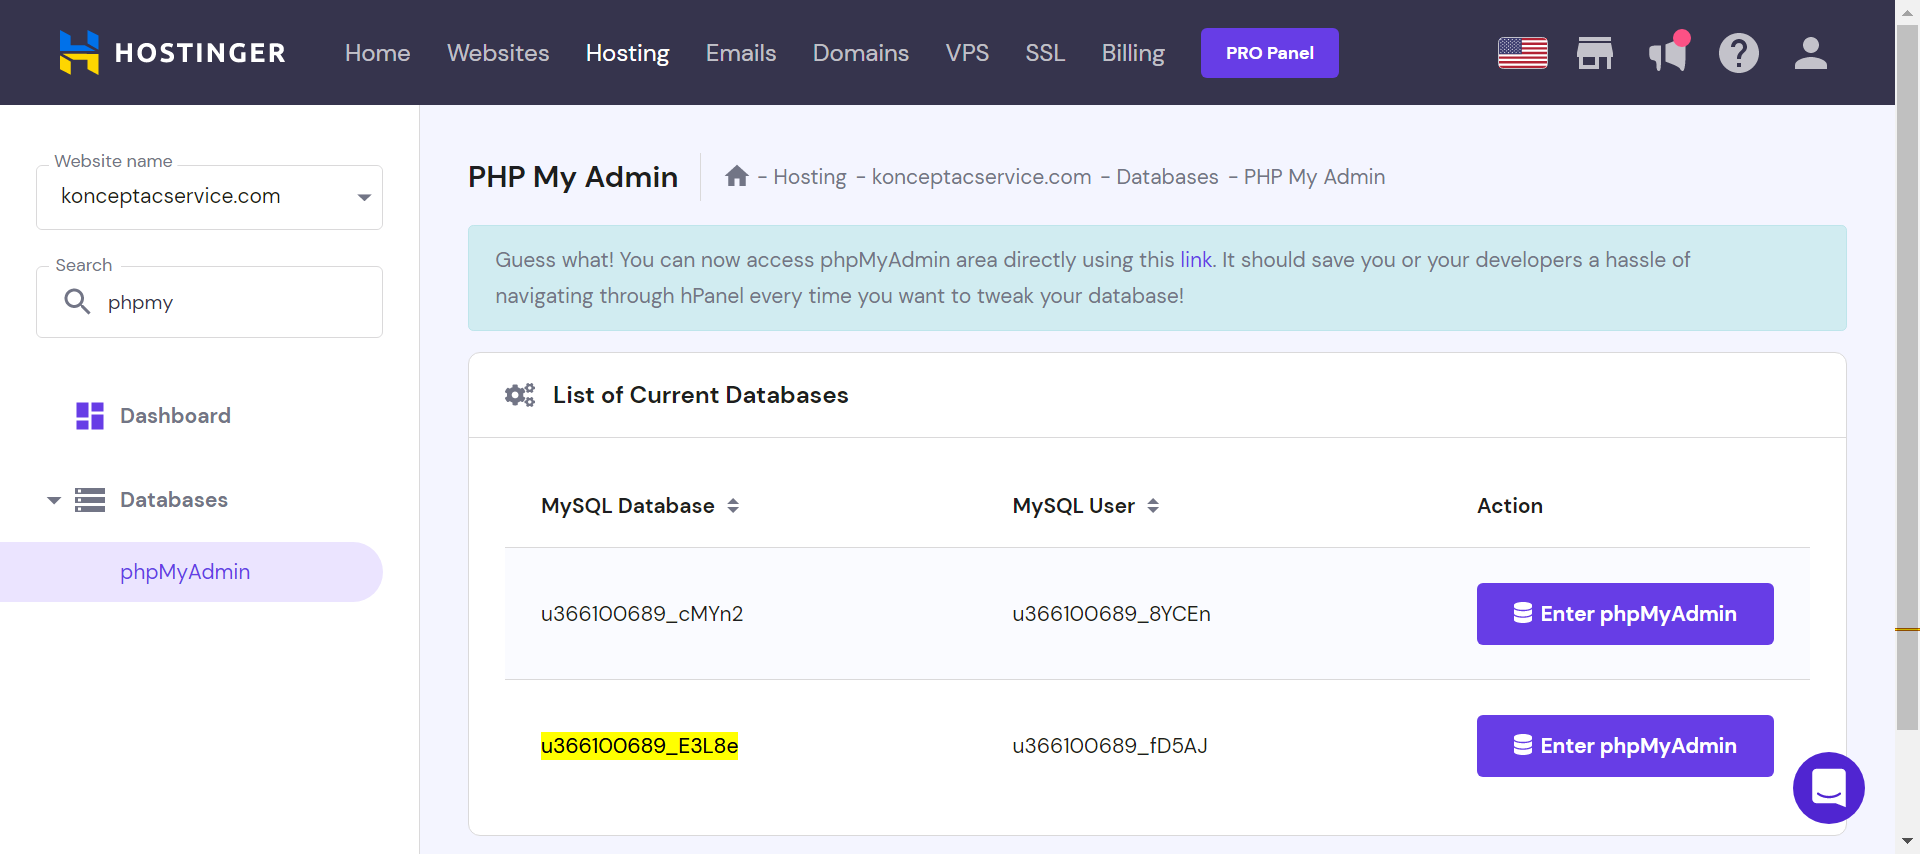
Now, Enter Phpmyadmin next to the database you searched for.
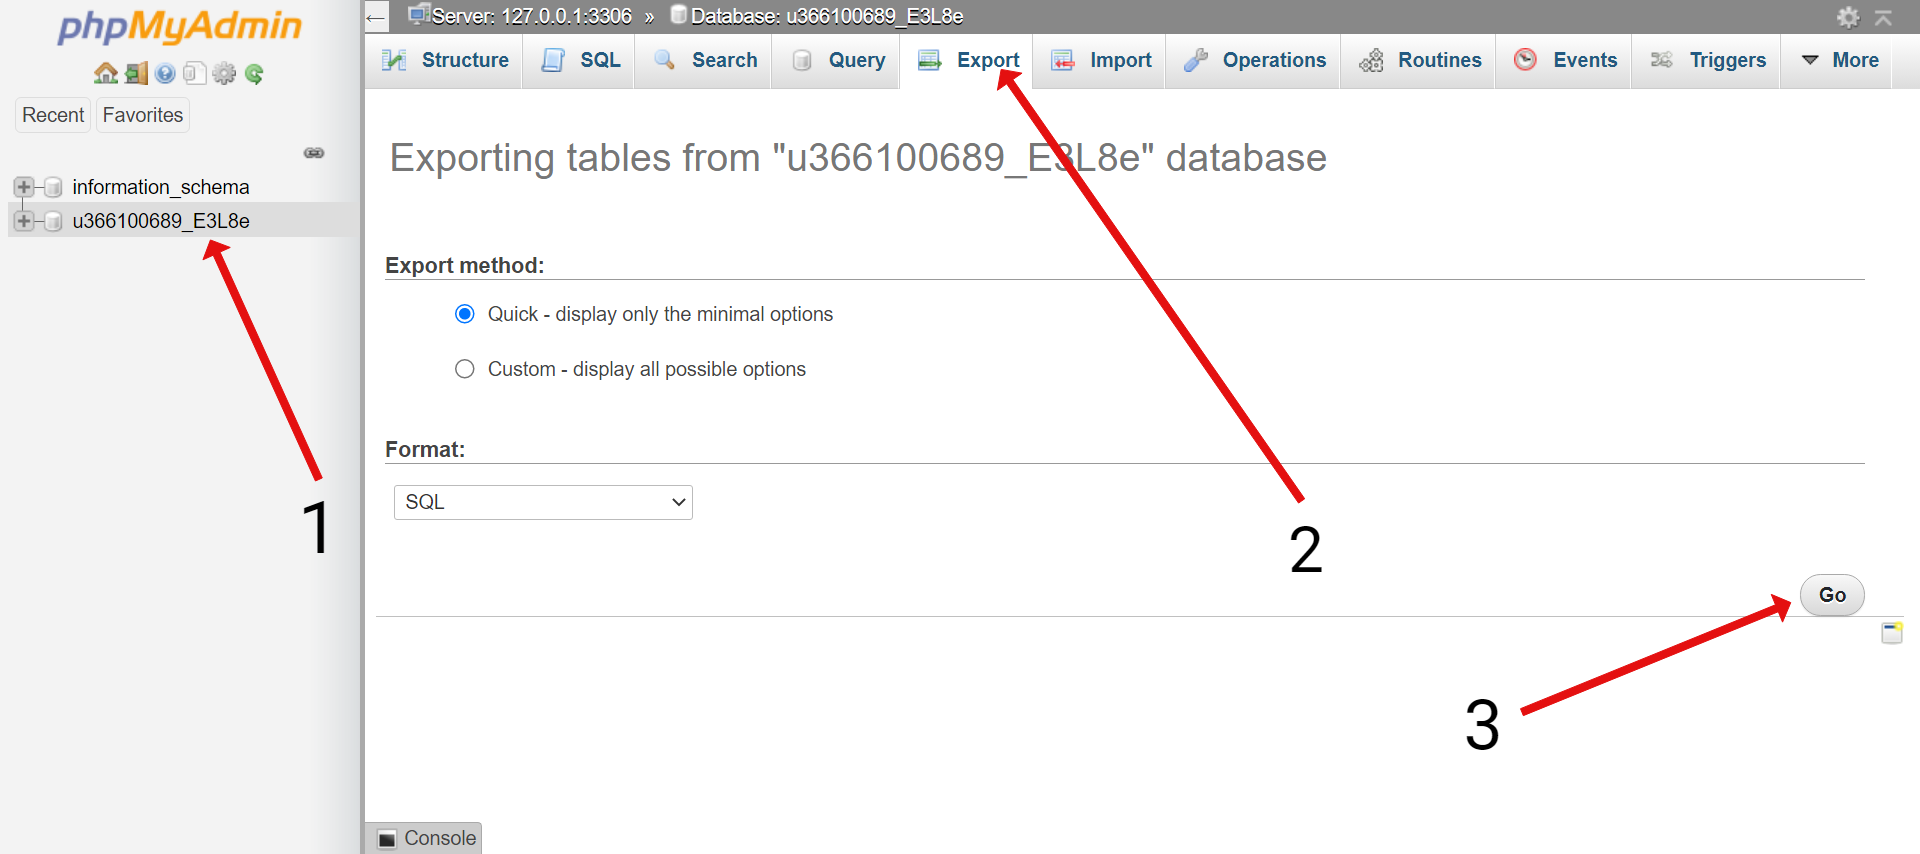
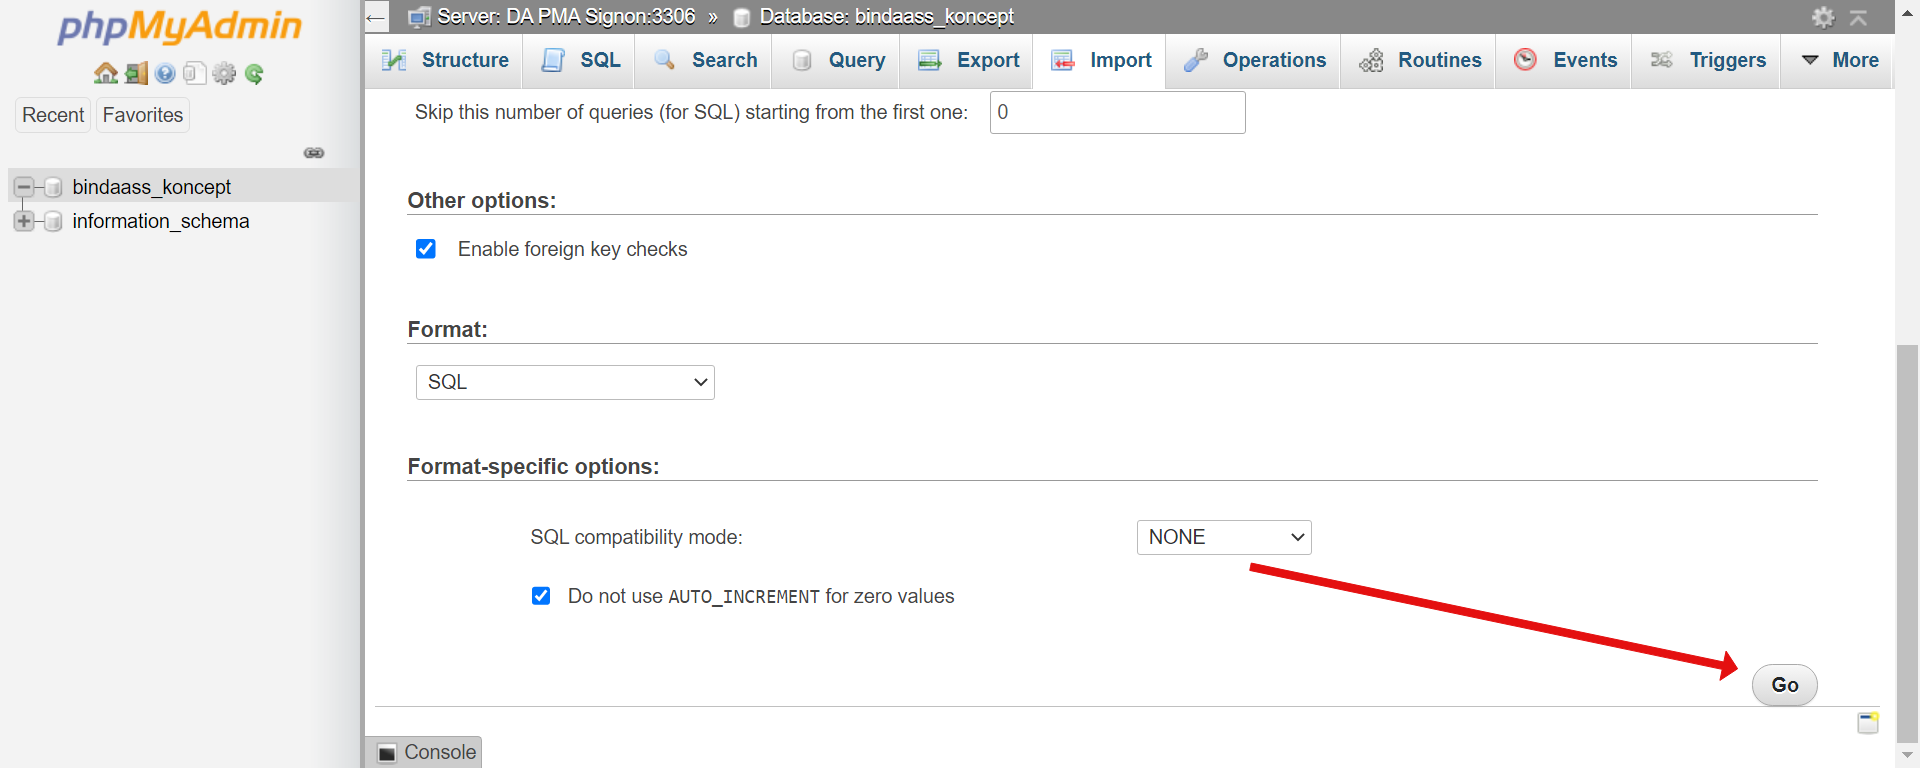
Now, click on the Database name in the phpmyadmin interface, then click on the export button, then click on Go.
This will download a SQL file which is the backup of the cutomer's Database.
Now, we have the backup of the files and database.
Step 5:) Now we have to upload the backup in the SiteCountry' control panel.
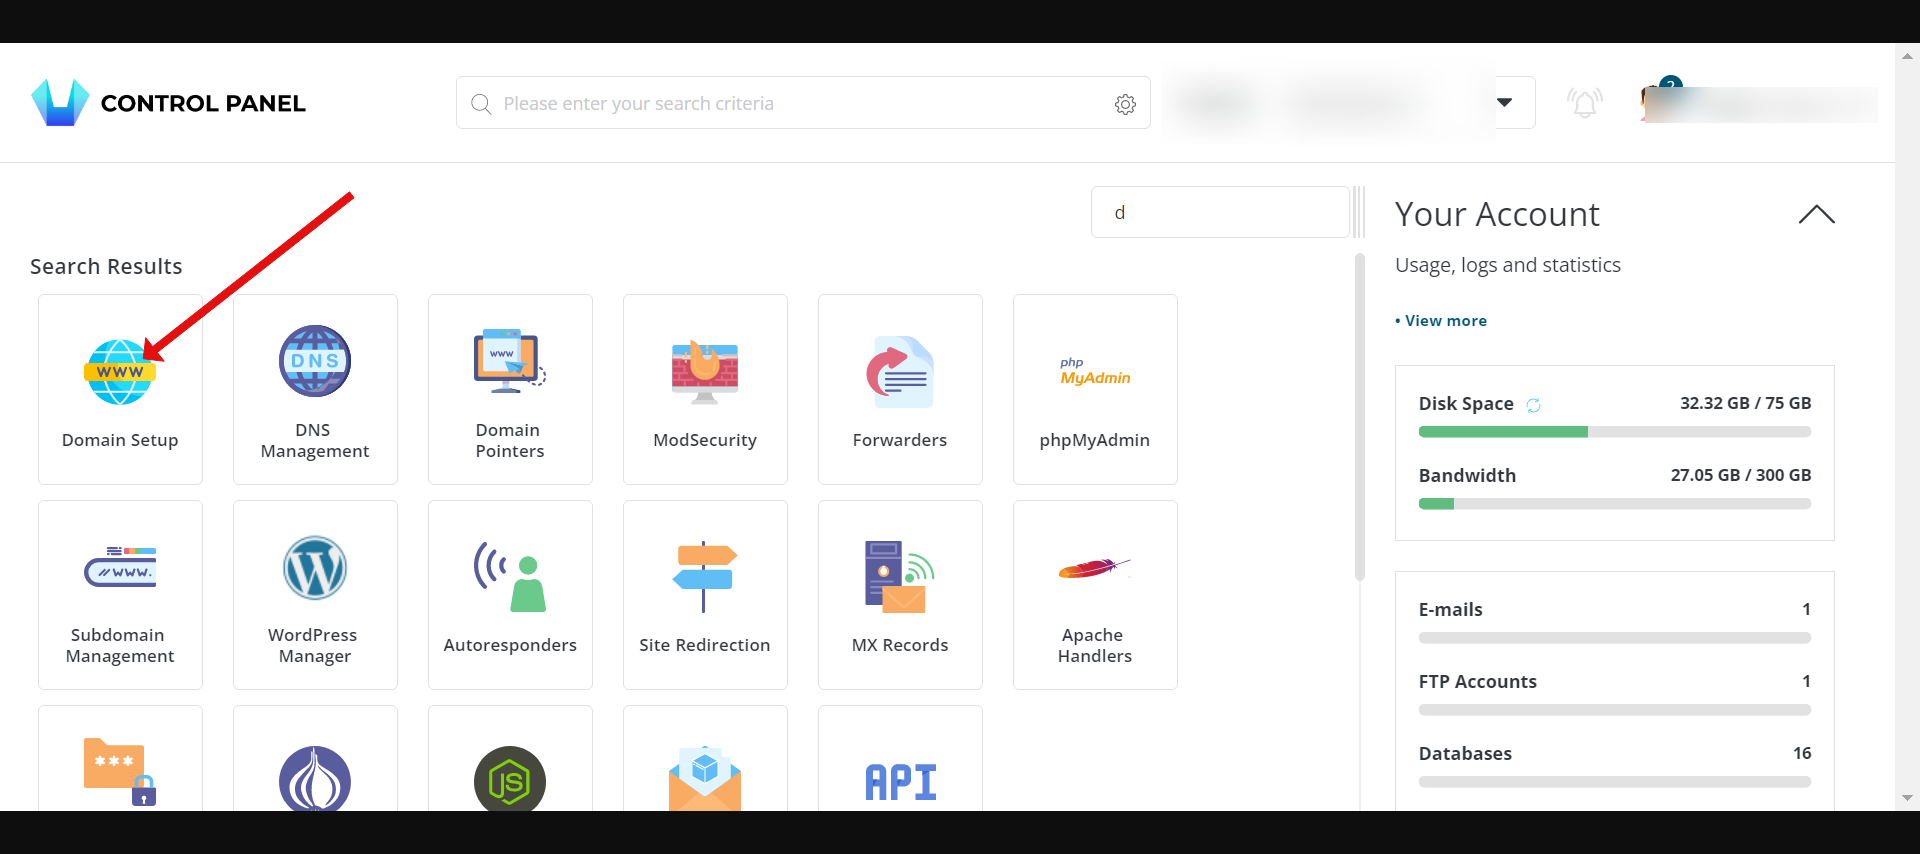
Access the Control Panel (Directadmin)
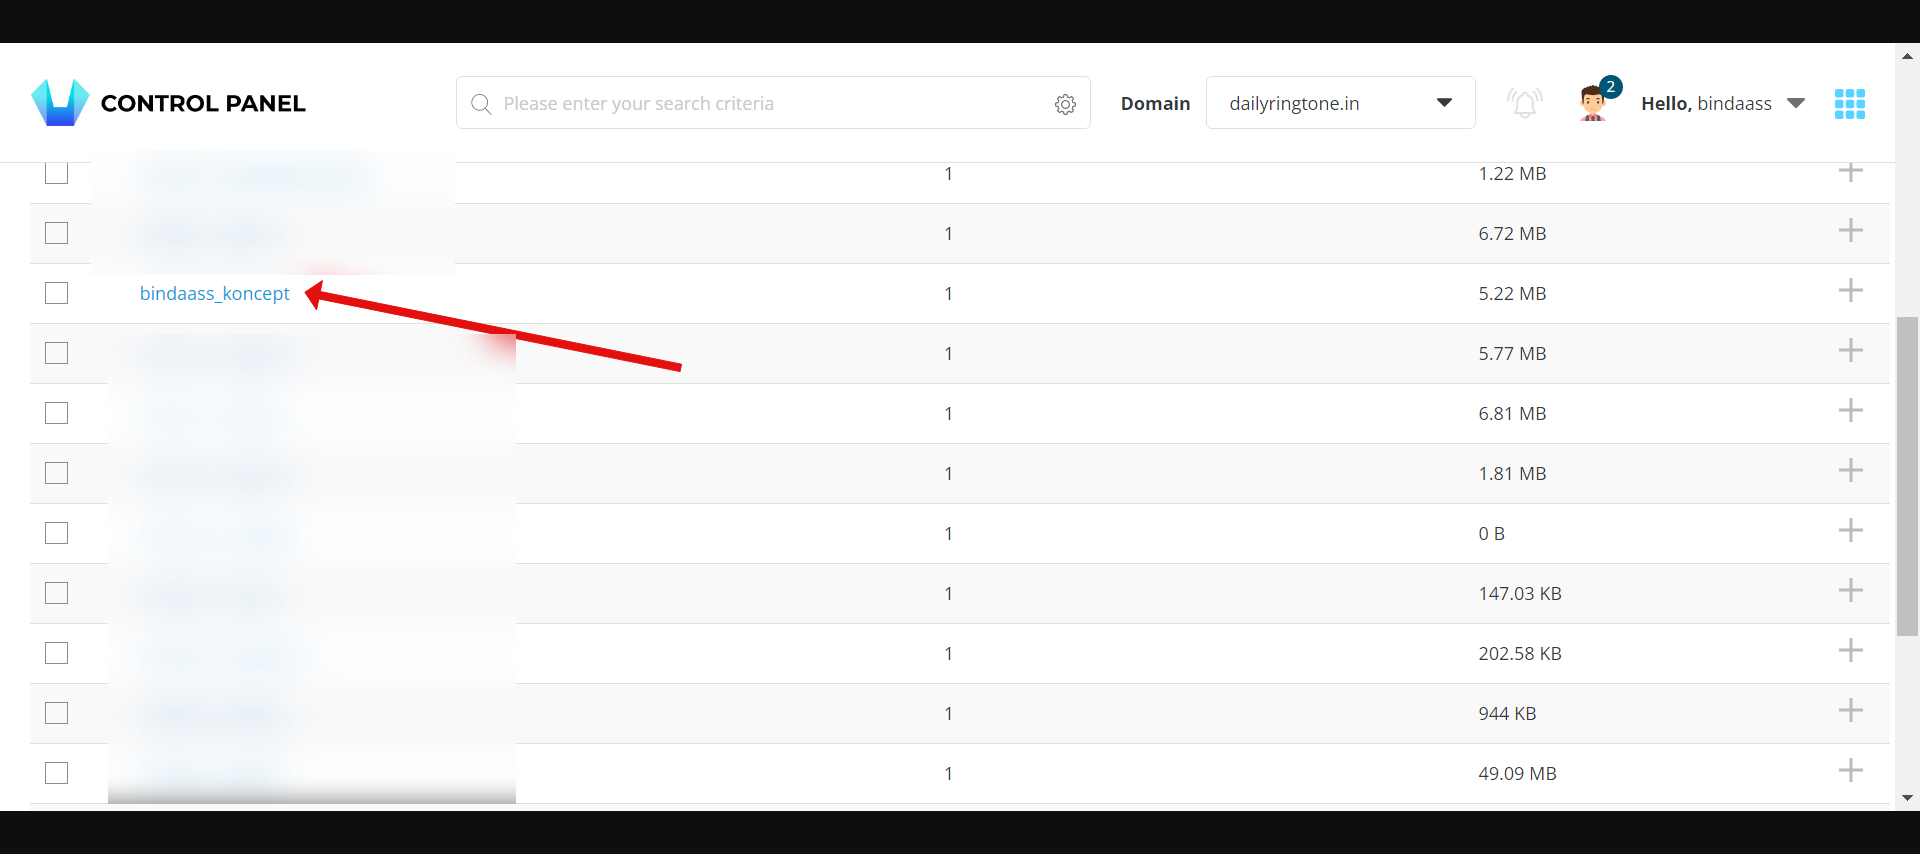
Look for the Domain setup option and Create the concerned domain over there :

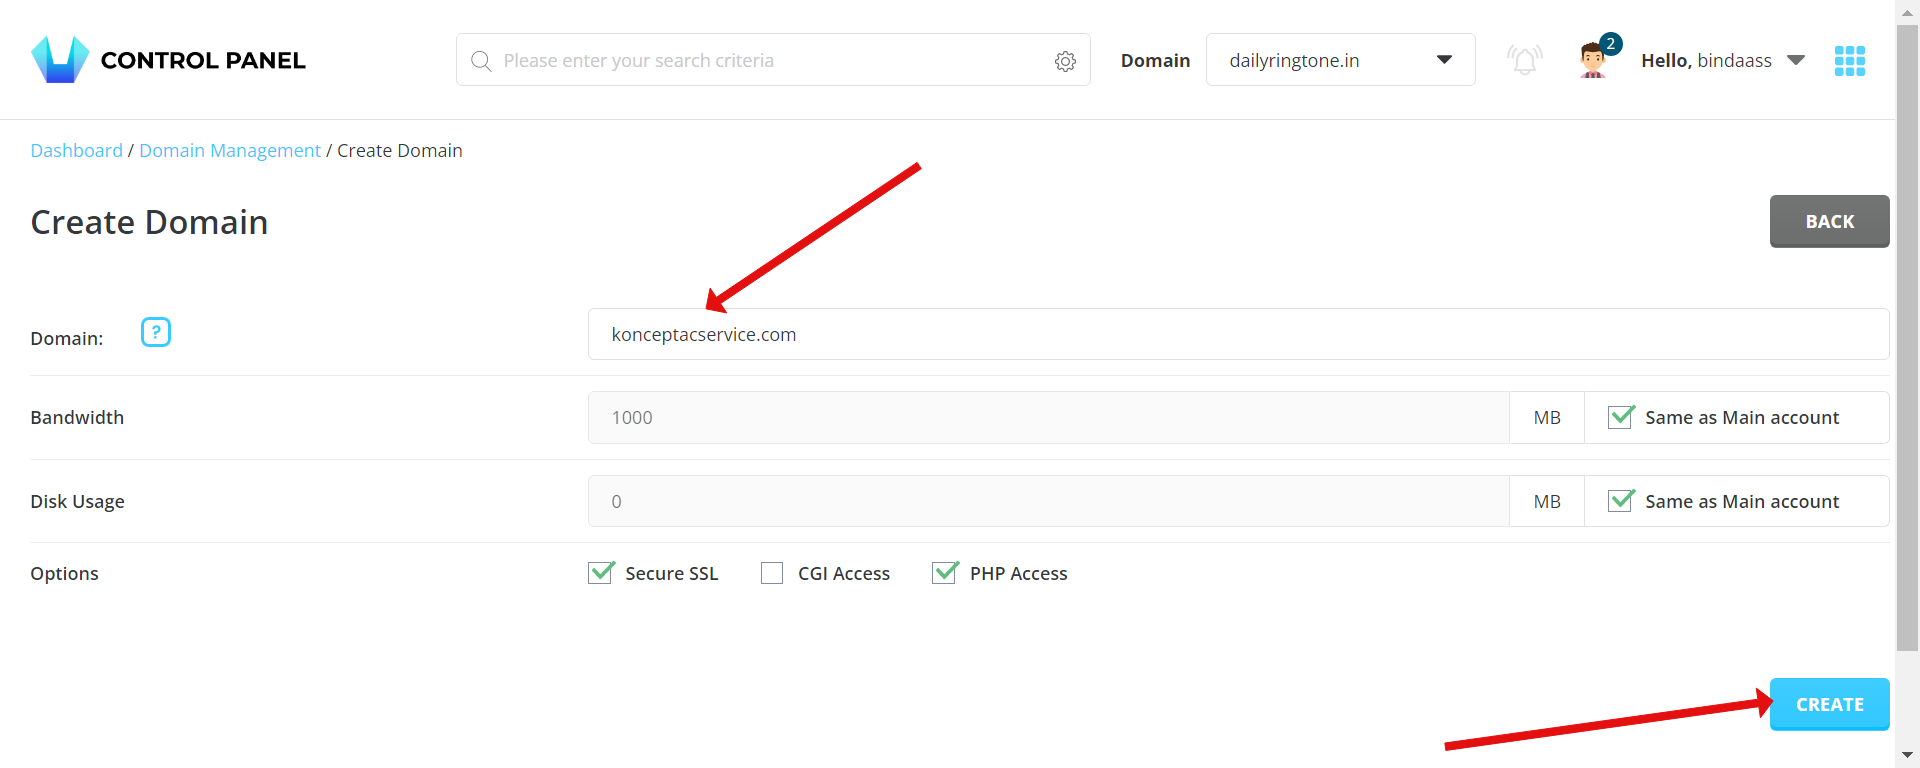
Tap on the create button and that should create the domain.
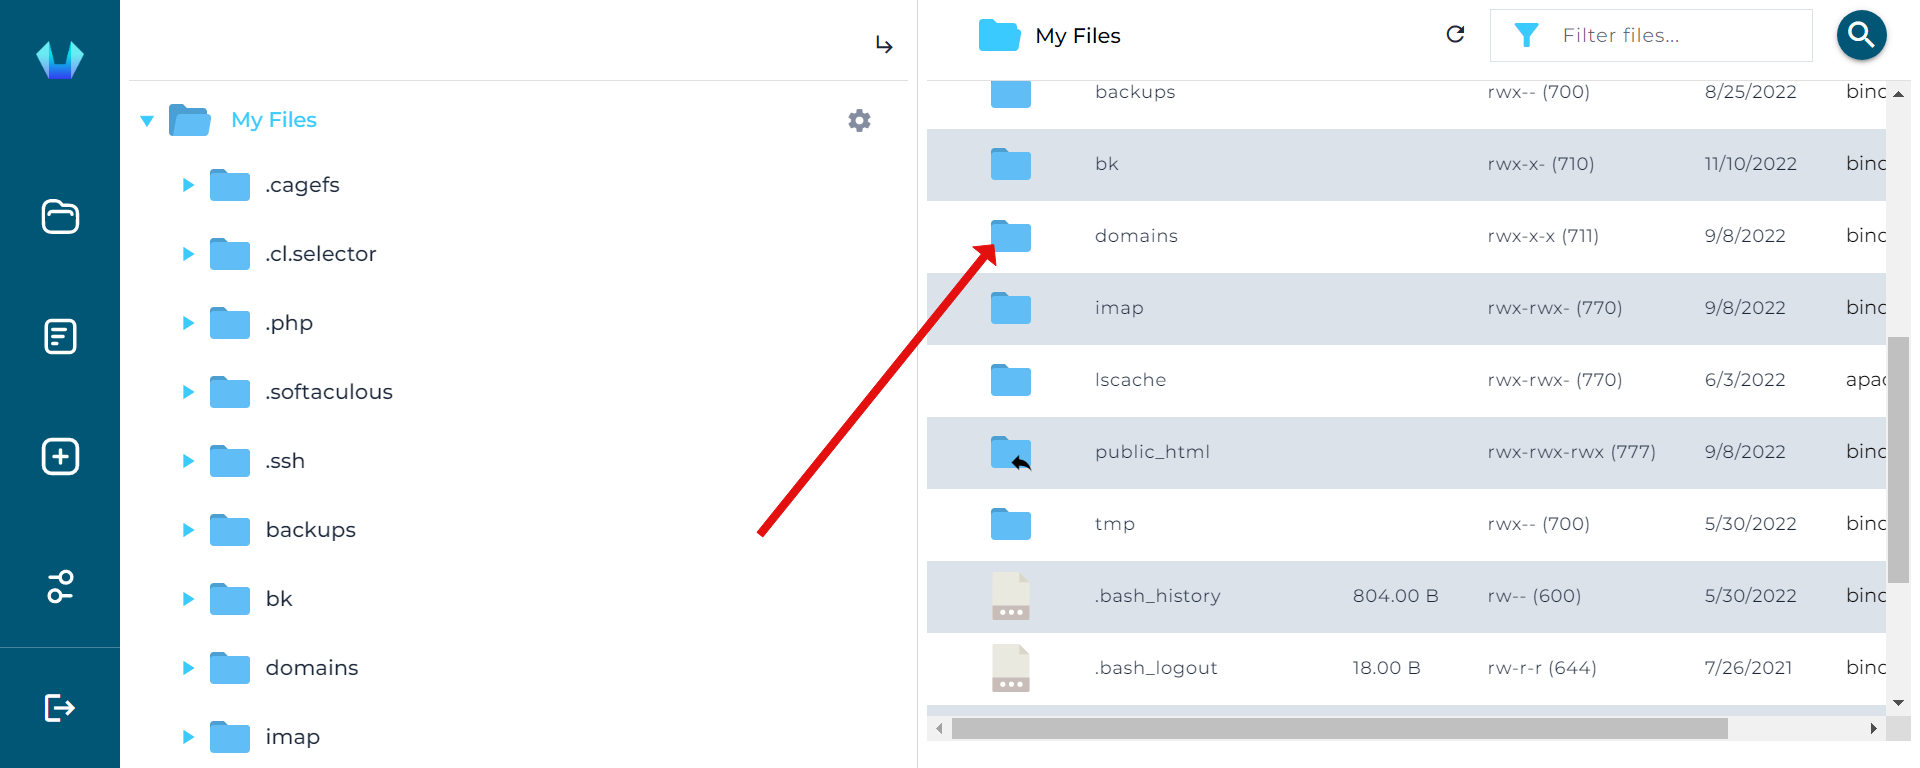
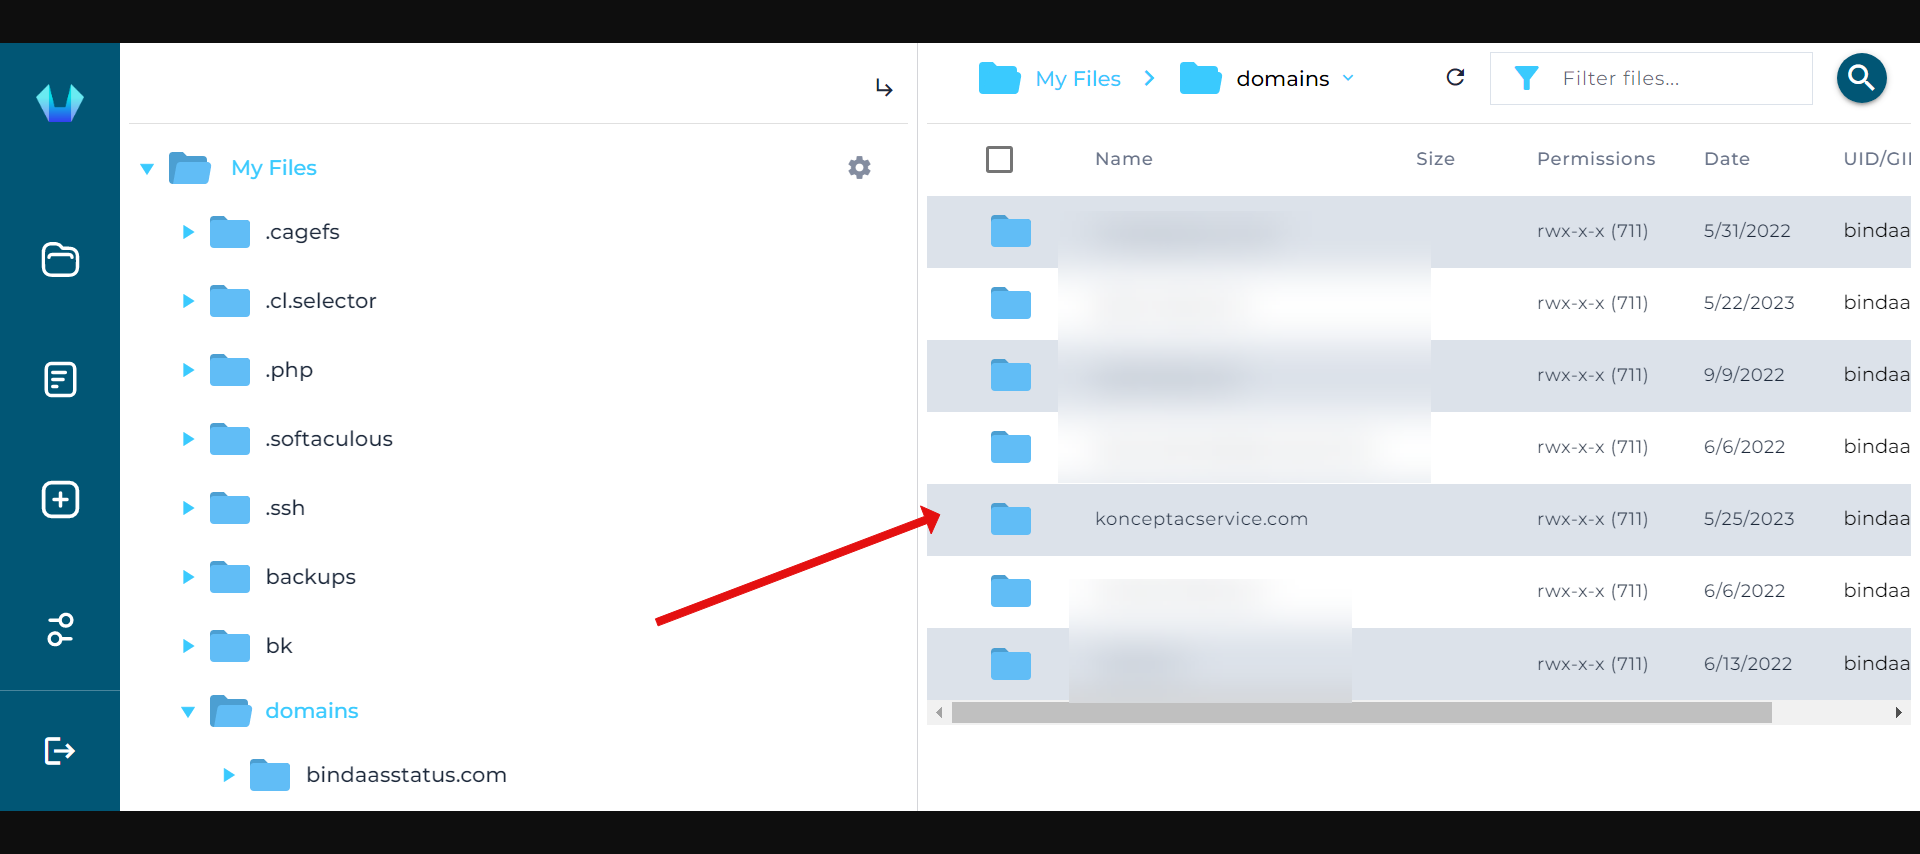
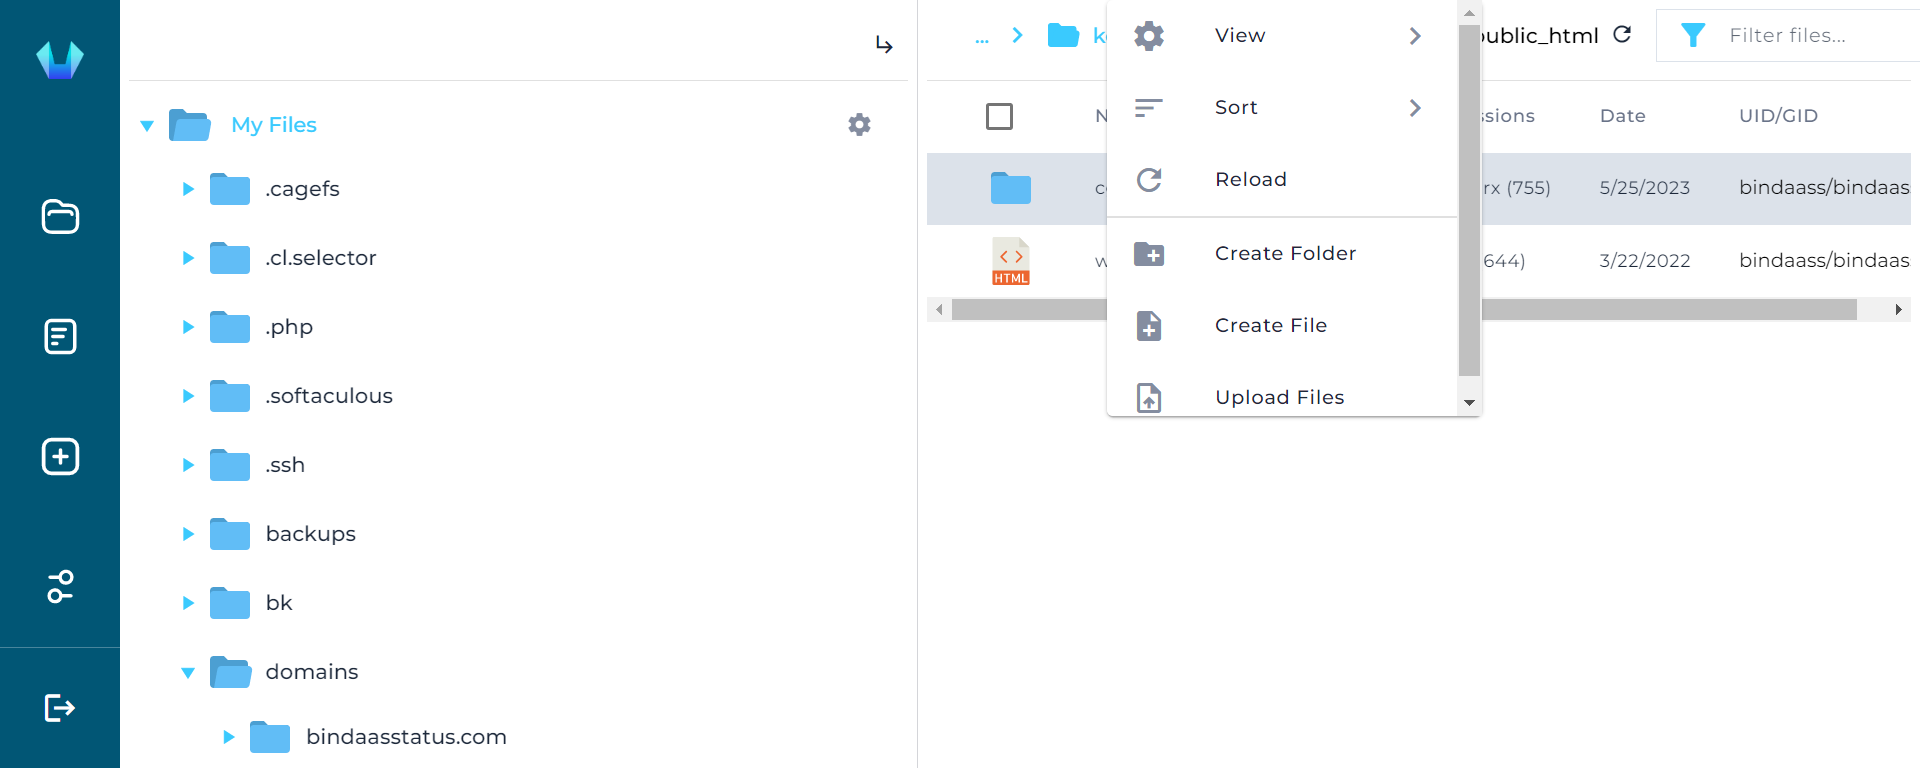
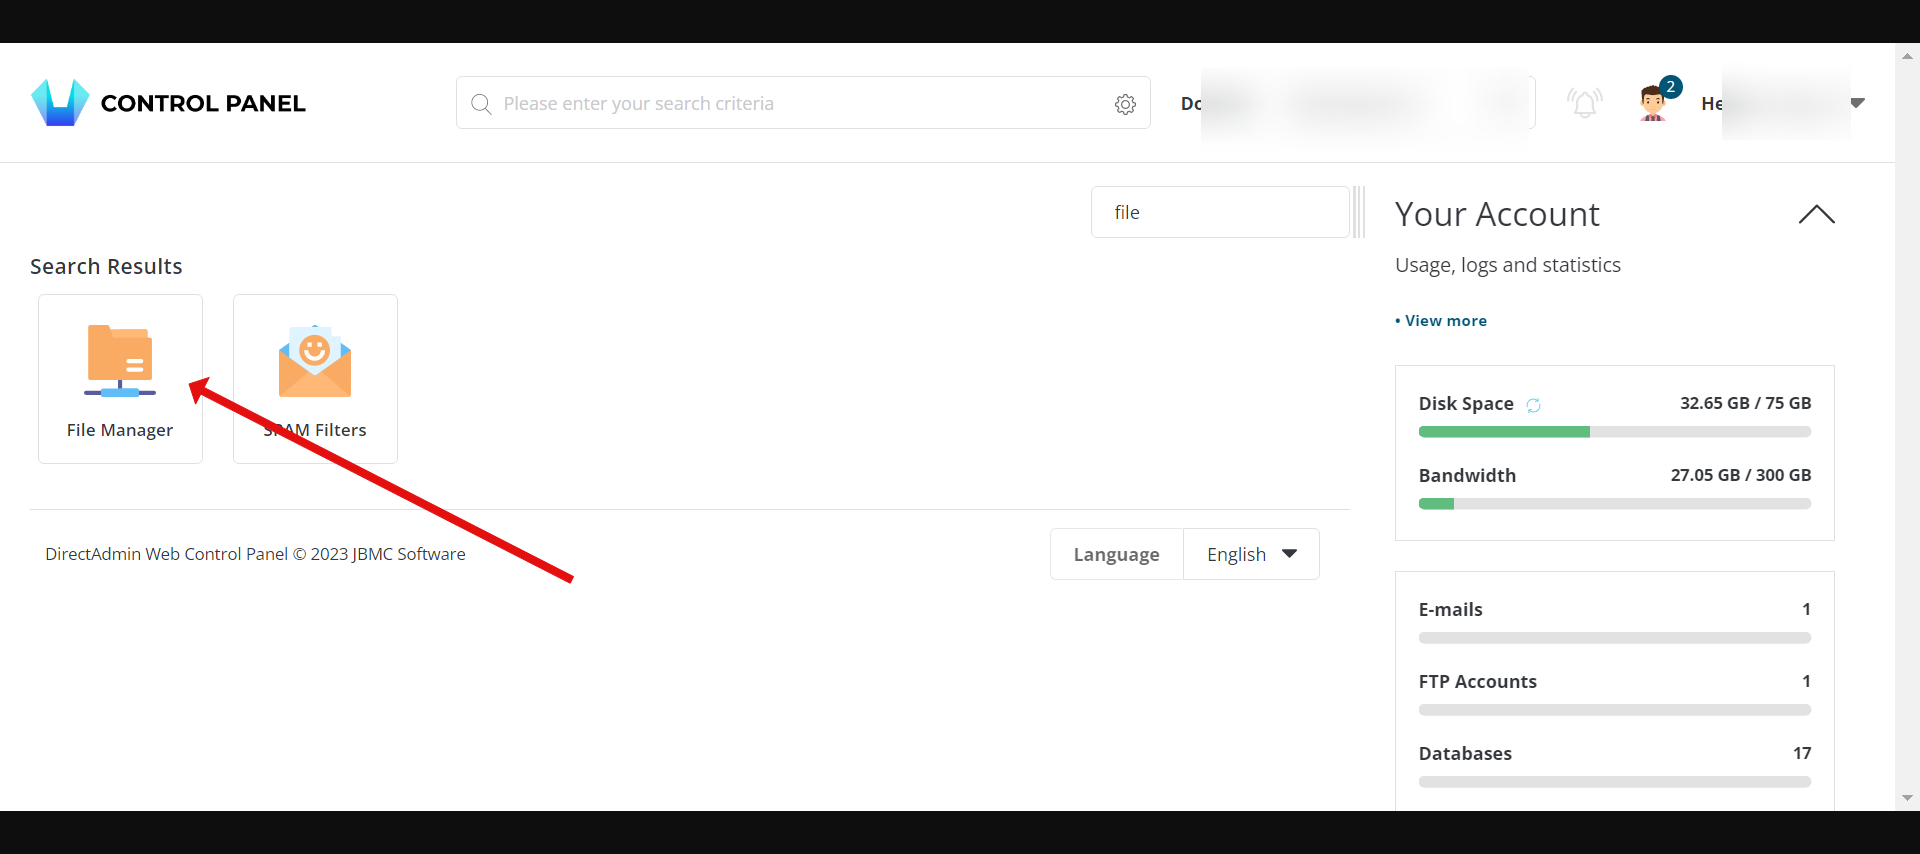
Step 6) Now go back to the control panel and search for " File Manager" by typing the file in the search bar. Open the file manager and go inside the
domains > your concerned domain> public_html.
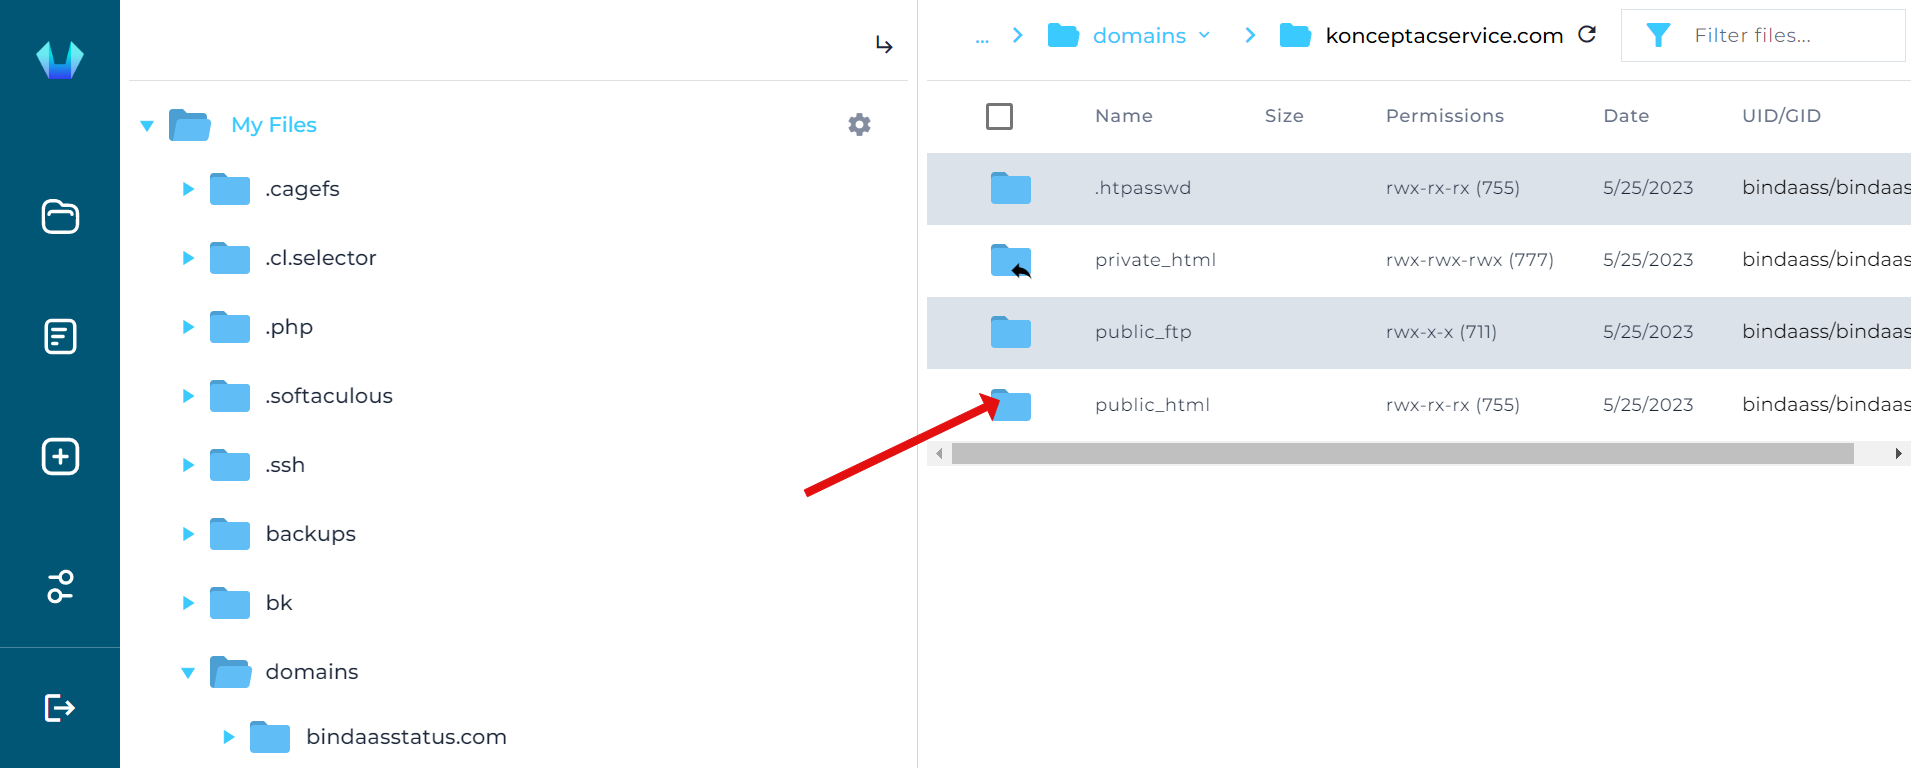

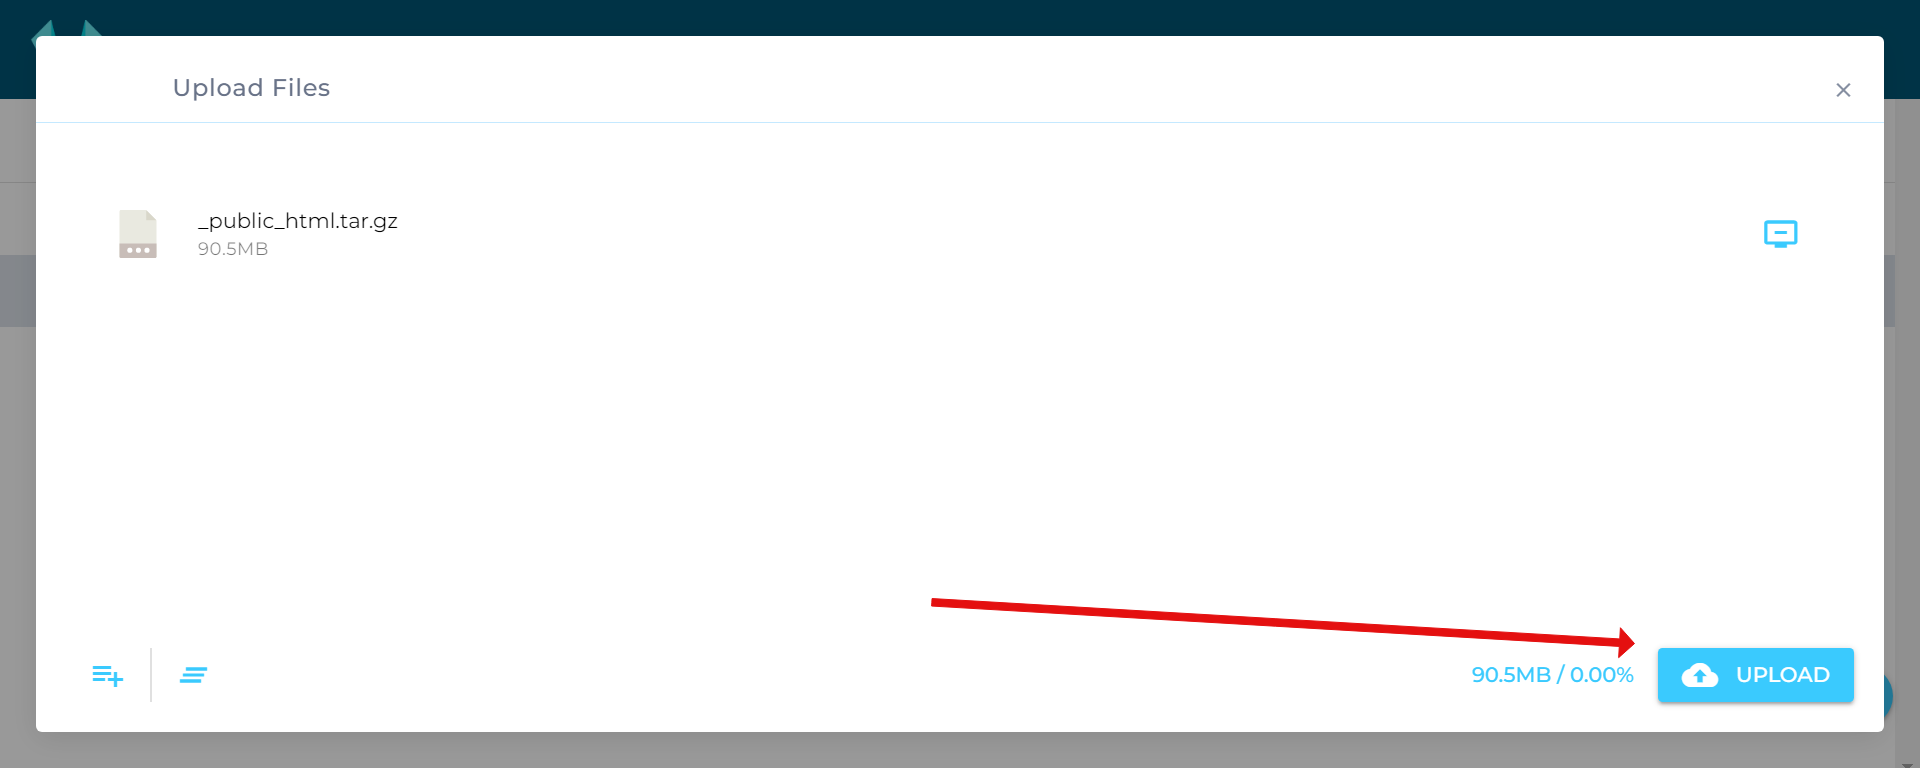
Now, once you have opened the public_html folder, right-click your mouse or touchpad and click on the upload button, and uploaded the file backup which you downloaded in the first step from the file browser.
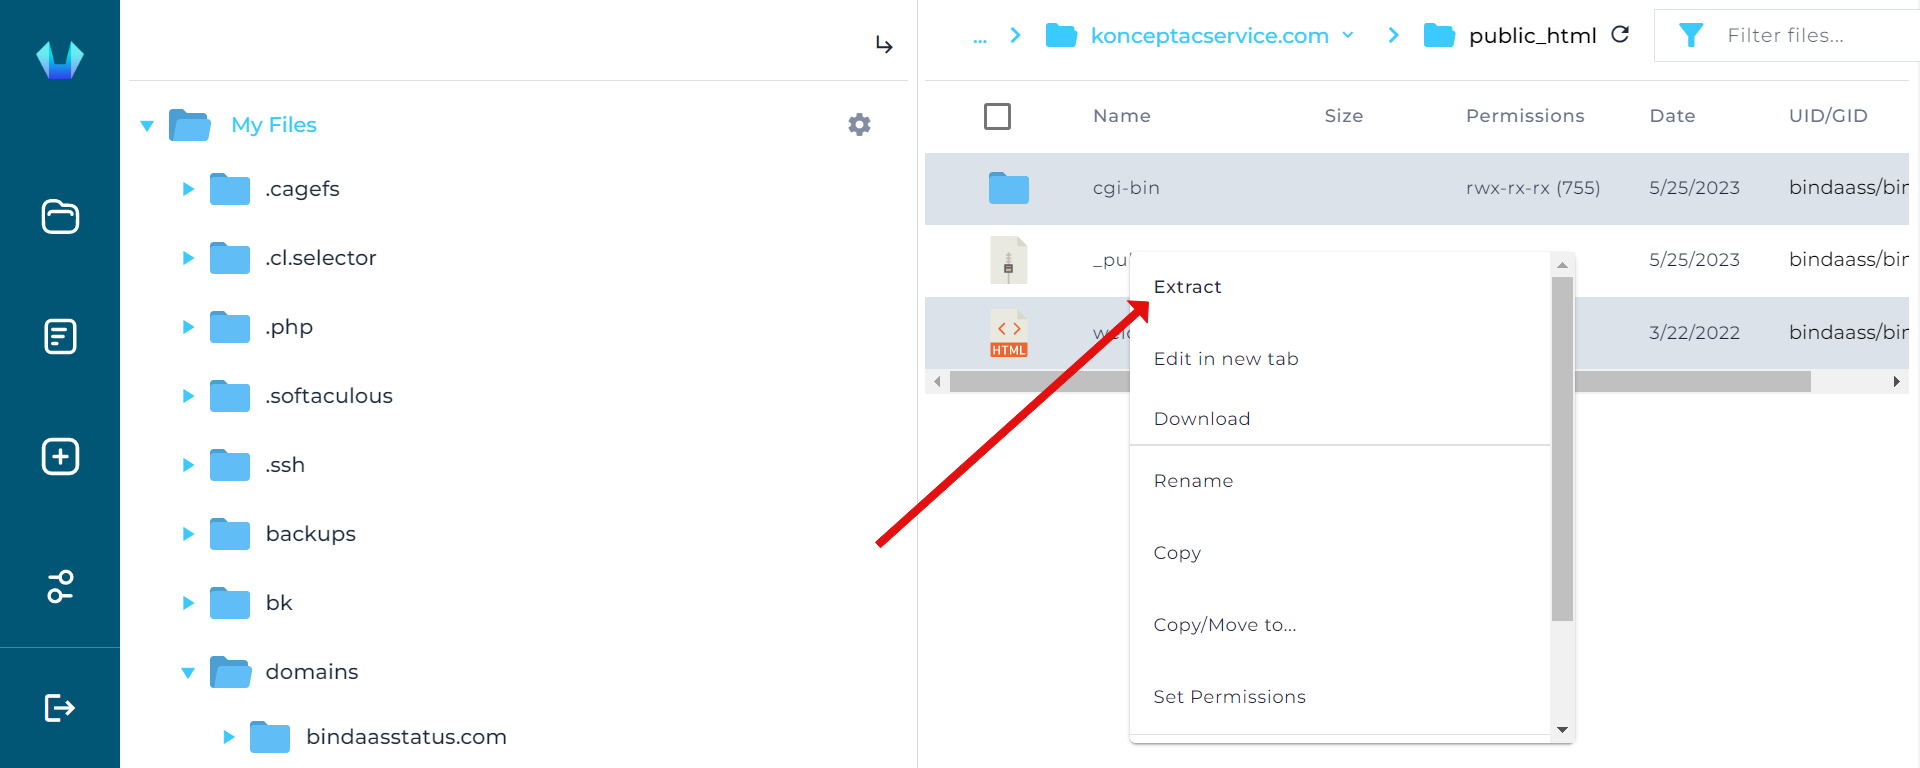
Once the file is uploaded, go ahead and extract the file as shown below :

Step 7: Now, Search for Mysql in the search bar in the control panel. Click on it once found.

Click on the Create database button > Create database.
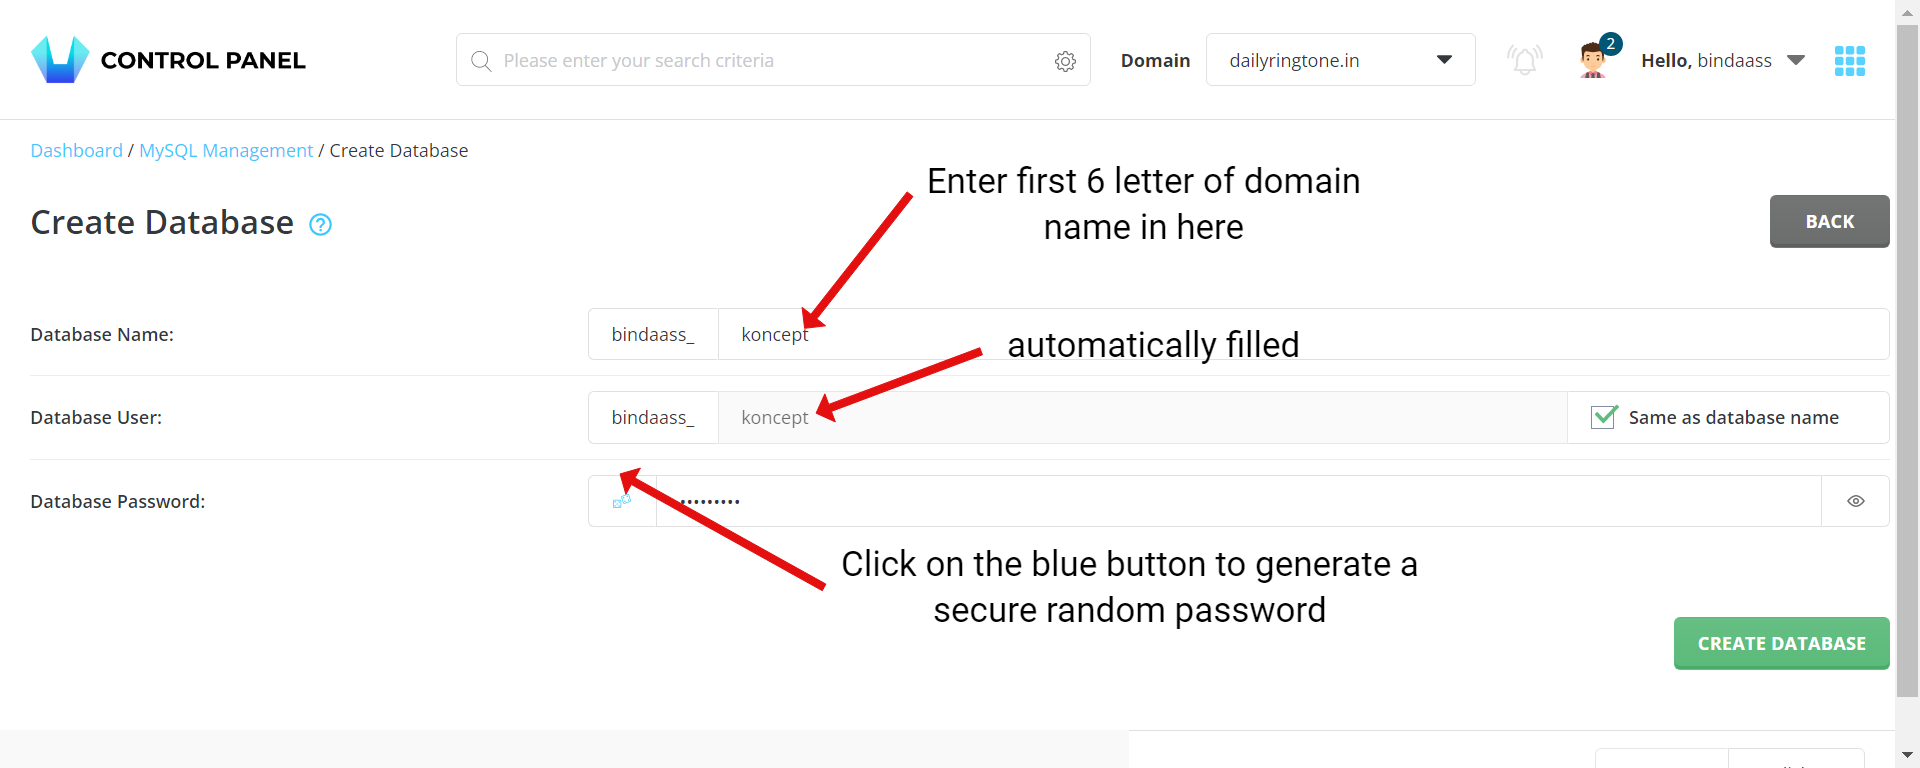
Finally, hit the green, create database button and it will show a success message like this.
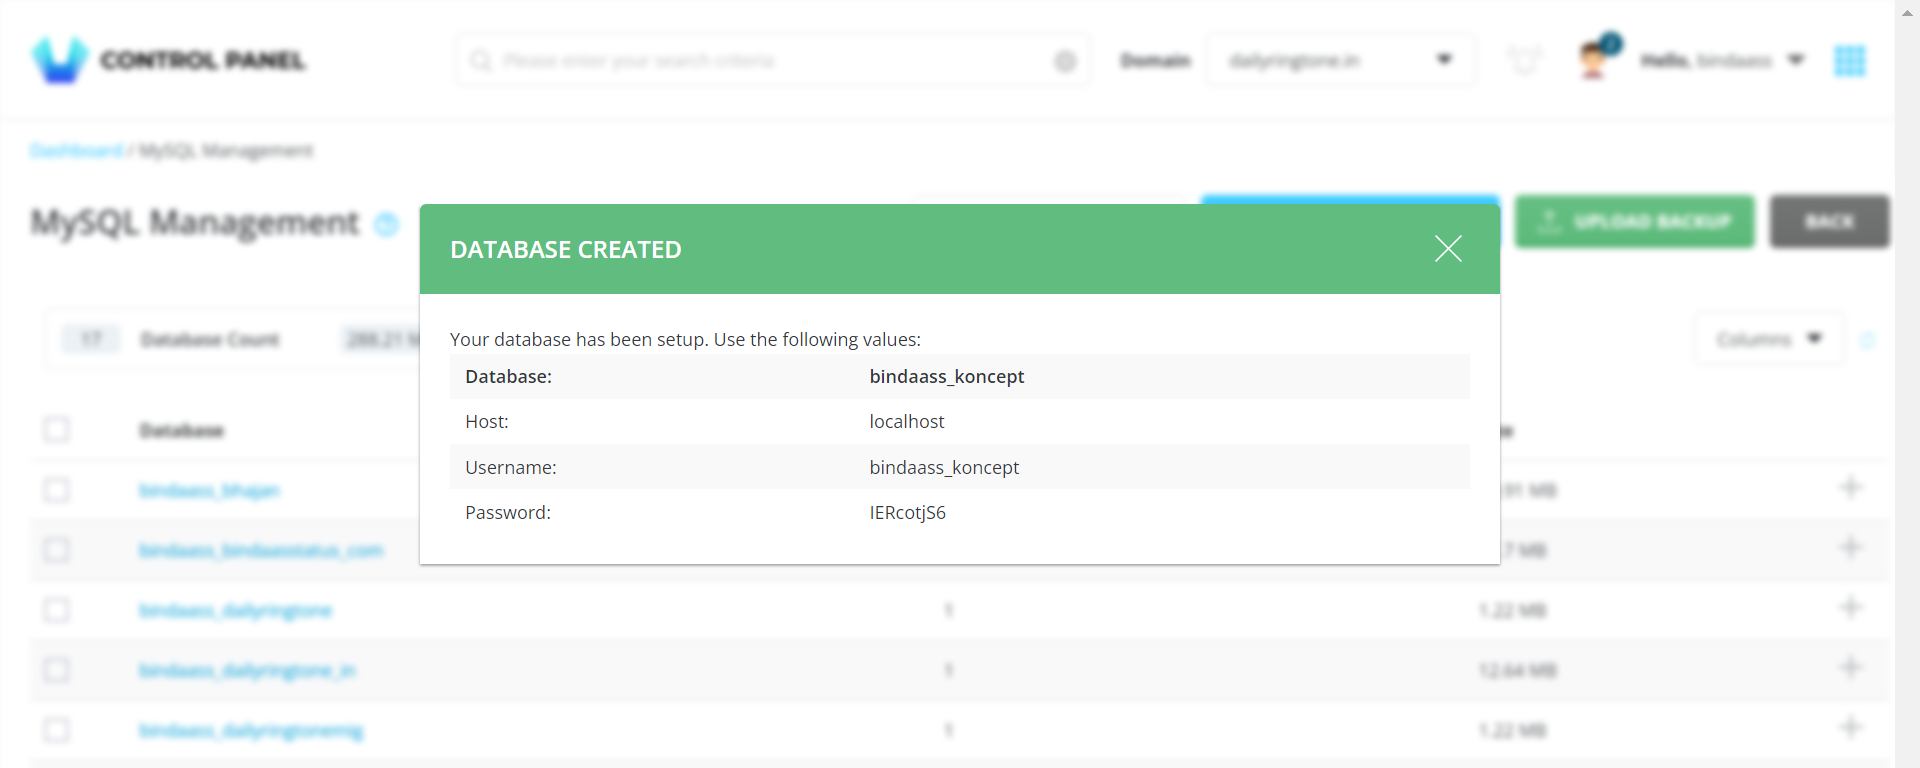
NOTE: Please copy the information shown in the above success message in Notepad temporarily for later use.
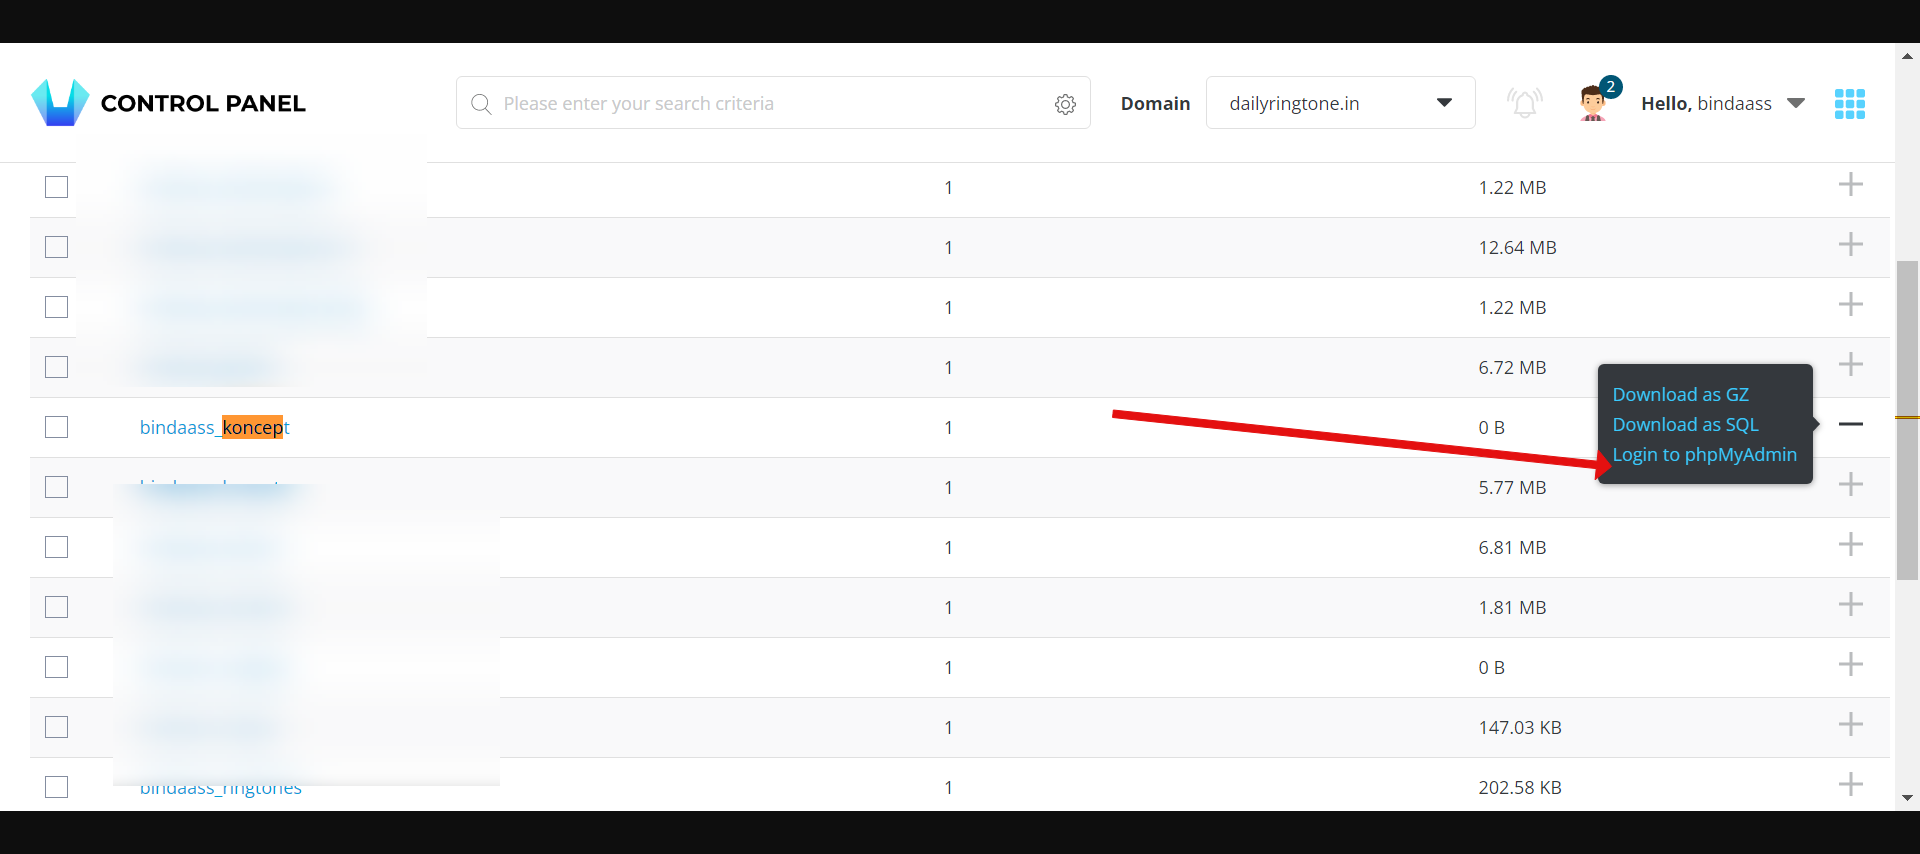
Step 8: After this, go back to the control panel, again search for MySQL, open the interface, and click on the + button next to the database you created.
This will show you three options, out of which you have to click on the Third option which allows you to Login to phpmyadmin.
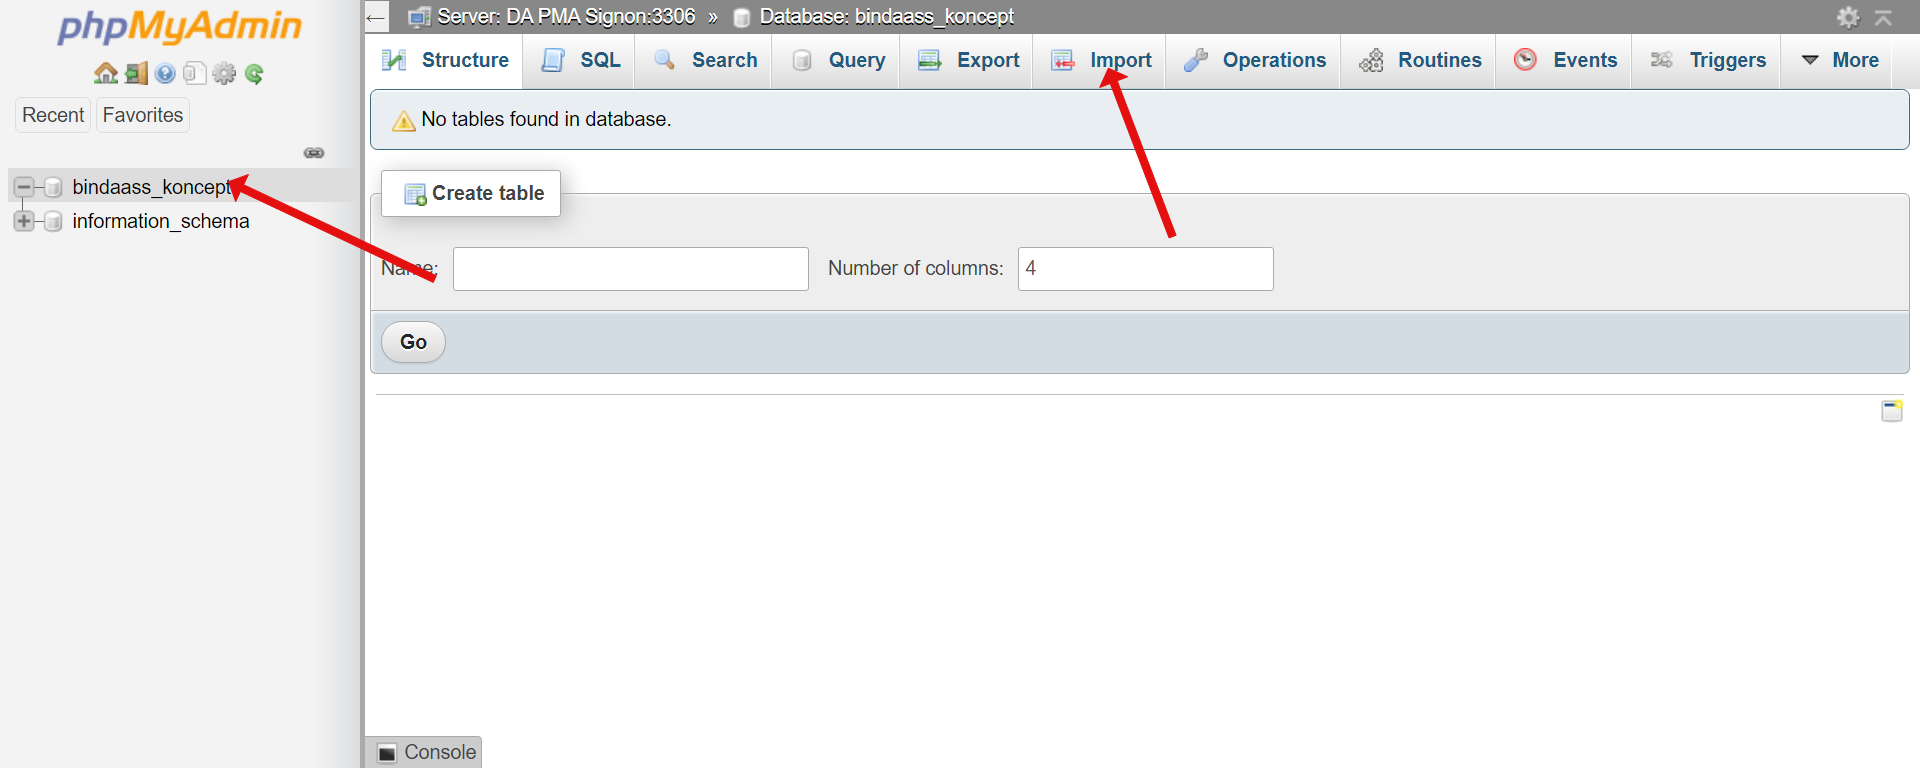
This will open Phpmyadmin interface, click on the database and then click on import :
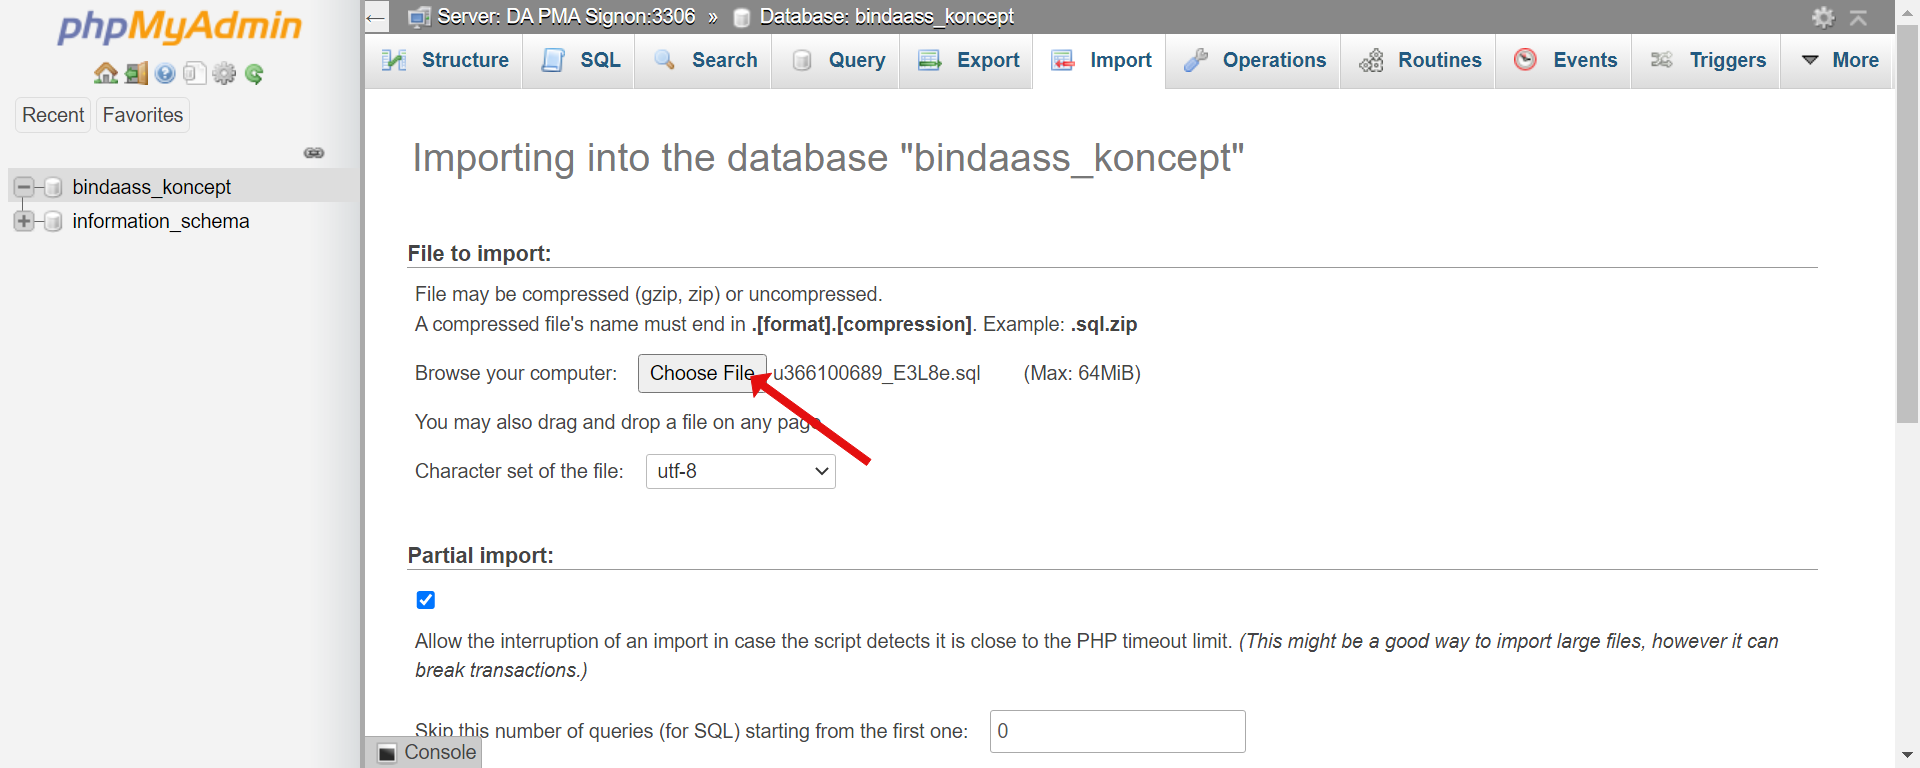
Here upload the SQL file which you downloaded from the hostinger's phpmyadmin and then click on go button available at the bottom.
After the Database restore is done, you will see a message like this :

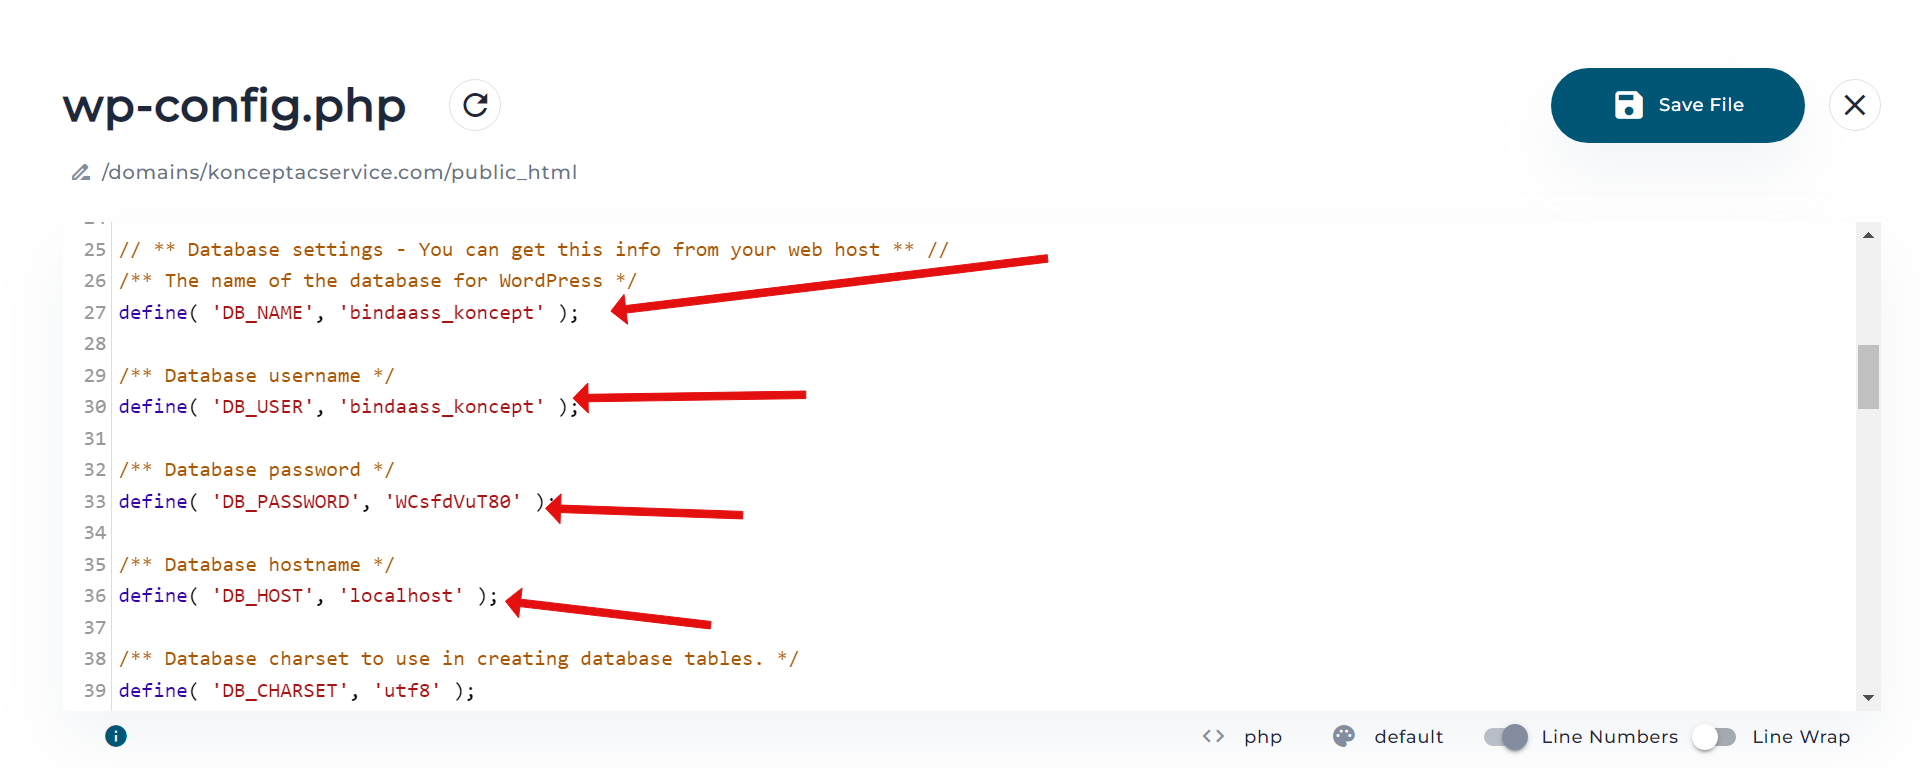
After this go back to the filemanger again, and go to domains> your domain> public_html and open the wp-config.php file by double clicking on it.
In the file, you should see the text like this :
In these, you have to replace 4 values, all of which were shown to you in the last step, where we asked you to save the login details safely.
However, if in case, you have forgotten the same or lost the details, then to get them back again : ( Skip this and move to step 9)
Search for MySQL in the control panel, look for the database you created, then click on it as it appears in blue. Click on change password, and click on the blue button before the password entry box. Hit Save and it will show you the information again.
Fill the values correctly and then save your file.
After Saving, it should be done.
Your site should be migrated now.