
How to Restore WordPress Core through Control Panel
In this tutorial, we are going to cover the step-by-step process of restoring the WordPress core for a WordPress website.
The WordPress core might get corrupted due to various reasons, primarily due to malware infection, conflicting themes or plugins, etc.
Restoring WordPress core helps in solving a majority of WordPress Critical errors.
Let's see how you can restore the WordPress core on your WordPress website hosted at SiteCountry through the control panel.
We see that this current website just displays a white/blank page as shown in the below screenshot :
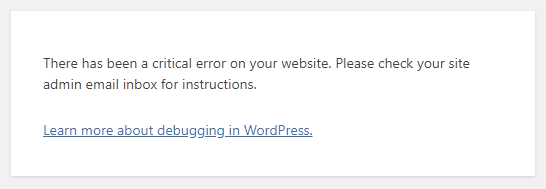
A blank page showing on the website when trying to access it.
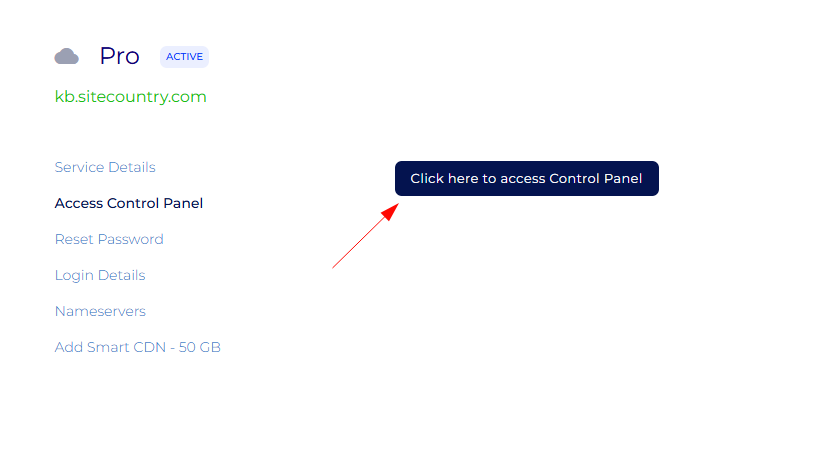
Step 1: Log in to your Hosting Control Panel.
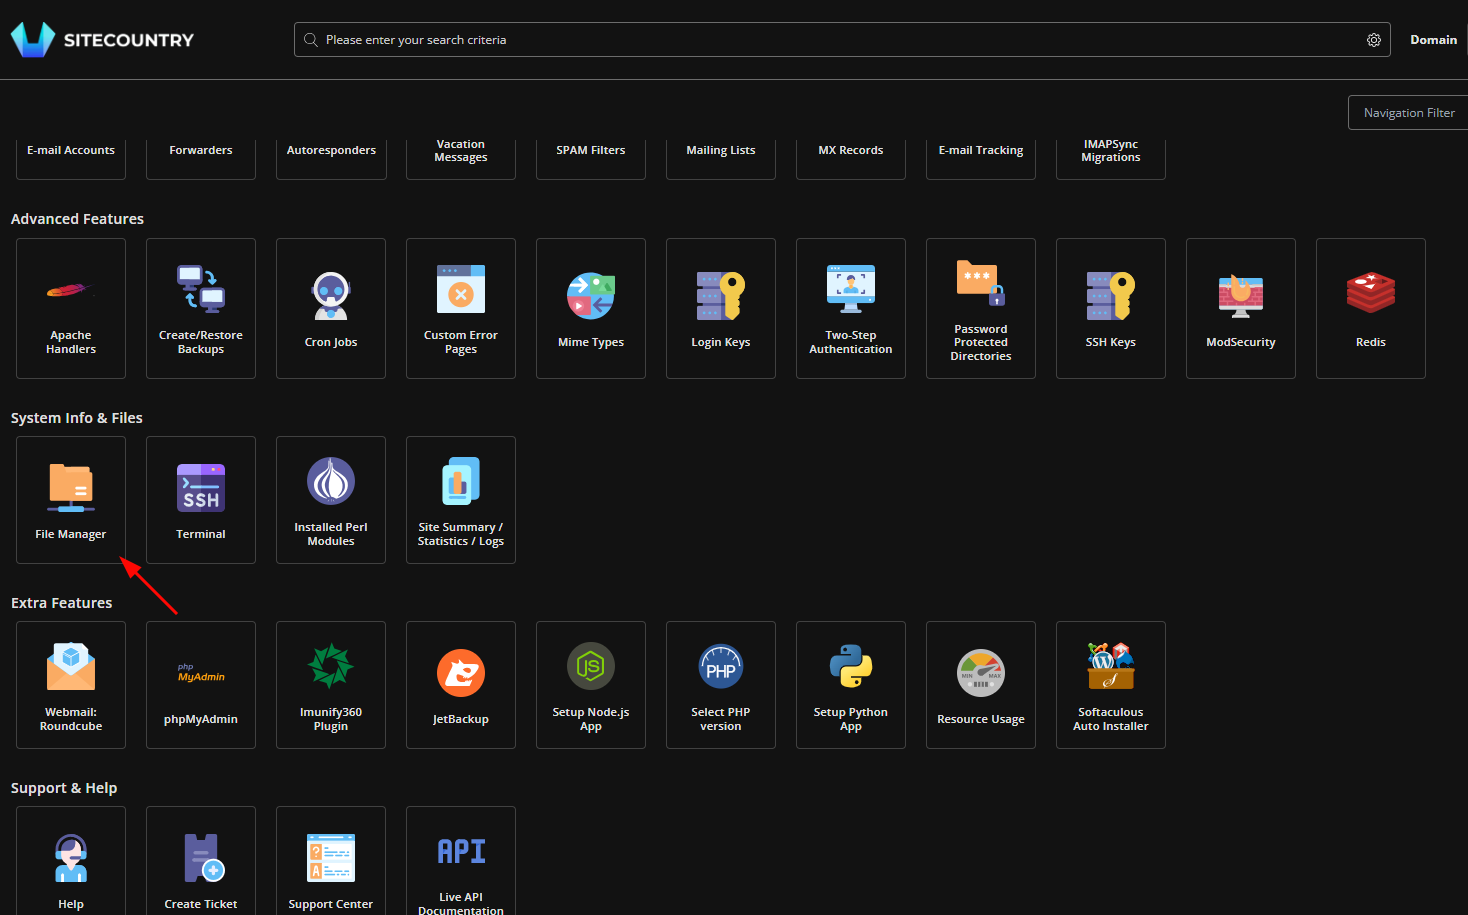
Step 2 : Once logged in, go to the file manager as shown below :
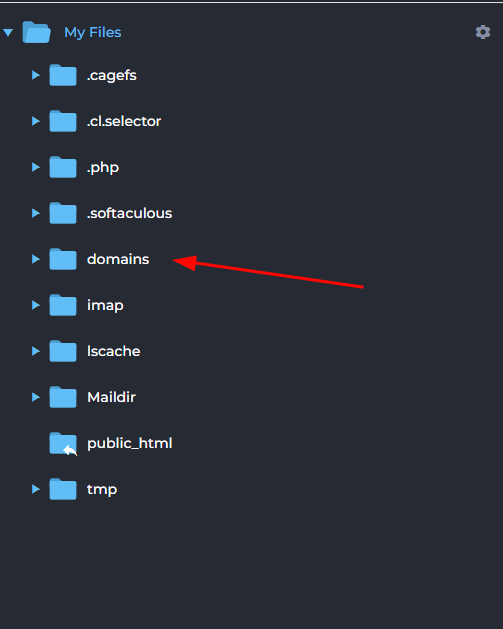
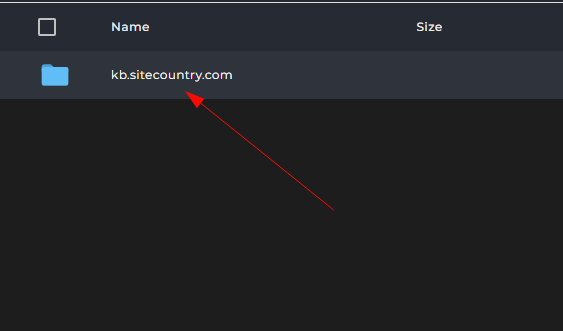
Step 3 : Now, go inside the domains folder as shown below
Inside the domains folder, go to domains> select the domain name where you are facing the issue by double-clicking on it to open the next folder.
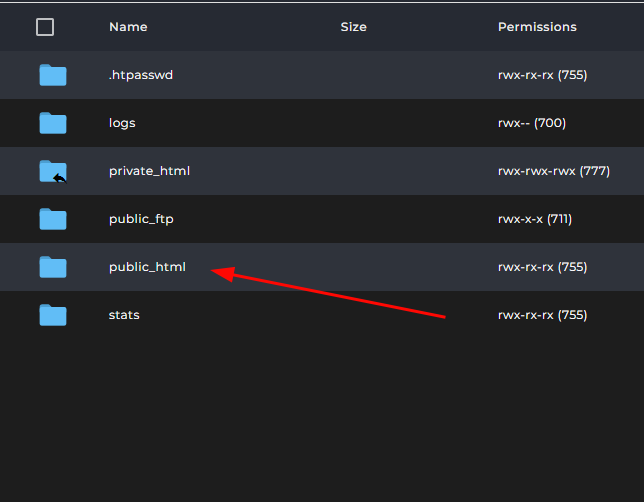
Now go inside the public_html folder of this particular domain.
Step 4: Now, download the WordPress core files from here: LINK
Click on the download button as shown below :
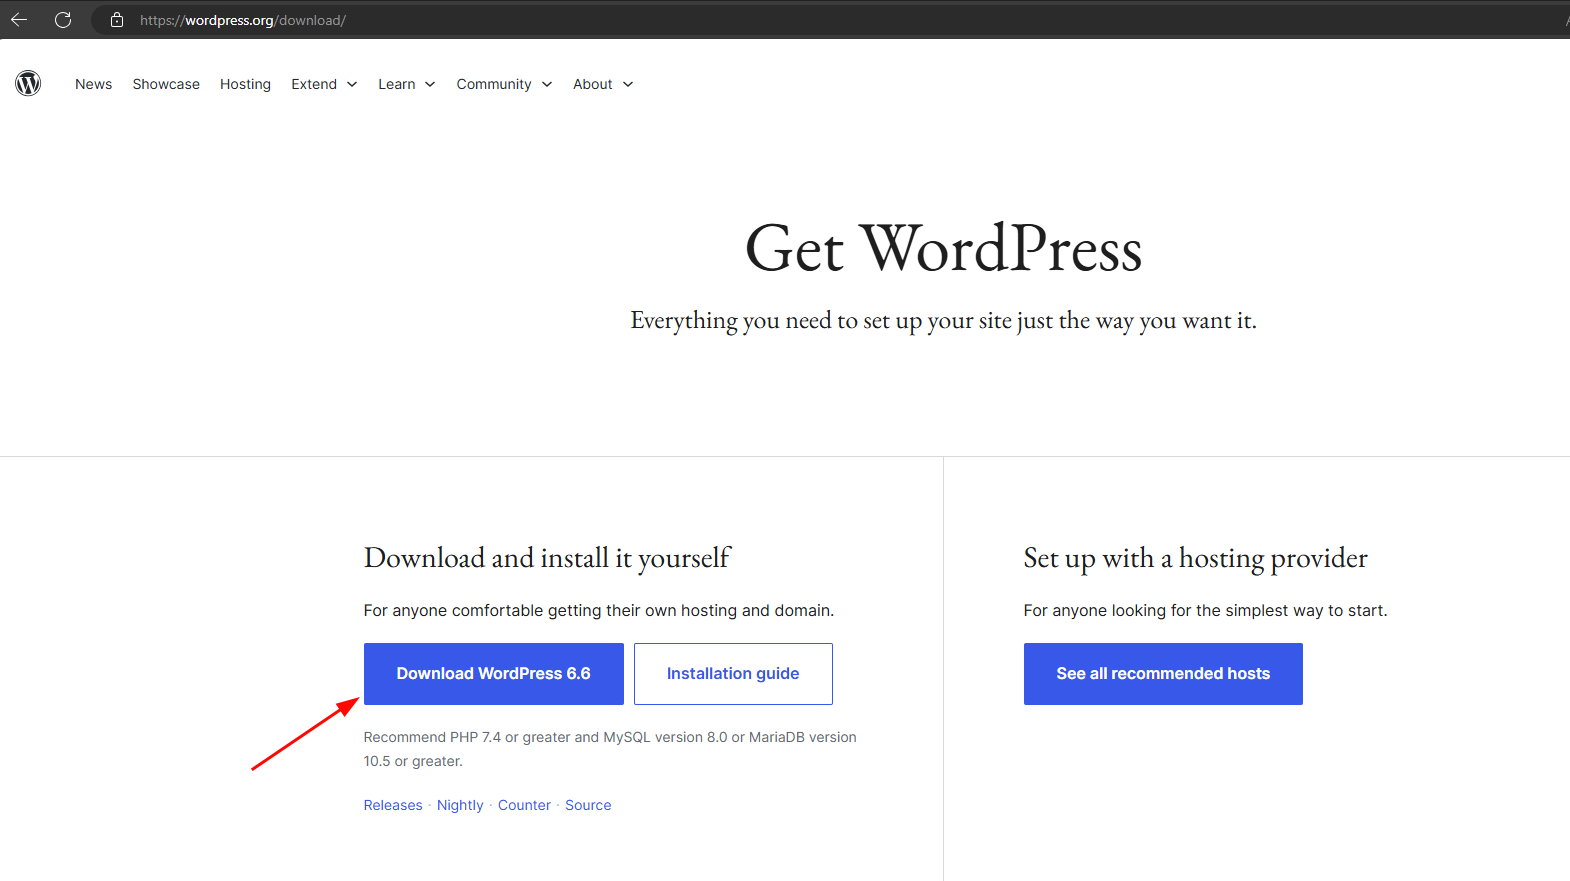
Alternatively, navigate to Google and search for "download wordpress org," then click on the first link that appears.
Remember that you need to download this file only once, even if you are going to restore WordPress core for multiple websites, the same Core file would work for all websites.
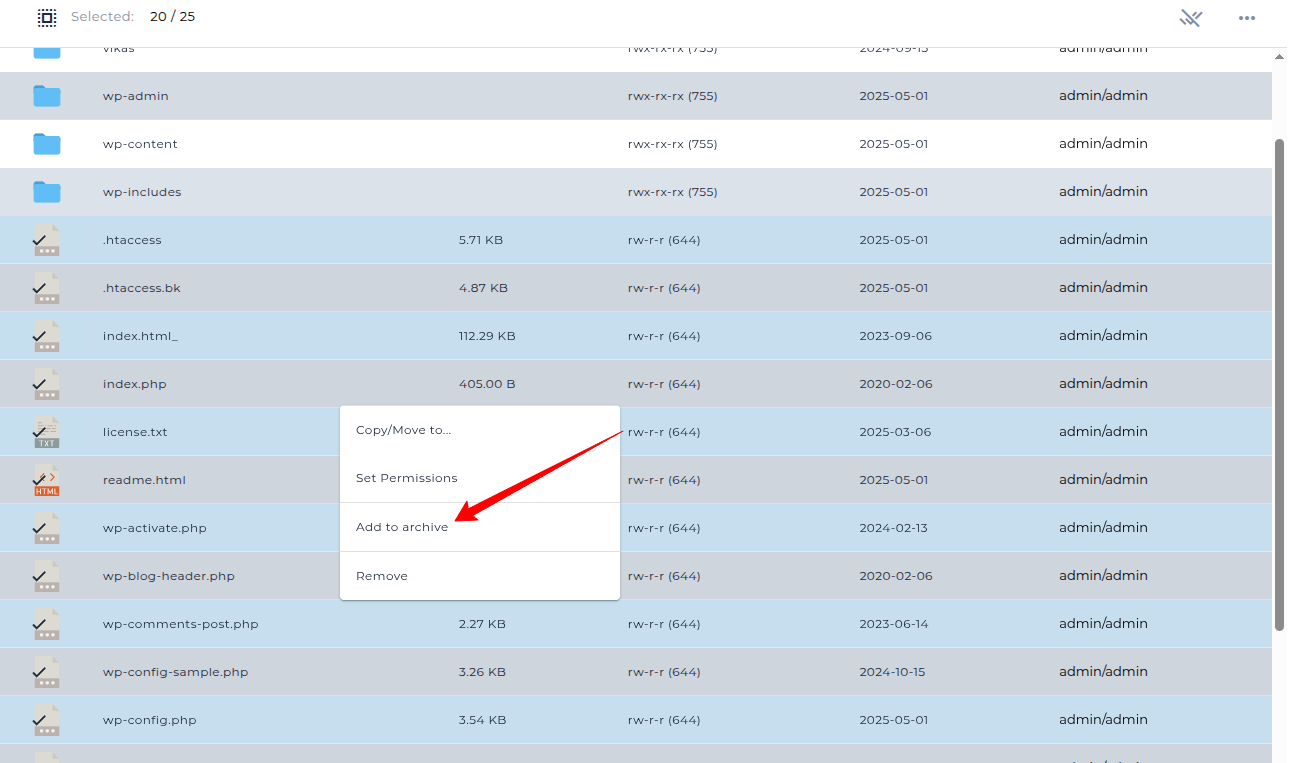
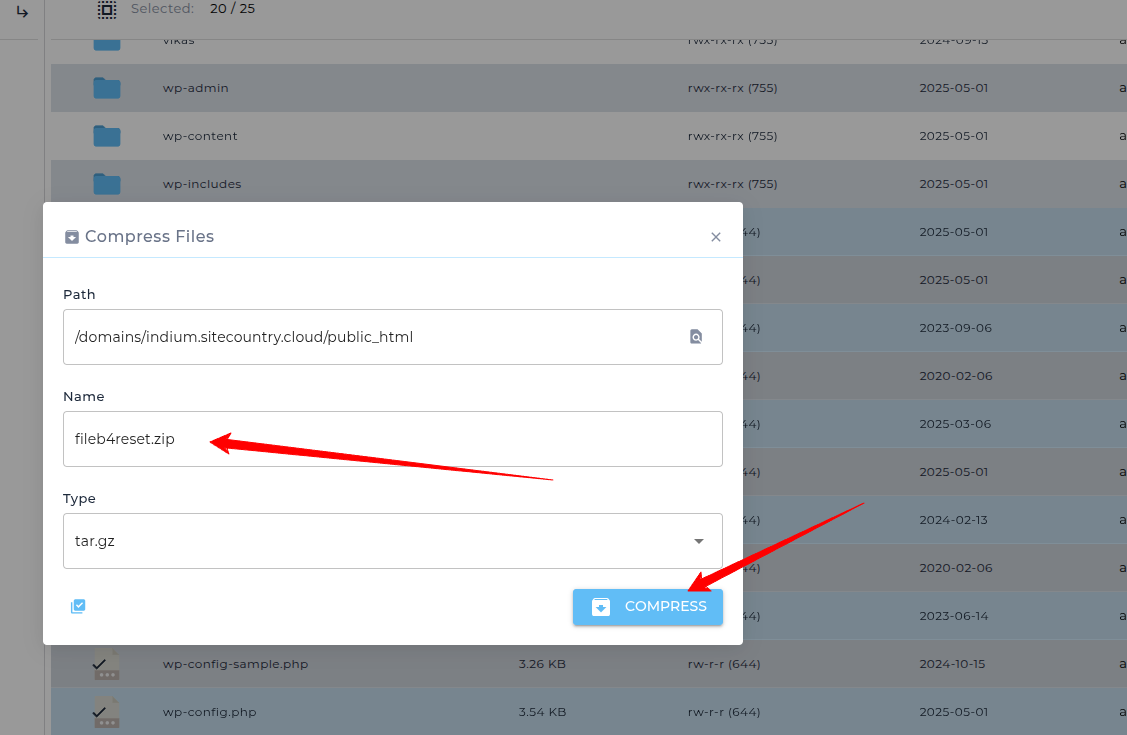
Step 5a : Take the backup of all the files in the public_html and skip the foldres and save the backup file with something like fileb4reset.zip replace the date with the date which you are taking the backup for your future reference.
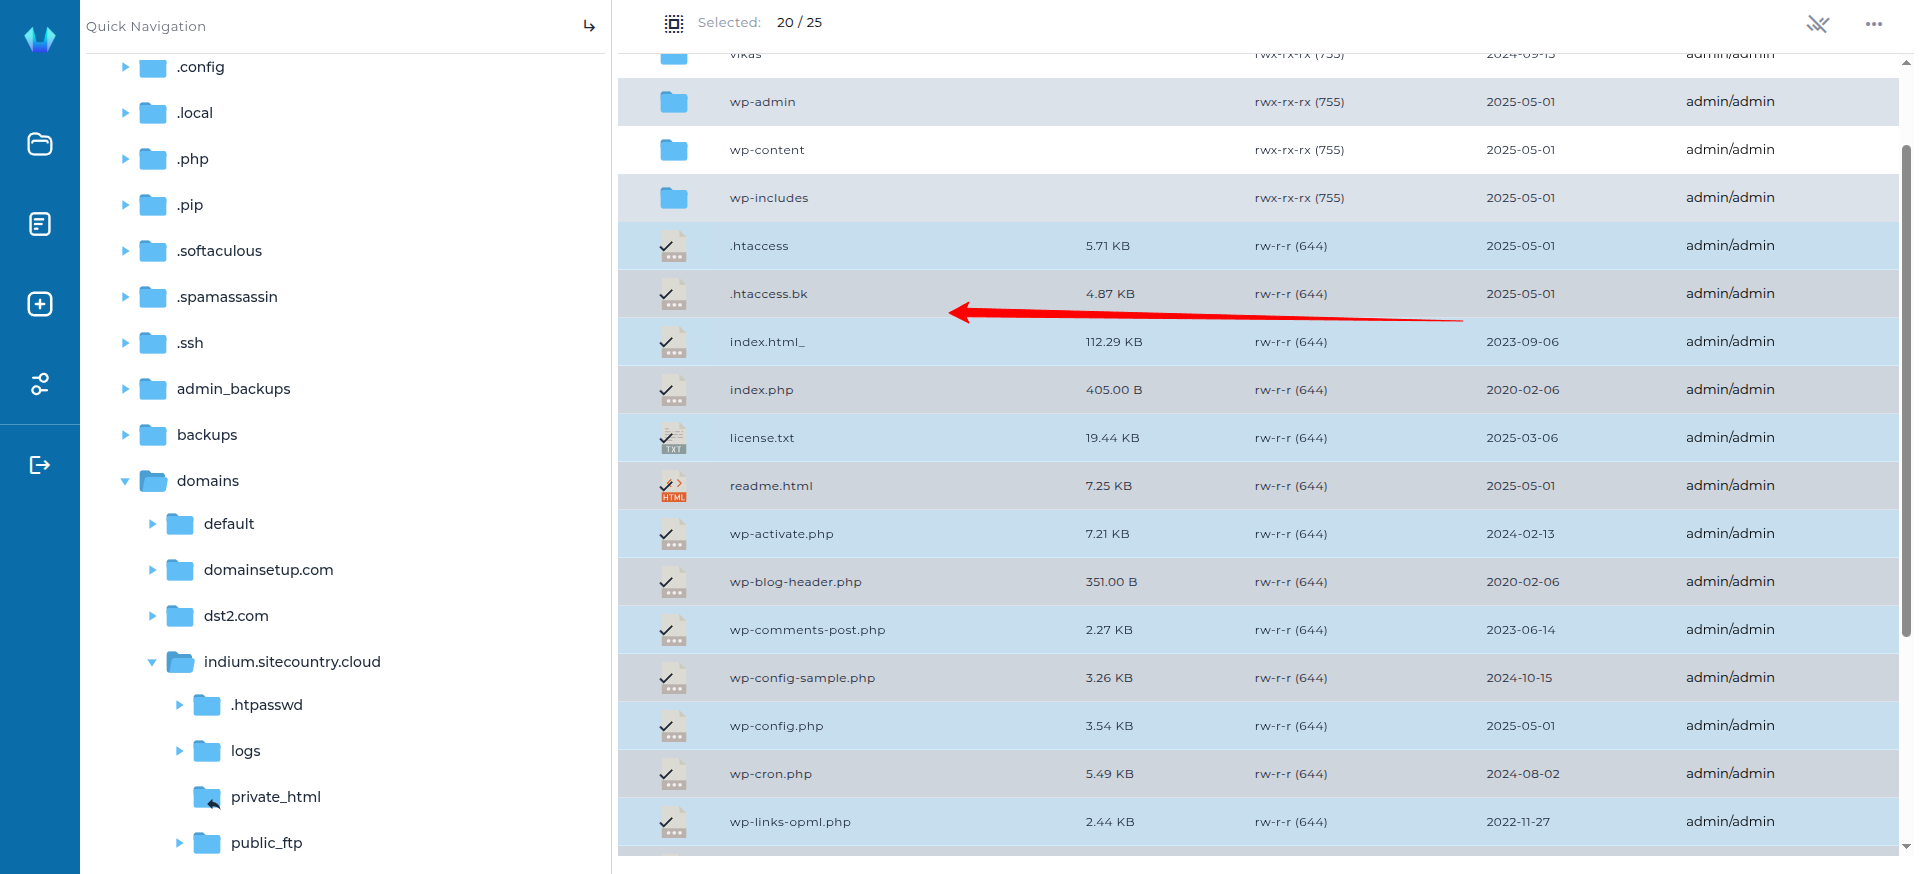
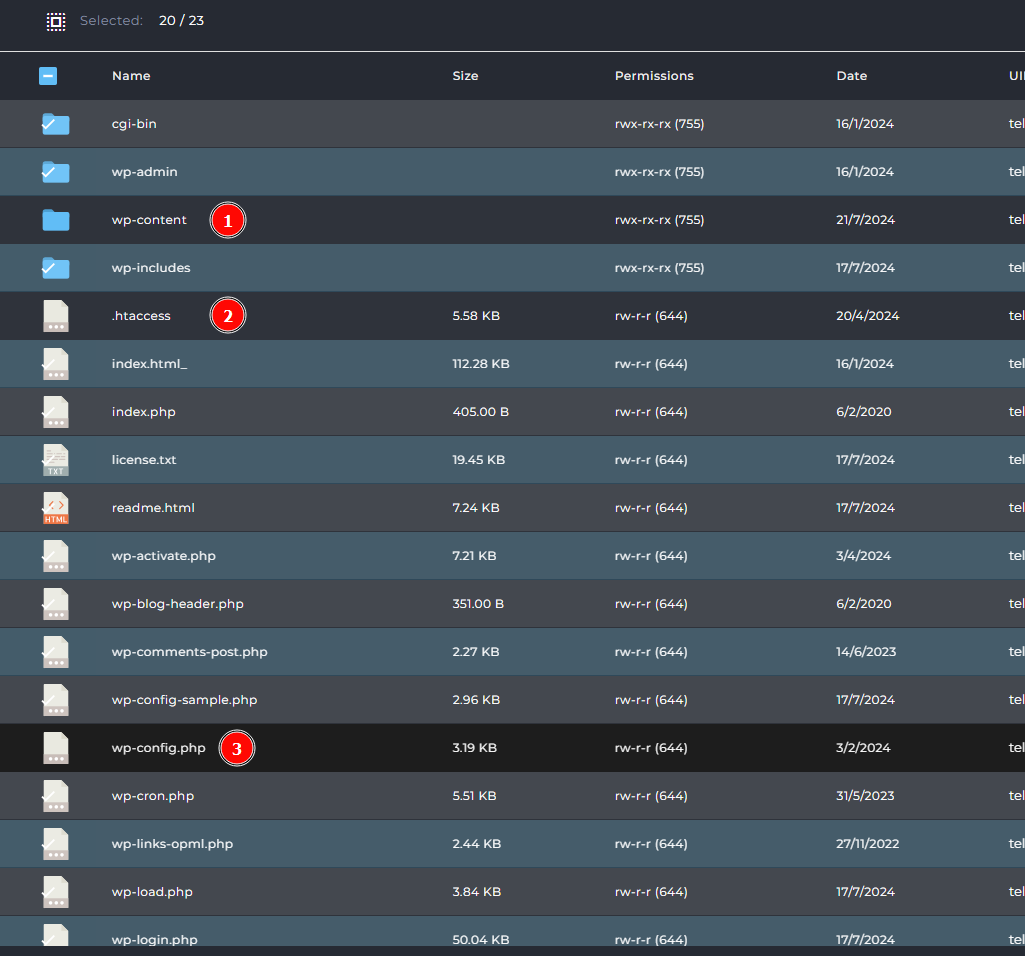
Step 5b: Return to the Hosting File Manager, and you will find the WordPress core files in the public_html folder. Select all the files, then deselect the 'wp-content' folder, the 'wp-config.php' file, the '.htaccess' file, the fileb4reset.zip file and any other files you have manually uploaded, as shown in the screenshot below.
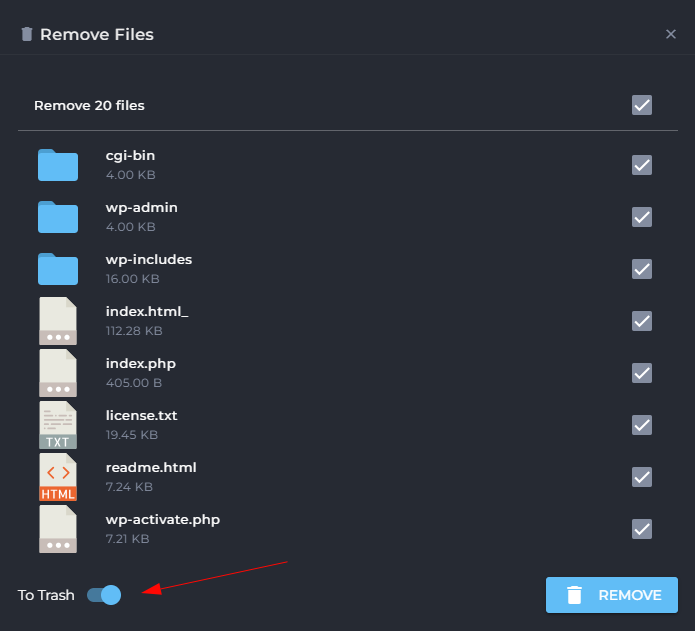
Step 6: Delete all of the selected files as shown below :
It's better to keep to "To Trash" option as Enabled (On).
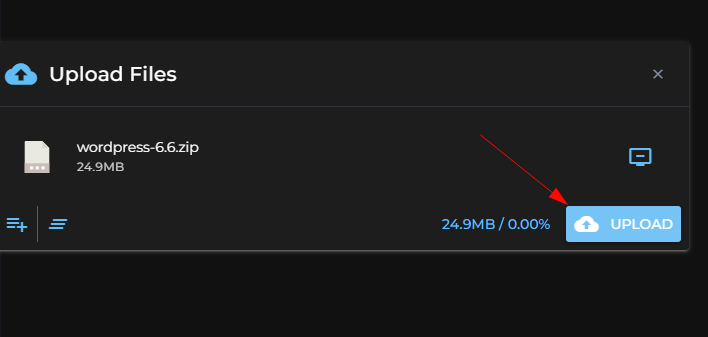
Step 7: Now upload the downloaded WordPress core zip file as shown below :
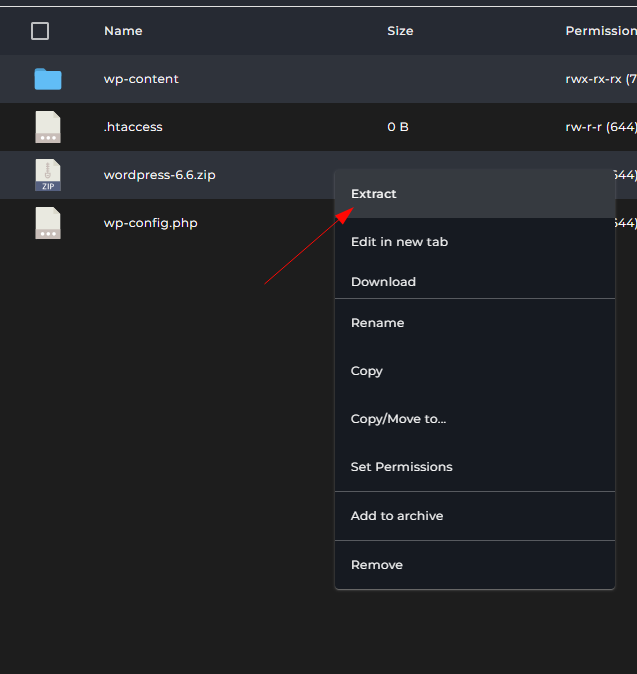
Step 8: Once uploaded, extract the file as shown below :
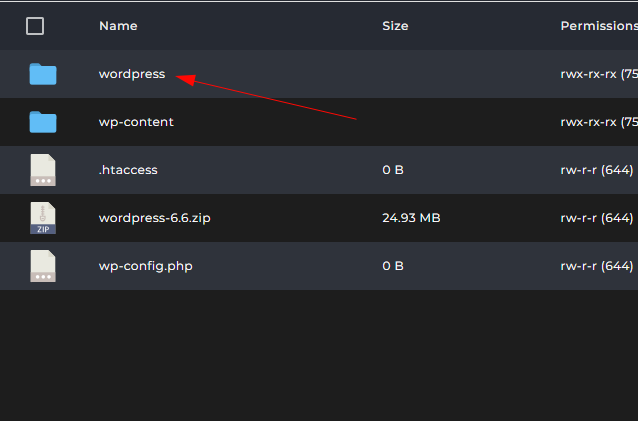
Now, files will get extracted inside the wordpress folder, go inside the folder as shown below :
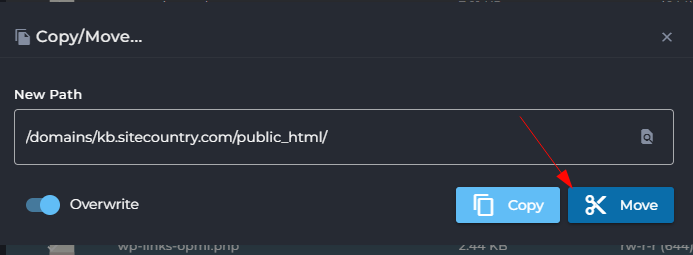
Select all the folders, except the wp-content folder as shown below, and move it to the path after removing wordpress from the shown path :
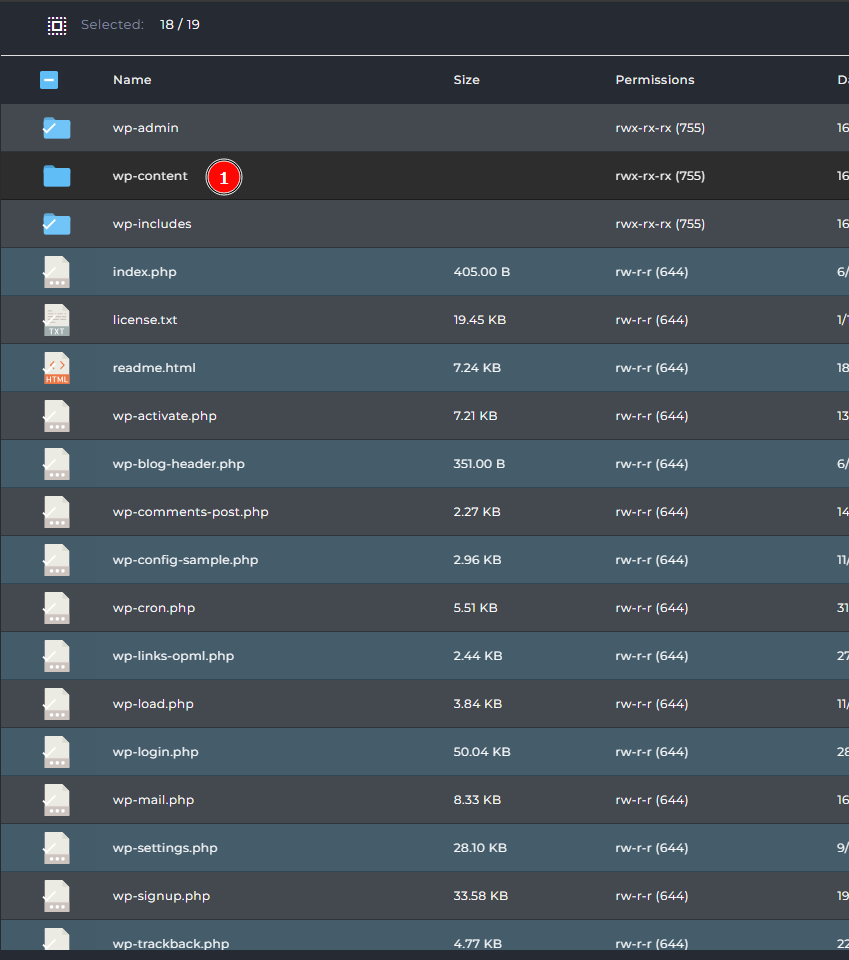
Click on the move button.
The WordPress core has been reinstalled successfully. You can try visiting the website now, it should work fine.