
How to Disable ModSecurity on your Domain in Control Panel
In this article, we will refer to the step-by-step process to disable ModSecurity for a particular domain name in the Control Panel.
Sometimes due to false positives, ModSecurity can create issues like failed wordpress admin logins, frequent 403 errors etc.
Steps :
Step 1: Login Inside your SiteCountry Control Panel. If you do not already know how to do that, please check out this article here.
 SiteCountry Team
Step 2: Once you are logged inside the control panel, search for "ModSecurity" or simply search "mod" and you will see the ModSecurity icon as shown below.

Step 3: Once you click on the ModSecurity icon, you will see a screen similar to this one :
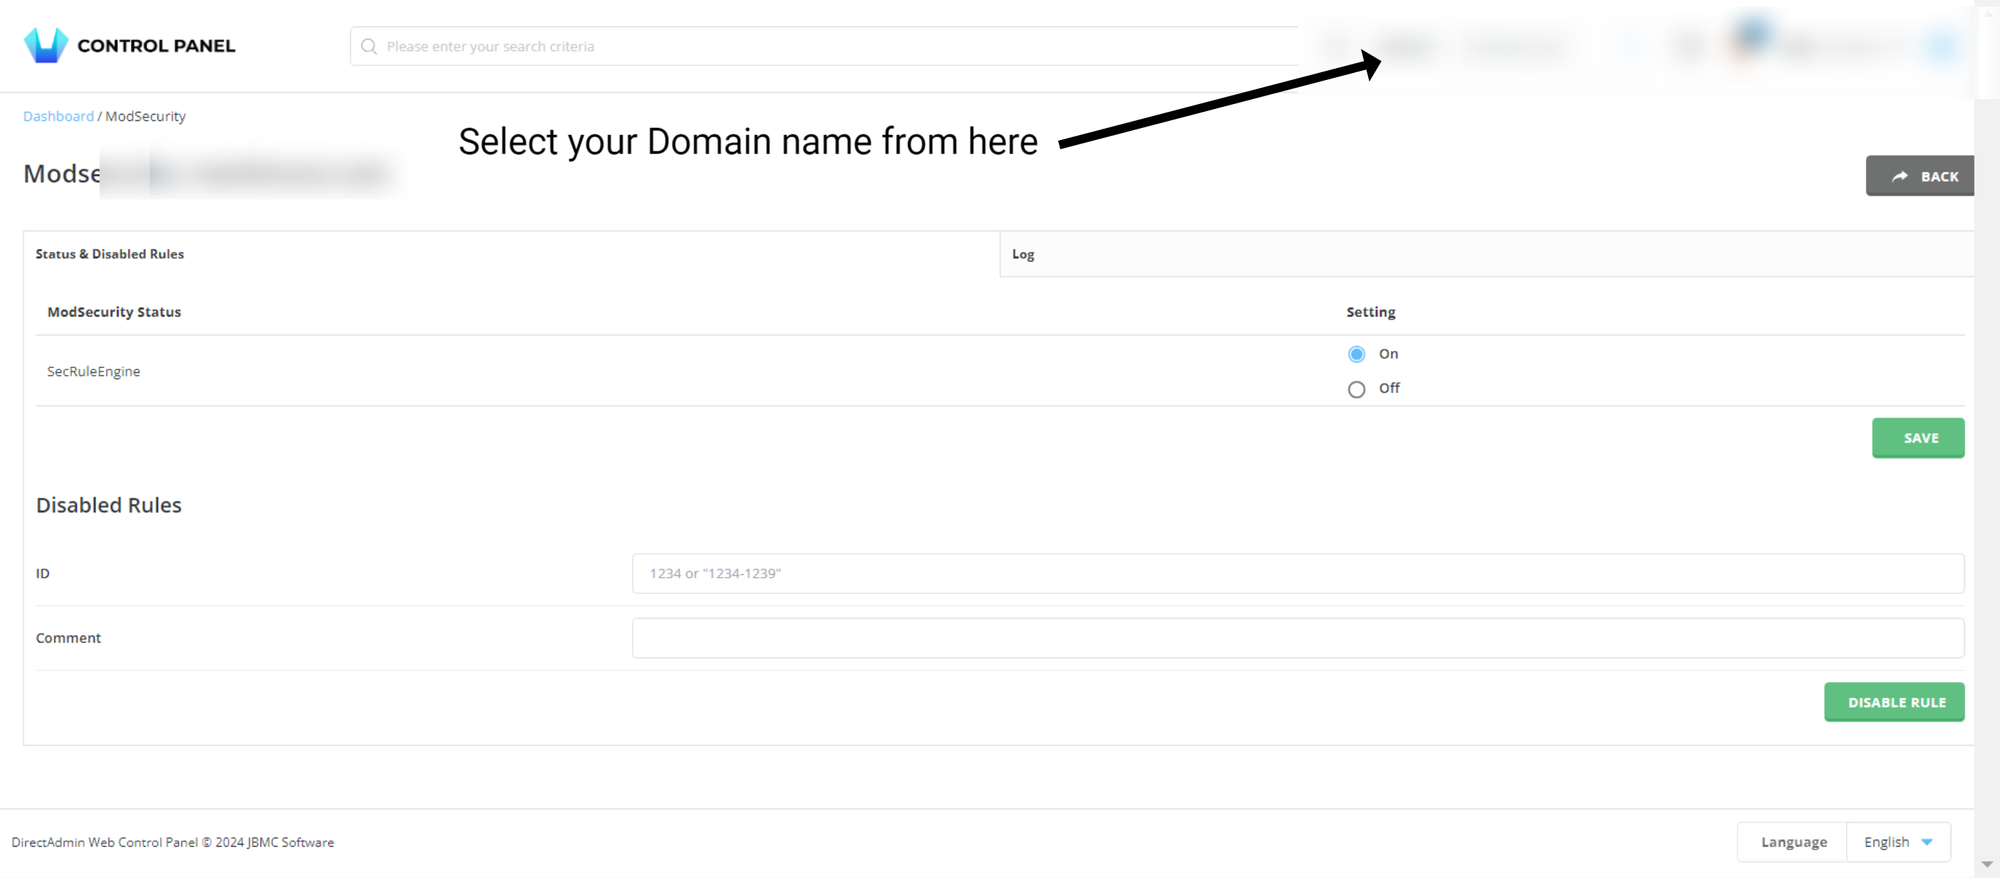
Now on this screen, select your domain name from the dropdown shown on the top section of the control panel as shown in the screenshot. ( refer above image)
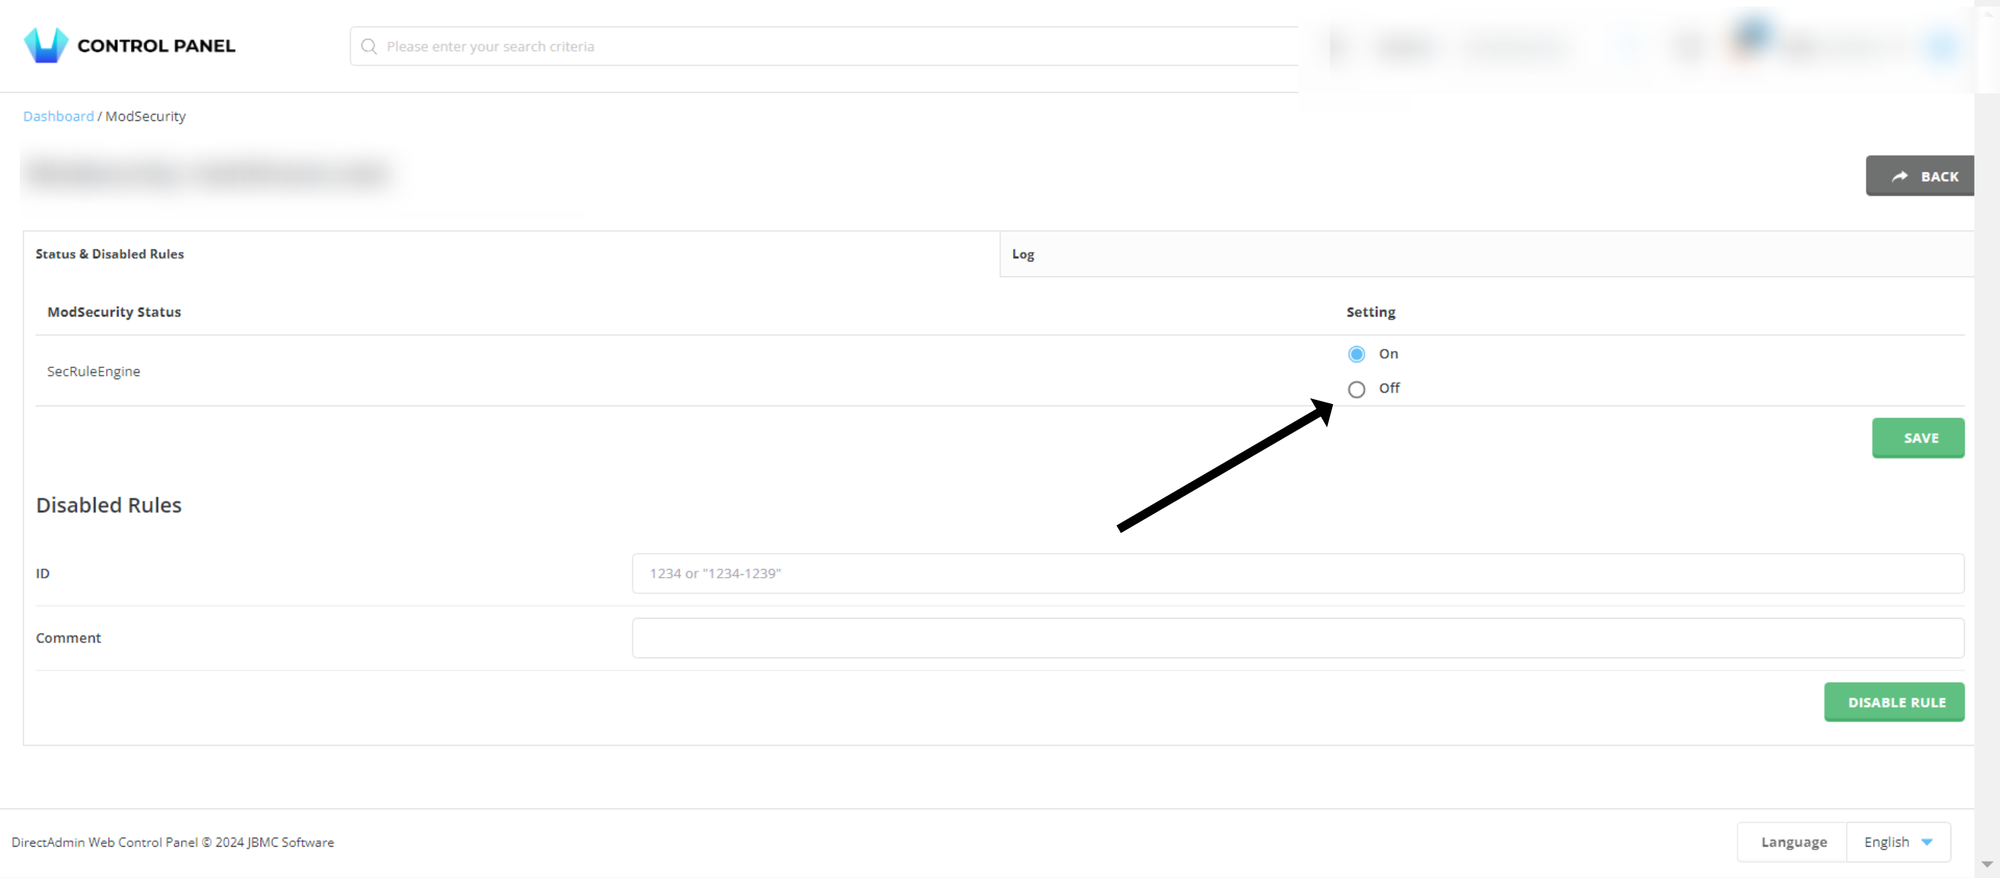
Step 4: Now, once you have selected the domain name, simply click on the off button and save it. If you get an error while turning Modsecurity off, it's completely fine, just refresh your page and check if Modsecurity is disabled now.
Once you have set the option Off and saved it, ModSecurity should be disabled.
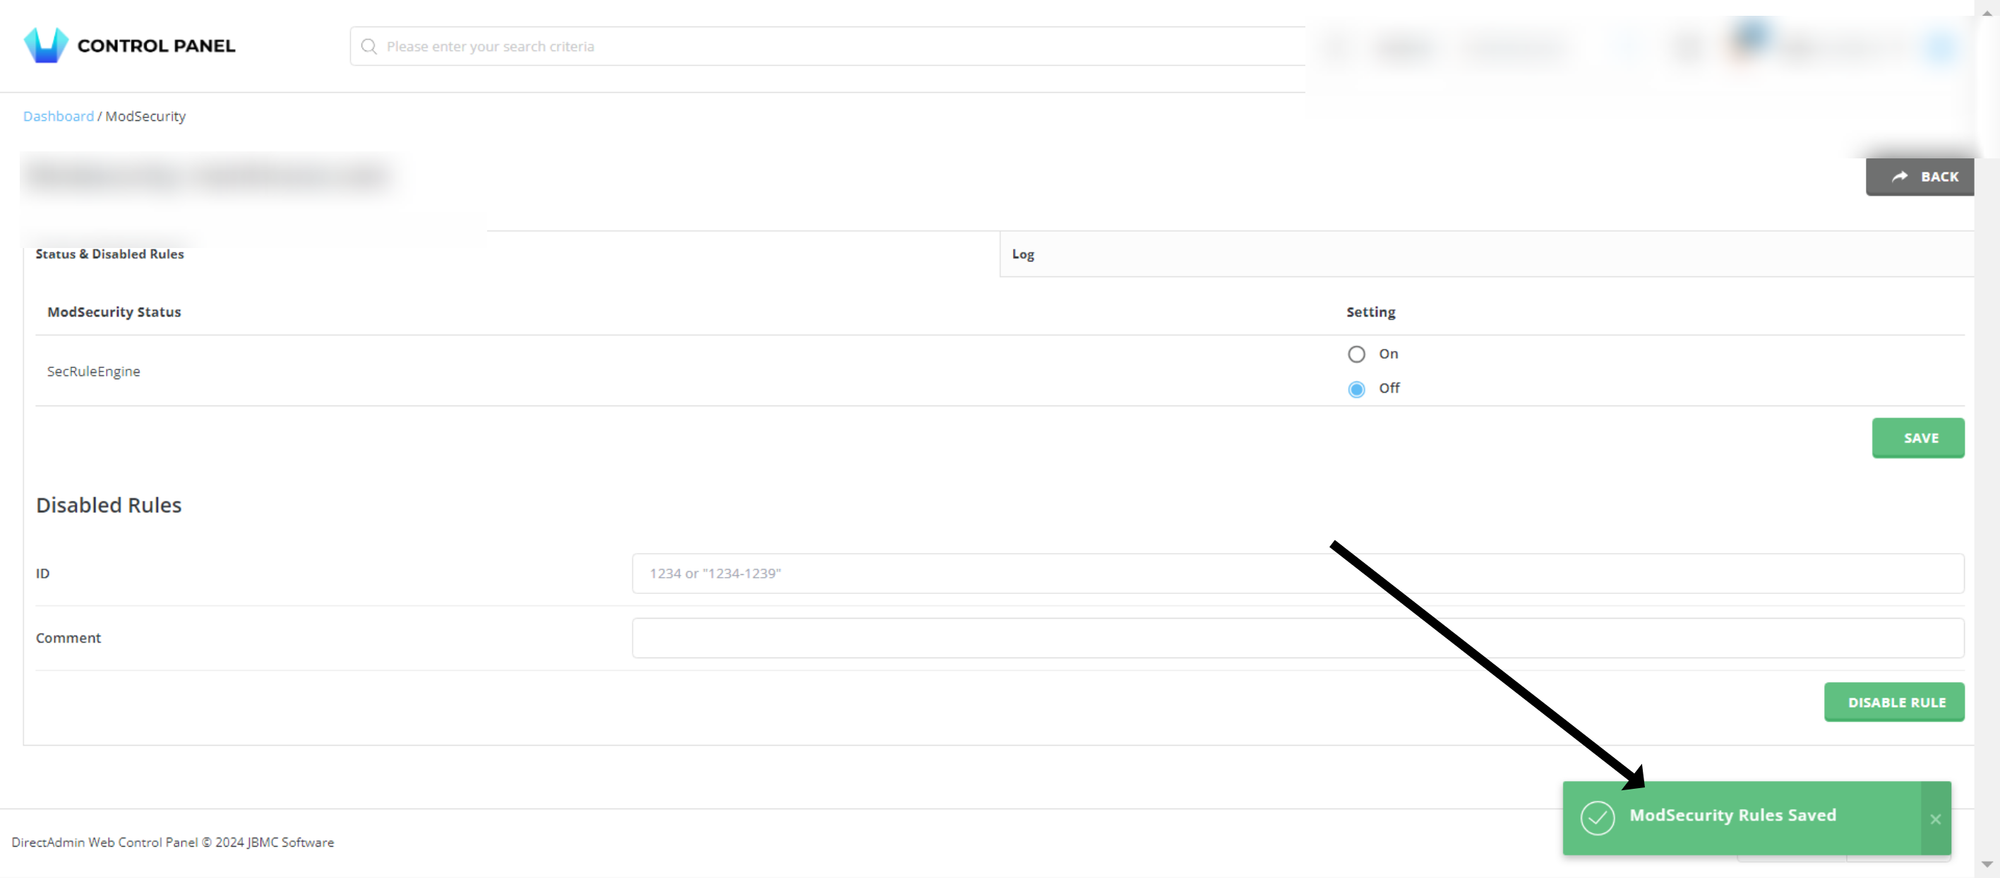
Note : If you got any errors while saving, then do not worry, just refresh the page and check if ModSecurity shows as off, if it does, then its successfully done as well.