
How to Create a Subdomain in the SiteCountry Control Panel?
In this article, we will show how to Create a Subdomain in the SiteCountry Control panel.
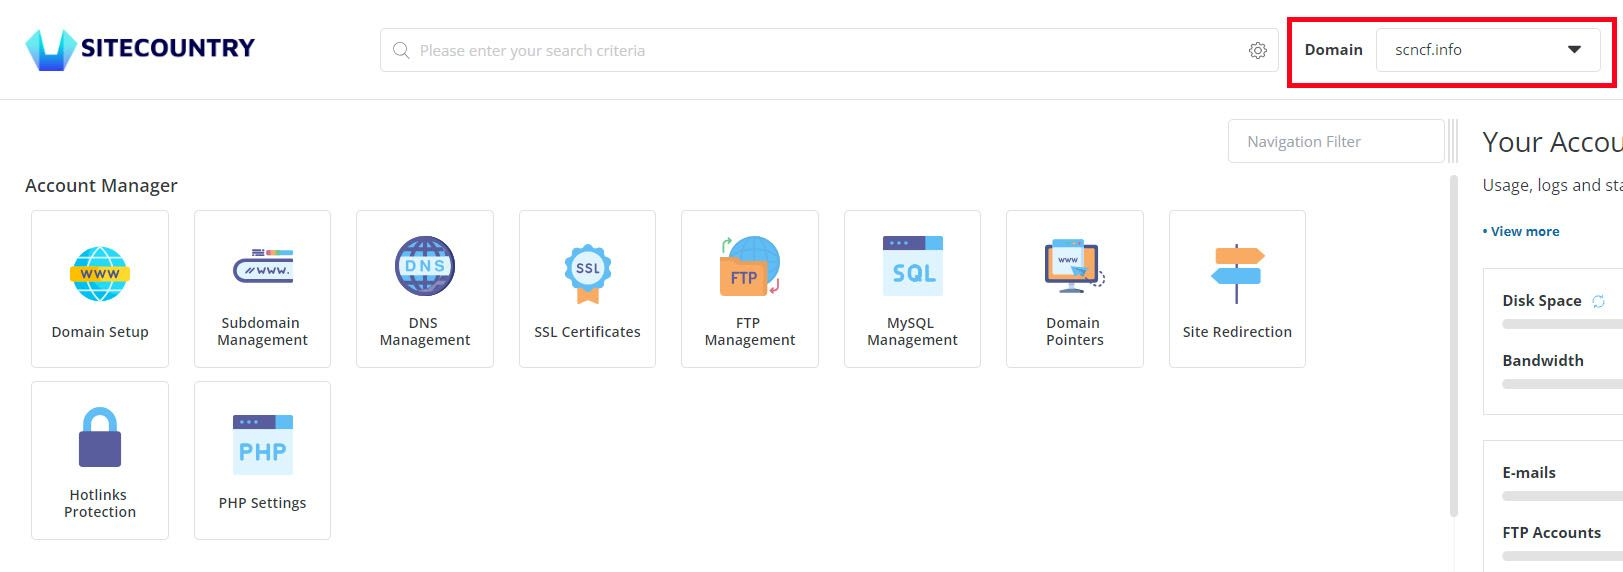
1) Log in to the SiteCountry Control Panel
2) Select the Domain Name for which you need to Create a Subdomain
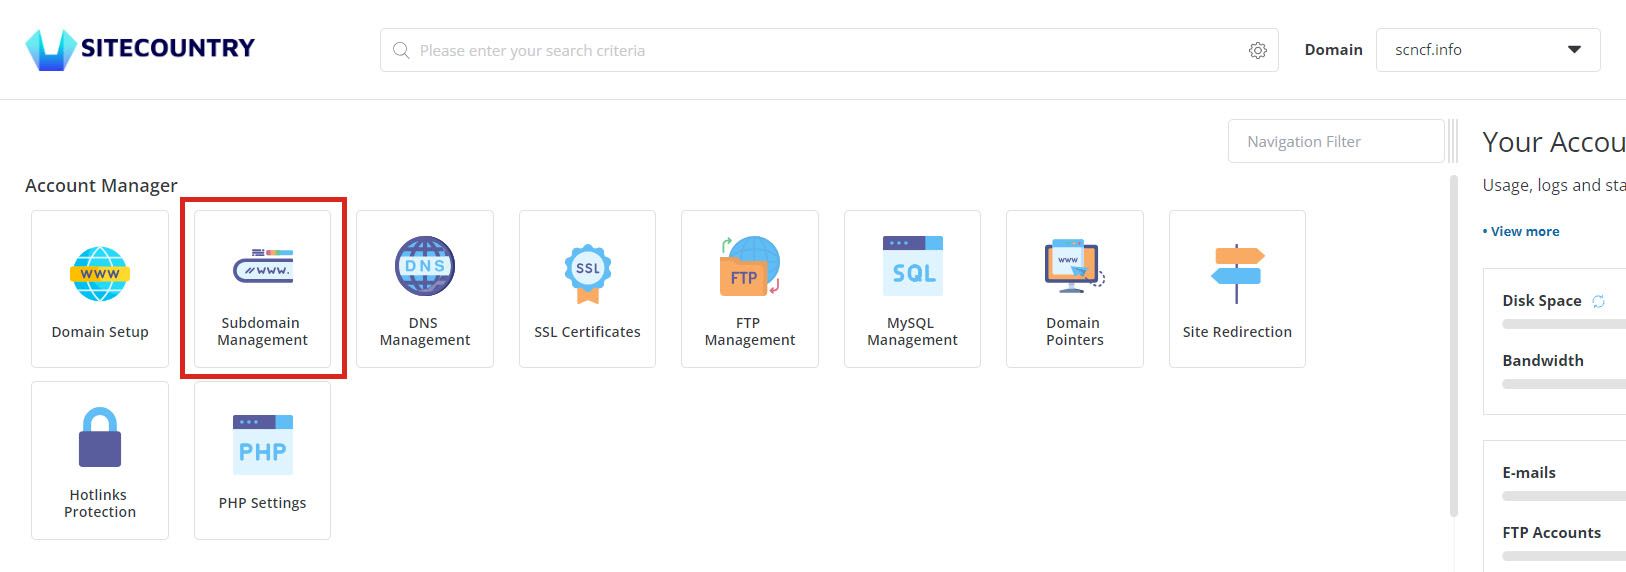
3) Click on Subdomain Management
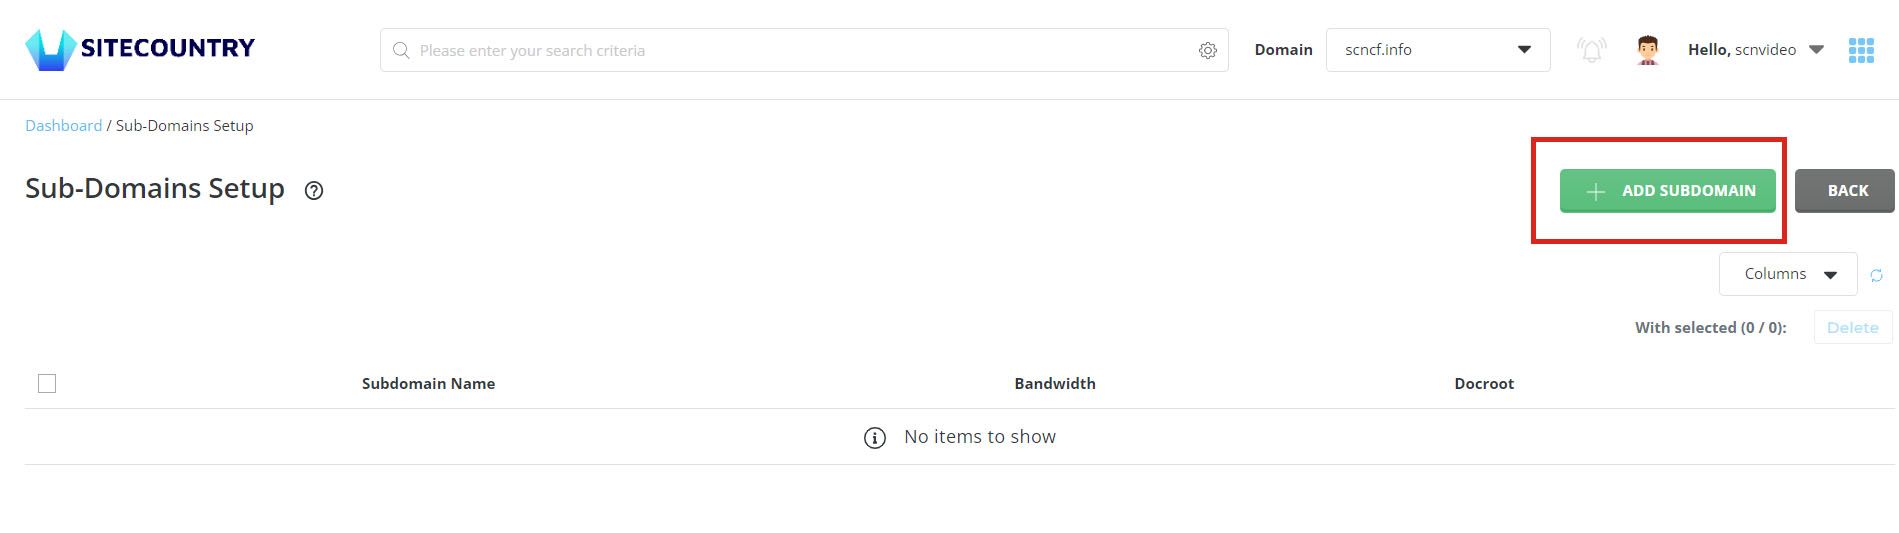
4) Click on the Add Subdomain button
5) Enter the Subdomain name as in the Screenshot below and Click on the Add Subdomain button to Create the Subdomain
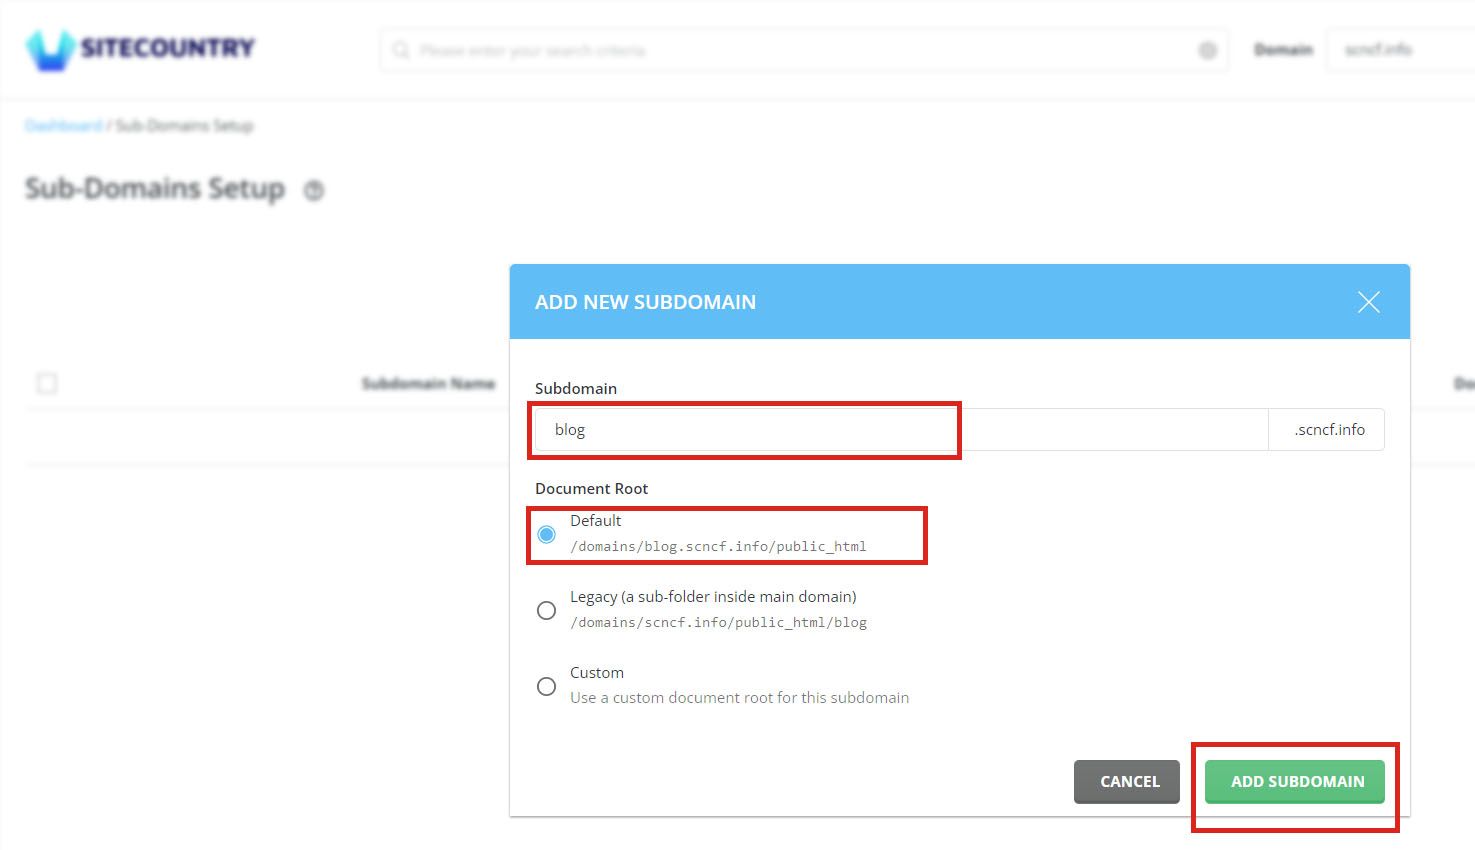
Note: You can Leave the Default Document Root or Select your Preferred one
That's all. You have created a Subdomain for your Domain hosted on SiteCountry Cloud hosting.
If you need any help with Creating Subdomains then please feel free to contact our customer support team.